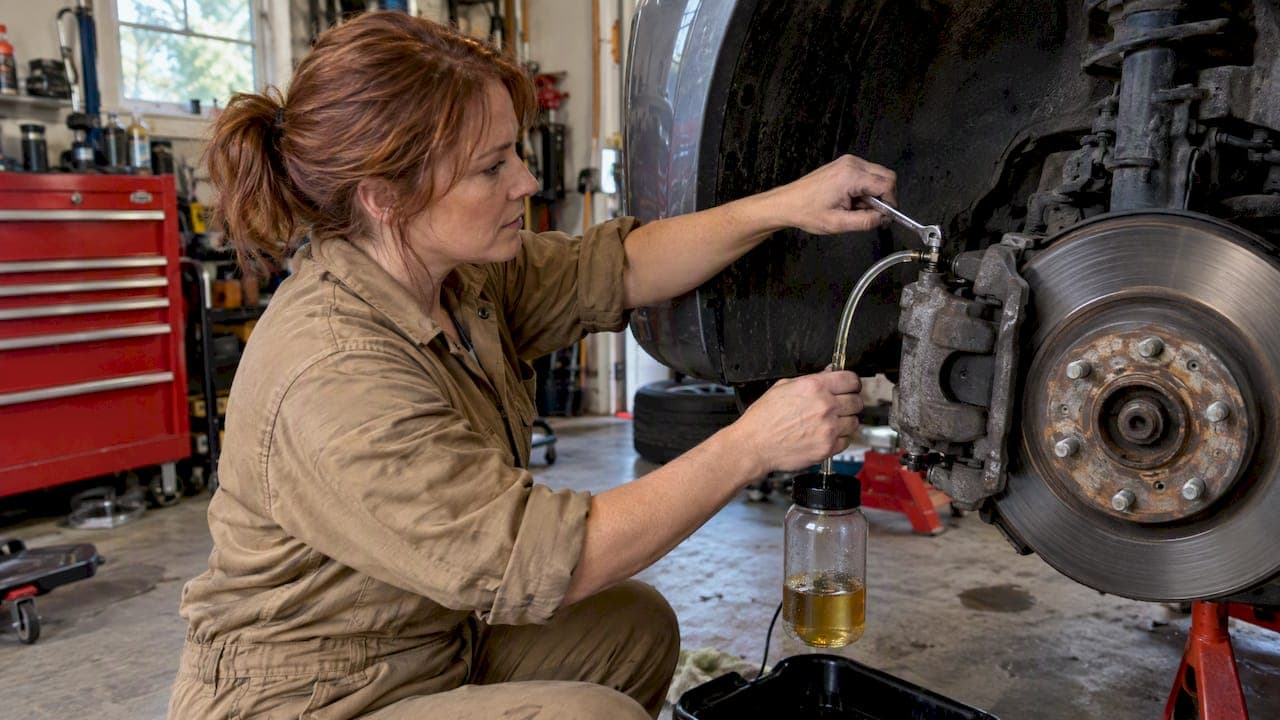
Brakes need bleeding after an install only when the hydraulic system was opened or air entered it. New calipers, replaced brake hoses or lines, a drained master cylinder and a pedal that feels soft all call for a bleed. A pad and rotor swap with the hoses and bleeder screws left closed usually does not. This guide covers each case, the tools, the wheel order, ABS limits and the checks that show the job is done.
TL;DR
- Pads and rotors only, system sealed: a bleed is not strictly required, though many professionals still recommend one.
- New or removed calipers, hoses, lines or a low master cylinder: bleed all four corners.
- Keep the master cylinder reservoir topped up the whole time. Letting it run dry pulls in new air.
- Confirm the result with a firm pedal that holds pressure, then a low-speed test stop before normal driving.
- A pedal that stays soft after a careful bleed, or any fluid leak: stop and have a technician inspect the vehicle.
Table of Contents
- Which installs require a bleed
- Before pushing the piston back
- Tools and fluid
- Wheel order
- Two-person manual bleed
- Can all four brakes be bled at once?
- ABS vehicles
- Stubborn air
- Checking that the bleed worked
- After the bleed: bedding and noise
- When to stop and get a professional
- Perspective: how we approach it
- DBC kits for the job
- FAQ
- Sources
Which installs require a bleed
The deciding question is simple: was the hydraulic circuit opened? Brake fluid sits in a closed loop from the master cylinder through the lines and hoses to each caliper. Air gets in only when that loop is opened or the fluid level drops far enough to let the master cylinder draw air.
| Job completed | Hydraulic circuit opened? | Bleed needed? |
|---|---|---|
| Pads only, bleeder and hose untouched | No | Not required |
| Pads and rotors, caliper unbolted but hose still attached | No | Not required |
| Caliper removed and hose disconnected | Yes | Yes, at that corner at minimum |
| New brake hose or hard line | Yes | Yes, at the affected corner, often all four |
| Master cylinder replaced or reservoir run dry | Yes | Yes, all four corners |
| Big brake kit with new calipers | Yes | Yes, all four corners are the safer choice |
| Soft or spongy pedal after any job | Likely air | Yes |
A pad and rotor job is the common case. A media report on bleeding after pad changes says a bleed is not strictly required when the system stays sealed, and that many professionals recommend it as good practice. The fluid is also a reason to bleed: it absorbs moisture over time and is due for replacement on a schedule regardless of pad work. The brake fluid guide covers that side.
Why air matters
Fluid does not compress. Air does. Technician trade coverage notes that air bubbles must be compressed before pressure reaches the brakes, which produces a soft, spongy pedal. The pedal sinks further than normal and stopping distance grows. That is the reason a bleed is not optional after the circuit is opened.
Before pushing the piston back
Most avoidable problems start when the caliper piston is forced back into its bore. The piston pushes old fluid up the hose toward the master cylinder and, on ABS vehicles, toward the ABS unit. A service document from an owners' club reports that forcing contaminated fluid backward can make ABS valves and pistons stick. The same document describes clamping the caliper hose and opening the bleeder before pushing the piston back, so the old fluid leaves through the bleeder instead.
A practical routine:
- Remove the master cylinder cap so displaced fluid has room.
- Attach a clear tube to the bleeder and place the other end in a catch bottle.
- Open the bleeder slightly, then press the piston in slowly with a C-clamp or piston tool.
- Close the bleeder before releasing the clamp.
- Check the reservoir level and top it up.
A piston that will not retract is a separate fault. The stuck caliper piston guide explains how to free it. A caliper explainer shows how piston, seal and bore work together, which helps when judging whether a caliper is reusable.
Tools and fluid
Gather everything before opening a bleeder. A bleed that stops halfway lets air back in.
- Correct brake fluid, in a sealed new container. Use the grade printed on the reservoir cap or in the owner's manual. Do not mix up grades without checking.
- A box-end wrench that fits the bleeder screw.
- Clear vinyl tubing that fits snugly over the bleeder nipple.
- A catch bottle, partly filled with fresh fluid so the tube end stays submerged.
- A helper, or a one-person bleeder, vacuum pump or pressure bleeder.
- Safety glasses, gloves and rags.
- A jack, stands and wheel wrench.
One manufacturer recall procedure from a US safety regulator specifies fresh DOT 3 fluid for that vehicle. That applies to that vehicle only. Every other vehicle follows its own manual. The same procedure tells the technician to wear safety glasses and direct fluid away from the body and painted surfaces.
Brake fluid damages paint. Wipe spills at once and rinse the area with water. Brake dust on wheels and calipers is another cleanup task, and a guide on how to remove brake dust safely helps keep wheels clean once the job is done. Keep dust and fluid away from fresh rotor surfaces. The new rotor cleaning guide covers preparation of the friction surface.
Wheel order
The usual rule is to start with the corner farthest from the master cylinder and finish with the closest. On a left-hand-drive vehicle that often means right rear, left rear, right front, left front. Some vehicles specify a different sequence, for example a diagonal pattern. A factory manual for one vehicle gives a different order, starting at the right rear and then the left front. Check the service manual for the exact vehicle before starting.

For a job that touched only one corner, bleed that corner. For anything that involved the master cylinder, a long period with the reservoir empty, or a main line, bleed all four in the specified order.
Two-person manual bleed
This is the standard method. It needs a helper and about 30 to 45 minutes for four corners. The soft pedal guide lists the same range for a full bleed when a pump test shows air.
- Raise the vehicle on stands and remove the wheel at the first corner.
- Fill the reservoir to the MAX line. Keep it above MIN for the entire job.
- Fit the tube on the bleeder and submerge the other end in the catch bottle.
- Helper presses the pedal and holds it down firmly.
- Open the bleeder a quarter to half turn. Fluid and air flow out.
- Close the bleeder before the helper lifts the foot off the pedal.
- Helper releases the pedal slowly. Repeat.
- Continue until the fluid runs clear with no bubbles in the tube.
- Tighten the bleeder, wipe it clean and refit the bleeder cap.
- Top up the reservoir and move to the next wheel.
The order of steps five and six matters. This is the same pattern as the two-person procedure in a regulator's recall document: one person pumps and holds, the other opens the bleeder, then closes it before the pedal is released. Opening the bleeder only for a brief moment is enough. Once the flow slows, close it.
Keep the reservoir full
The same document says to monitor the reservoir level so it does not go dry. Check it after each corner, not after each pedal stroke only. A dry reservoir sends air into the master cylinder and the whole job restarts.
One-person alternatives
A one-way valve bleeder, vacuum pump or pressure bleeder removes the need for a helper. Pressure bleeders hold the reservoir under light pressure and keep it topped up. The pedal method still works alone with a clear tube and a check valve on the end of the hose. The principle is identical: fluid and air leave, nothing returns.
Gravity bleeding is slower but needs no pedal work. It has limits on ABS vehicles, so read the gravity bleed guide for Canada before starting.
Can all four brakes be bled at once?
No, not by hand. A manual bleed works one bleeder at a time, because opening two at once drops pressure in the circuit and lets fluid and air move toward the open points unevenly. A pressure bleeder pressurizes the reservoir, but the technician still opens one bleeder at a time in sequence. Opening one, finishing it, and moving on is faster overall than trying to rush several.
ABS vehicles
Most vehicles with ABS bleed with the normal procedure. Trade coverage states that on most ABS vehicles, normal bleeding is enough if no air entered the ABS modulator. Air that got into the modulator, for instance after the reservoir ran dry or the unit was replaced, needs a different approach.
An automated bleed on a scan tool cycles the internal solenoid valves. A repair data publication states that this procedure is designed to purge air from secondary circuits that are normally closed. The same publication notes that a manual or pressure bleed of the base system comes first.
Use a scan tool procedure when:
- The ABS unit or modulator was replaced.
- The reservoir ran empty with the ignition on.
- The pedal stays soft after a complete manual bleed.
- The service manual for the vehicle calls for it.
Do not cycle the ABS pump by hand-pumping the pedal with the ignition on and expect it to purge the modulator. Without a scan tool command, the valves do not open on their own.
Stubborn air
Not all air leaves with a normal bleed. A US safety regulator's technical document says that in cases of air trapped in lines routed higher than the master cylinder, technicians may need extra steps such as repositioning lines to purge bubbles before the standard bleed. That document concerns one vehicle design, but the principle applies: air rises, and a high point in the line can trap it.
Other common causes of a persistent soft pedal:
- A bleeder screw that leaks air around its threads.
- A caliper installed with the bleeder pointing downward. The bleeder must be at the highest point.
- A hose that is not fully seated or a loose banjo bolt.
- A worn master cylinder seal.
- A caliper piston that is seized or leaking.
Checking that the bleed worked
Run these checks in order, with the vehicle on stands and then on the ground.
- Pedal feel, engine off. The pedal is firm and stops high. It does not sink slowly under steady pressure.
- Pedal feel, engine running. The pedal drops slightly as the booster engages, then holds.
- Fluid level. Level sits between MIN and MAX. Cap is on.
- Leak check. Inspect each bleeder, hose and fitting for wet spots.
- Tube check. Fluid at the last bleed ran clear and bubble-free.
- Low-speed test. In a clear, empty lot, make several slow stops. The vehicle stops straight and the pedal stays firm.
If the pedal is spongy, repeat the bleed before driving. A pump test first can separate air from other causes, and the soft brake pedal guide describes it.
After the bleed: bedding and noise
New pads and rotors need a bed-in period. A fresh bleed does not replace it. Follow the pad manufacturer's procedure, usually a series of moderate stops from moderate speed with cooling time after. The pad glazing guide covers a 10 to 15 stop bedding routine. If new brakes make noise afterwards, the new brake noise checklist lists causes in order. Hardware also affects feel and noise, and the brake hardware kit guide explains what each part does.
If only rotors were replaced, see replacing rotors without pads for the thickness and runout checks.
When to stop and get a professional
Stop the job and have a technician inspect the vehicle when:
- The pedal goes to the floor or sinks under steady pressure.
- Fluid leaks from a line, hose, caliper or master cylinder.
- A bleeder screw is seized or has snapped.
- The brake warning light or ABS light stays on after the bleed.
- A brake line is rusted or flaking.
Rust is a real issue on Canadian roads. Transport Canada has posted a recall in which corroded brake lines can leak and reduce braking on certain Kia vehicles, with dealers inspecting, treating and replacing lines as needed. Check the vehicle make and VIN against the recall database if the lines look corroded. A line that is rusted should be replaced, not bled.
Perspective: how we approach it
We manufacture brake kits in Canada, and most bleed questions reach us after a customer installs new rotors and pads. Our position is plain. Check what was opened. If only pads and rotors were swapped and the hoses were left alone, the circuit stays sealed. If a caliper came off the hose, bleed it.
We also see the same mistakes repeated. Pistons are forced back without opening the bleeder. Reservoirs run low during the job. A bleed is rushed on one wheel and the pedal stays soft. None of these need special tools to avoid, only patience and a checklist.
We answer questions from people, not automated scripts. If a fitment or procedure question comes up, ask before starting. A pedal that feels wrong after a brake job is a safety issue, and it is better handled with a second opinion than a guess.
— Sam
DBC kits for the job
A new set of rotors and pads is the usual reason for a brake install. DBC brake kits combine cross-drilled rotors with matched pads and are built for cars, trucks and performance vehicles, with guaranteed fitment. Pricing is inclusive with no hidden fees, and orders over $100 ship free within Canada. Expedited shipping is available for $29.99 per order. Details are on the shipping information page.
Browse brake kits by vehicle, or select brake pads and brake rotors separately. Big brake upgrades with new calipers are listed under big brake kits. Plan a full four-corner bleed for those.
FAQ
Do you need to bleed brakes after installing new pads and rotors?
Usually not, if the hoses and bleeder screws were never opened. The system stays sealed and no air enters. Some technicians bleed anyway to refresh old fluid. A bleed is required if a caliper was disconnected from its hose.
Do you need to bleed brakes after installing new calipers?
Yes. Disconnecting a hose or banjo bolt opens the circuit and lets air in. Bleed the affected corner at minimum, and all four corners if the reservoir ran low or the pedal feels soft. Fit the caliper with the bleeder at the highest point.
How do you get air out of brake lines quickly?
The fastest reliable methods use a pressure bleeder or vacuum pump, which hold flow steady and keep the reservoir filled. Manual two-person bleeding works as well with a helper. Speed comes from preparation: fresh fluid, a full reservoir and the right wrench.
Can you bleed all four brakes at once?
No. Bleed one corner at a time in the sequence the service manual gives, finishing each before moving on. A pressure bleeder helps by keeping the reservoir full, but each bleeder is still opened separately.
How do you know the brakes are properly bled?
The pedal is firm and high, holds steady under pressure, and the last fluid from each bleeder is clear with no bubbles. No leaks appear at fittings. Slow test stops feel normal. If the pedal is still soft, repeat the bleed or have the vehicle inspected.
Sources
- Do You Need To Bleed Brakes After Changing Pads?
- Selling Services: Bleeding ABS Brakes after Component Replacement
- Preventing ABS Problems after Caliper or Pad Change
- NHTSA Recall Notification 18V-523
- NHTSA Recommendation and Instructions, 2014
- Brake system service manual
- Automated Bleed Procedure
- Transport Canada Recall 2024163, Kia