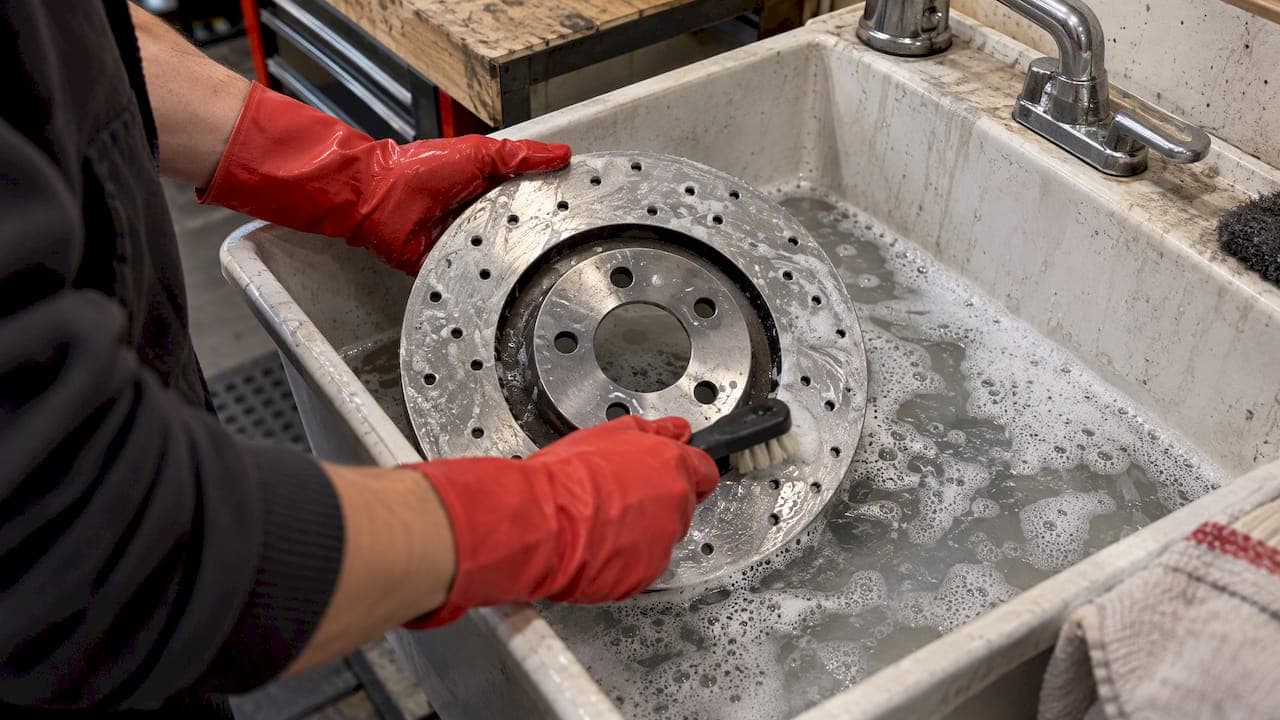
Clean new rotors before they go on the vehicle if they carry a protective oil film. Most uncoated cast iron rotors ship with one. Wash the friction surfaces with warm water and dish soap, rinse, dry fully, then wipe with a lint-free cloth. Clean the hub face as well. Rotors that arrive fully coated or dry-packed may need no washing. Follow the maker's instructions for those.
TL;DR
- Uncoated new rotors ship with a rust-preventative oil. That oil has to come off before installation, or it can transfer to the pads.
- Warm water and dish soap work. Aerosol brake cleaner is common, but Canadian regulators have flagged the solvents in many aerosol brake cleaners as a concern.
- Clean the hub face to bare metal. Rust or debris there can cause runout and pedal pulsation.
- Dry the rotor, then bed in the pads. Cleaning does not replace bedding.
- Check the packaging first. Fully coated rotors can have different instructions.
Table of Contents
- Do new rotors need cleaning?
- What happens if the oil stays on
- What is needed
- Step by step: cleaning new rotors
- Soap and water or brake cleaner?
- Cleaning the rest of the brake job
- Why a clean rotor still needs bedding
- Our view
- Brake kits matched to the vehicle
- Quick checklist
- FAQ
- Sources
Do new rotors need cleaning?
It depends on the finish. Many new rotors are not clean. They carry a thin film of oil applied at the factory to stop rust during shipping and shelf storage. This film is not a finish and is not meant to stay.
A technician-focused guide from Brake & Front End explains that residue from shipping oils, graphite and carbon can lead to glazing or uneven pad transfer. ACDelco's Canadian technical blog states that non-fully coated rotors have oil applied to prevent rust in transit or on a shelf, and that this oil must be removed before installation.
Three situations cover most cases:
| Rotor type | Typical condition out of the box | Action |
|---|---|---|
| Bare cast iron, oiled | Slick, shiny film, sometimes with a paper or plastic wrap | Wash and dry before install |
| Bare cast iron, dry-packed | Dry surface, sealed bag | Read the box, wipe down, install |
| Fully coated | Paint-like or plated finish on most surfaces | Follow the maker's instructions. Clean the friction faces as directed |
When unsure, wash the friction faces. Washing a clean rotor costs five minutes. Skipping a wash on an oiled one can cost a set of pads.
What happens if the oil stays on
Brakes work by transferring a thin layer of pad material onto the rotor face. That layer is called the transfer film. It forms during the first stretch of driving after installation, and it sets how consistent the brakes feel. An SAE technical paper on transfer film composition covers how this film affects friction stability.
Oil on the rotor interferes with that process. Possible results:
- Longer stopping distances while the pads are contaminated.
- Squeal or noise in the first days.
- Uneven pad deposits that feel like vibration.
- Glazed pads that need sanding or replacement. See how to sand or replace glazed brake pads.
Oil that soaks into pad material is hard to remove. In that case, new pads are the usual fix.
What is needed
A short list. All of it is available at a Canadian hardware or auto parts store.
- Clean water, warm to hot
- Dish soap
- A clean, lint-free cloth or paper shop towels
- A brush for the hub, wire or abrasive pad
- Nitrile gloves
- Eye protection
- Optional: a brake parts cleaner, used as described below
Step by step: cleaning new rotors
1. Unpack and inspect
Remove the rotor from its packaging. Handle it by the edges or the hat. Check the friction faces for chips, deep scratches or shipping damage. New rotors should arrive finished and ready to fit. Brake & Front End notes that there should be no reason to give a new rotor a clean-up cut. If there is one, contact the supplier.
2. Wash with warm soapy water
Work the soap over both friction faces, the edge, and the inside of the hat. Use a clean cloth or soft brush. On cross-drilled rotors, flush the drilled holes so no residue sits in them. Rinse with clean water until it runs clear and no suds remain.
The research behind this article points out that warm, soapy water flushes manufacturing residue out of the pores of cast iron better than a quick spray. It is also the lower-risk choice for the person doing the work.
3. Dry completely
Bare cast iron begins to flash-rust quickly when wet. Dry it right away with a clean cloth. Warm air from a heat gun on low or compressed air helps in the holes and the hat. Do not leave a washed rotor sitting on the bench.
4. Final wipe
Wipe each friction face with a fresh, clean cloth. Check the cloth. If it picks up grey or oily residue, repeat the wash. Repeat until it comes away clean.
5. Clean the hub face
This is the step most guides skip. A rotor sits against the hub. Rust or debris on that surface can leave the rotor seated unevenly and add runout from the first drive. Scrub the hub mounting face with a wire brush or abrasive pad until bare metal shows. Wipe off the loose rust.

For runout targets, see how to match pads and rotors and check 0.10 mm runout.
6. Install and torque
Fit the rotor, caliper bracket, pads and caliper. Torque all fasteners to the vehicle's service manual values. Do not touch the friction faces with oily or greasy hands.
7. Pump the pedal and bed in
With the wheels on and the vehicle on the ground, pump the brake pedal until it is firm before moving. Then follow the pad maker's bedding procedure. DBC's guide to why performance brakes need bedding covers the process.
Soap and water or brake cleaner?
Both appear in shop practice. They differ on safety and on how well they remove oil.
| Soap and water | Aerosol brake cleaner | |
|---|---|---|
| Removes shipping oil | Yes, with rinse and scrub | Yes, evaporates quickly |
| Dry time | Needs thorough drying | Fast |
| Rust risk | Flash rust if left wet | Low |
| Health and fire concerns | Low | Flammable. Solvent vapours |
| Cost | Low | Moderate per can |
What Canadian regulators say
Health Canada describes low boiling point naphthas as petroleum substances used as solvents in many consumer products. Environment and Climate Change Canada's risk management scope for the LBPN group, dated 15 March 2024, covers solvents used for cleaning and degreasing. Government assessments of this group identified aerosol brake cleaners as a subgroup where consumer exposure needs risk management.
The practical reading: wash with soap and water where possible. If brake cleaner is used, work outdoors or with strong ventilation, wear gloves and eye protection, keep it away from ignition sources, and read the safety data sheet on the can. Safety data sheets for Canadian brake cleaners list an extremely flammable aerosol hazard. Anyone with a respiratory condition or who is pregnant should ask a doctor or pharmacist before working with solvents, and should avoid it where soap and water will do.

If you do not want to use solvent products, safe brake dust cleaning methods and alternatives are worth a read. That covers wheel and caliper dust, which is a separate job from prepping a new rotor.
Do not do this
- Do not spray oil-based lubricants near the rotor or pads.
- Do not use degreasers that leave their own film.
- Do not sand the faces unless the manufacturer says so.
- Do not mix cleaning products.
- Do not hose a rotor and leave it wet.
Cleaning the rest of the brake job
The rotor is one part. A few other items are worth the same attention.
Hub and bracket
Besides the hub face, clean the caliper bracket slides and contact points. Rust buildup on bracket abutments can make pads bind. Light brushing and fresh hardware help. Stuck parts: see the 15 to 30 minute soak method for freeing stuck rotors.
Pads
New pads come ready to fit. Keep them clean. Do not set them on a dirty bench. Do not touch the friction material. Pads that were fitted with oil on the rotor often cannot be saved.
Old rotor surface rust
Light surface rust on a used rotor is usually a film that wears off with pad contact. Heavy pitting is different. The DIY guide on brake rotor rust explains how to tell the two apart.
Why a clean rotor still needs bedding
Cleaning removes the contaminant. Bedding builds the transfer film. Both are needed.
A basic outline:
- Confirm the pedal is firm and the wheels are torqued.
- Make a series of moderate stops from a set speed, with no full stop and hold. The pad maker's procedure gives exact speeds and counts.
- Allow the brakes to cool by driving without hard braking.
- Avoid parking with hot brakes applied.
Holding the pedal with hot pads against the rotor can leave uneven deposits that feel like warping. For more on avoiding that, see three habits that prevent rotor warping.
If noise continues after bedding, a repair shop's guide to brake squeal checks gives a sense of what a technician looks at. A shop visit is the right step if the pedal pulses, the vehicle pulls to one side, or the noise is a grinding sound.
Our view
We build brake kits, and most of the comebacks we hear about come down to preparation, not parts. A rotor that is oily, a hub that is rusty, or pads that were never bedded can make a good kit feel bad. Customers then suspect the rotor.
Our advice is plain. Read the instructions that came in the box. Wash what needs washing. Clean the hub to bare metal. Torque to spec. Bed the pads. This takes less than an hour on top of the brake job, and it protects the money spent on the parts.
Performance parts show problems faster. Cross-drilled rotors are built to shed heat, gas and water, and a clean surface lets the pads do their part. Pad and rotor pairing matters as much as cleanliness. Parts that were designed to work together are easier to prepare, bed and trust.
— Sam
Brake kits matched to the vehicle
DBC makes brake kits and sells rotors, pads, and wheel bearings and hubs for Canadian vehicles. Shop by vehicle to get parts that fit.
- Brake rotors, front and rear
- Brake pads
- Brake kits, with rotors and pads matched
Pricing is inclusive, with no hidden fees. Shipping within Canada is free on orders over $100. Expedited shipping is $29.99 per order. Start at the DBC collections page.
Quick checklist
- Read the box and any included instructions
- Inspect the rotor for damage
- Wash friction faces and hat with warm soapy water
- Rinse until no suds remain
- Dry fully and wipe with a clean cloth
- Clean the hub face to bare metal
- Clean bracket contact points
- Torque to the service manual
- Pump the pedal before driving
- Bed in pads
FAQ
Do I need to clean new rotors?
In most cases, yes, if they are bare cast iron with a protective oil film. The oil can transfer to the pads and cause noise or reduced braking. Fully coated or dry-packed rotors may have different instructions, so check the packaging.
Can I use brake cleaner instead of soap and water?
Yes, many people do. Use it outdoors or with strong ventilation, wear gloves and eye protection, and keep it away from flames. Canadian regulators have flagged the solvents in many aerosol brake cleaners, so soap and water is the lower-risk option when it will do the job.
Do I have to clean the hub too?
Yes. Rust or debris on the hub face can leave the new rotor sitting unevenly and cause runout. Scrub to bare metal with a wire brush, then wipe it clean. Do not skip this step even if the rotor itself is spotless.
Should I clean rotors I can't remove from the vehicle?
New rotors are cleaned before installation, off the vehicle, so the question rarely applies. For a rotor already installed, wheel-on spraying can get cleaner on the pads, and that contaminates them. Remove the wheel and keep pads protected if any cleaning is needed.
How long after cleaning can I drive?
Once the rotor is dry, installed, torqued, and the pedal is firm, it is ready for bedding. Start with gentle driving, then follow the bedding procedure from the pad maker.
Sources
- Preparing New Brake Rotors For Installation, Brake & Front End
- Washing Rotors, ACDelco TechConnect Canada
- How to Install New Rotors, YourMechanic
- Transfer Film Composition and Characteristics in Copper-Free NAO Brake Pads, SAE
- Low boiling point naphthas, Health Canada
- Risk management scope for low boiling point naphthas group, Canada.ca
- Brakleen Brake Parts Cleaner Low VOC safety data sheet, CRC Canada