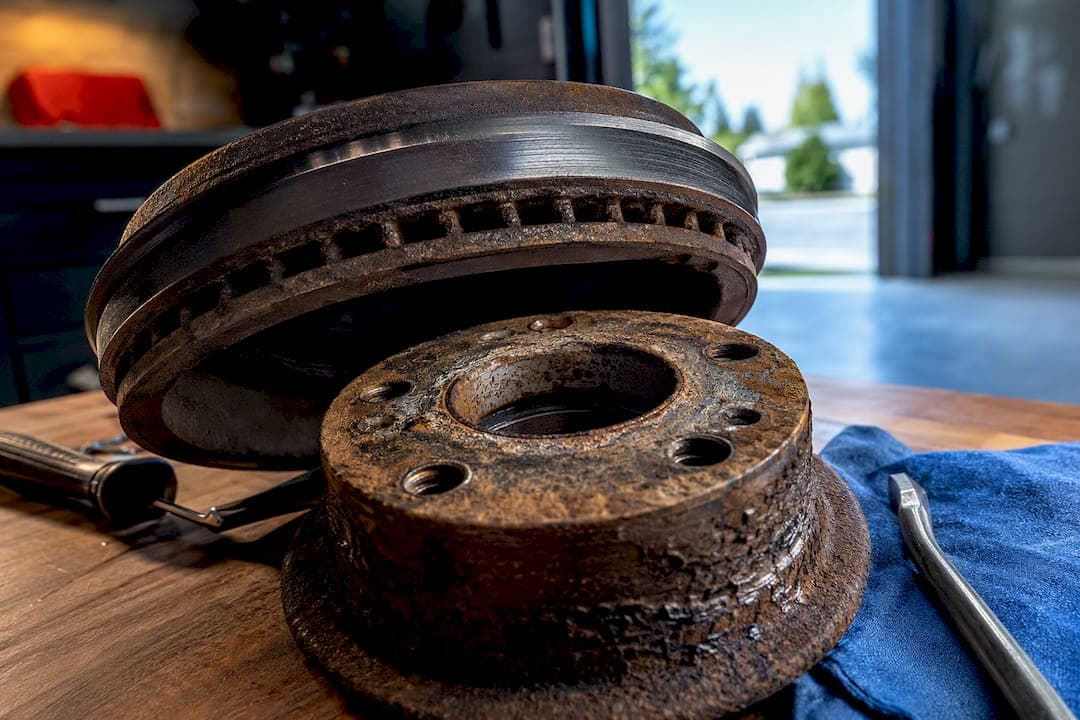
Free most stuck rotors with penetrating oil and controlled hammer taps at the hat, letting it soak for a moderate amount of time before you strike. If that fails, thread bolts into the rotor's push holes or use a puller. Save heat for last. Rear drum-in-hat rotors need the parking brake shoes backed off first. Chock the wheels and set jack stands before touching anything.
TL;DR:
- Applying penetrating oil and tapping repeatedly is often enough to free most rusted rotors without resorting to heat or forceful impacts.
- Using factory-threaded push holes or jacking bolts provides controlled, even pressure that reduces the risk of cracking the rotor or damaging the hub.
- When needed, a hub puller or an improvised C-clamp setup can exert additional force, but only after other methods have failed, and careful placement is crucial.
- Backing off parking brake shoes inside rear drum-in-hat rotors is essential before applying penetrant or force because they often cause sticking when rusted against the drum surface.
- Proper hub cleaning and applying anti-seize during reassembly significantly lowers the chance of future rotor seizures, especially when combined with correct torque procedures.
Table of Contents
- How do you remove a stuck rotor?
- Essential tools and safety checklist before you start
- Quick reference: methods to try in order
- Penetrant soak and controlled vibration: how to do it safely
- Using rotor push holes or jacking bolts to press the rotor off
- When and how to use a 3-jaw or hub puller
- How to free a rear rotor stuck by parking-brake shoes
- Targeted heat technique: exact limits and safety cautions
- Cleaning the hub, applying anti-seize, torque and bed-in checks
- Red flags and when to seek professional help
- DBC technical assets and author note
- What most guides get wrong about stuck rotors
- Sources
How do you remove a stuck rotor?
A stuck brake rotor almost always comes down to one culprit: galvanic corrosion between the cast-iron rotor and the steel hub, sometimes called rust welding. Moisture gets trapped in the seam where the rotor hat meets the hub, and the two metals essentially fuse together as rust builds between them. Road salt speeds this up dramatically, which is why the problem shows up more on vehicles that see winter driving than on ones that don't.
The standard industry term for this failure is "hub corrosion" or "rotor seizure," though most forums and how-to videos just call it a stuck or frozen rotor. Whatever you call it, the fix follows the same logic every time: break the rust bond mechanically and chemically before you try to force anything.
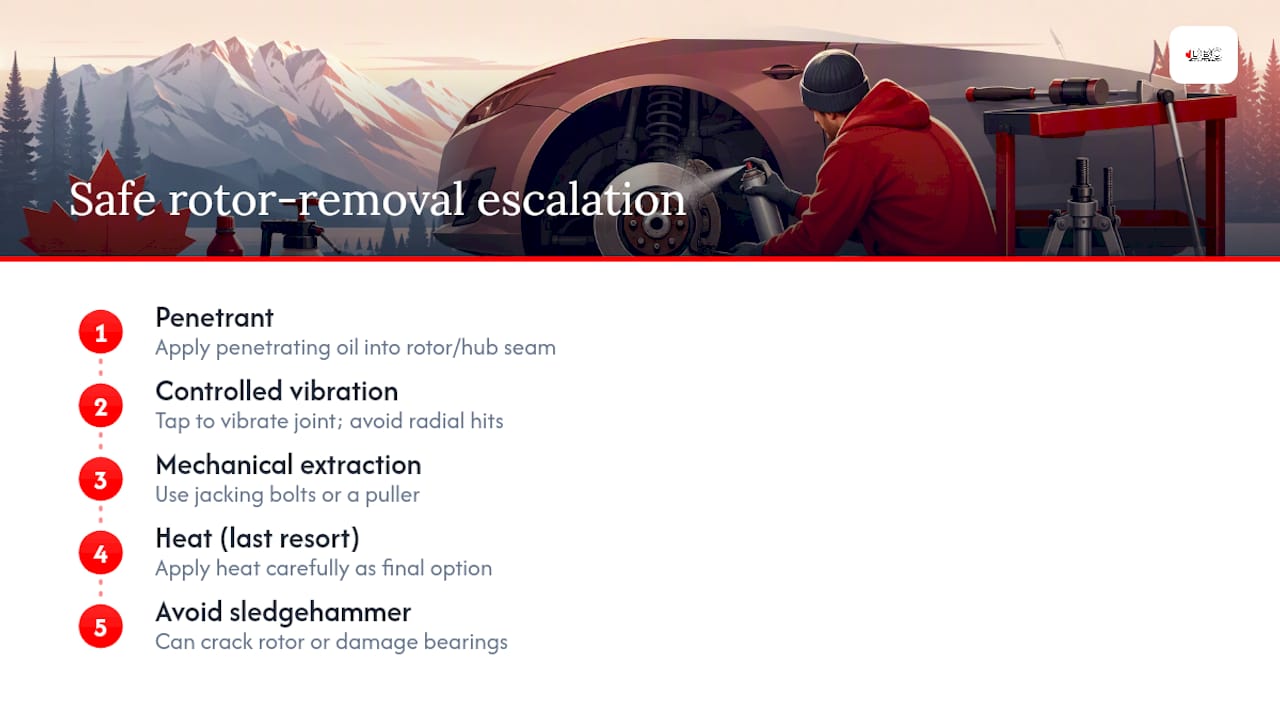
That escalation matters because rotors, studs, and wheel bearings are not built to absorb random impact or sideways force. A rotor stuck fix that starts with a sledgehammer swing to the friction ring can crack the rotor or knock the bearing out of preload. Work throughpenetrant and vibration first, move to jacking bolts or a puller if needed, and treat heat as a last-resort option.
Essential tools and safety checklist before you start
You don't need a full shop to handle stuck rotor removal, but you do need the right handful of items and a setup that won't hurt you if something slips.
Tools to gather:
- Floor jack and a matching pair of quality jack stands
- Wheel chocks for the tires staying on the ground
- Penetrating oil (PB Blaster, Liquid Wrench, or similar)
- Dead-blow hammer or a brass/rubber mallet
- Two or three M8×1.25 bolts for jacking holes
- Socket set and breaker bar
- Impact screwdriver for stuck caliper bolts
- Wire brush for cleaning threads and the hub face
- Propane torch, kept in reserve for the last-resort step
Safety setup before anything else:
- Park on level, solid ground, never gravel or a soft driveway
- Chock the wheels that stay on the ground in both directions
- Lift the car and support it on jack stands rated for the weight; never trust the jack alone
- Loosen lug nuts before you lift, snug them back partway, then remove fully once the wheel is off the ground
- Remove the caliper and bracket, then hang the caliper with a bungee or wire so it doesn't strain the brake hose
- Confirm the parking brake is released, or put an electronic parking brake into service/maintenance mode per the vehicle's manual
Pro Tip: Thread two lug nuts back onto the studs backward, flat side out, before you start hammering. It gives you something to strike near the studs without risking the threads themselves.
Quick reference: methods to try in order
Work through these in sequence. Skipping ahead to a puller or a torch before trying the simpler steps is the most common way DIYers turn a stuck rotor into a cracked one.
- Penetrant plus tapping — lowest risk, works on most moderately rusted rotors. Spray, wait, tap, repeat.
- Jacking bolts or push holes — medium risk, applies steady mechanical pressure through factory-threaded holes.
- Puller — medium risk, useful when there are no push holes or the bolt method stalls.
- Targeted heat — highest risk, reserved for rotors that won't budge after everything else.
Give each method a real chance before moving on. That means at least two or three penetrant applications with 15 to 30 minutes of soak time each, not one quick spray and a single tap. If a rotor hasn't moved at all after two full rounds of soak-and-tap, it's time to bring in the jacking bolts rather than hammering harder. Throughout every stage, keep hammer strikes on the reinforced hat between studs, never on the friction ring, and never on the hub or bearing itself.
Penetrant soak and controlled vibration: how to do it safely
This is where most stuck rotor jobs get solved, and it's also where impatience does the most damage. The goal is simple: get oil into the rust seam and use vibration to crack the bond apart.
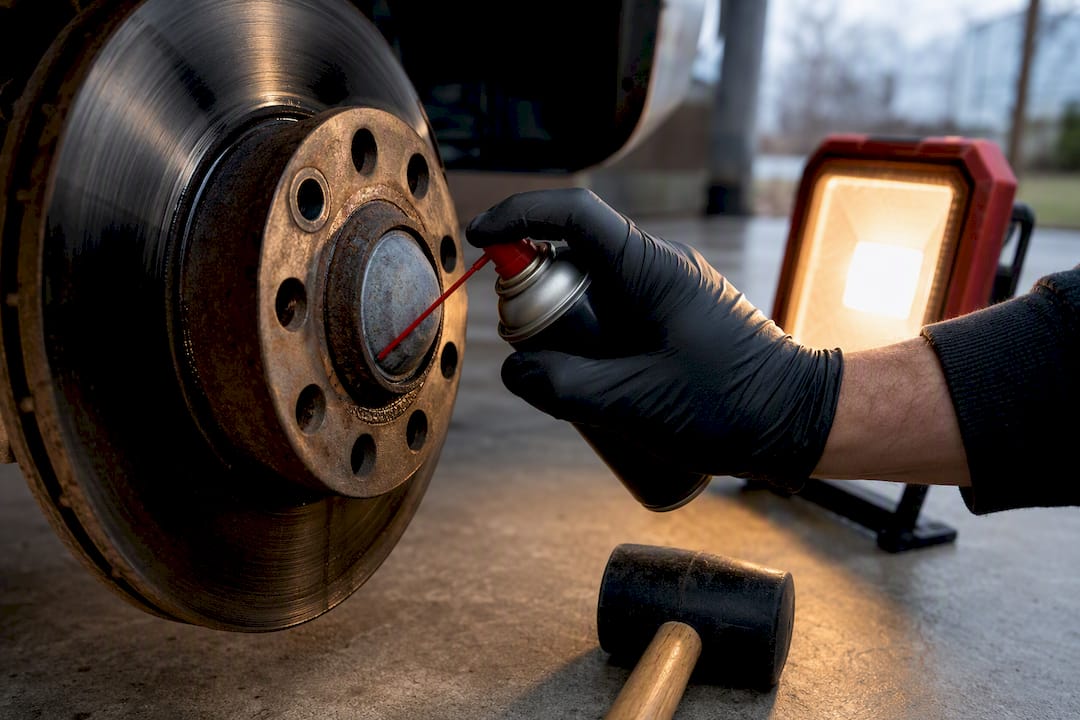
Spray penetrating oil directly into the gap between the rotor hat and the hub, working it in around each stud and along the full seam where the two metals meet. Give it a full soak, at least 15 to 30 minutes, and overnight if the vehicle has seen heavy salt or coastal air. Rotate the rotor 180 degrees partway through if it moves even slightly, and reapply oil to the section that was previously hidden.
Once it's soaked, grab your dead-blow or brass hammer and strike the rotor hat, the raised section between the wheel studs, not the flat friction surface where the pads contact. The friction ring is cast iron and can crack or chip if you hit it directly, so keep every strike on the hat.
- Strike in a rotating pattern, moving to a new spot between each stud rather than hammering one point repeatedly
- Use the backward-threaded lug nuts as strike-adjacent guides to avoid glancing blows on the threads
- Reapply penetrant every few minutes if you're working through a stubborn one
- Listen and feel for a pop or sudden looseness, that's the rust bond breaking
Pro Tip: Combine oil and heat from the sun. Leave a freshly sprayed rotor sitting in direct sunlight for an hour on a warm day, the slight temperature rise helps draw the penetrant deeper into the seam.
Once the rotor spins freely on the hub, verify the fix rather than assuming it. Spin it by hand and check for even rotation without grinding or catching, then reinstall the caliper and pump the brake pedal a few times before road testing. If the rotor still won't shift after two thorough soak-and-tap cycles, move to mechanical leverage.
Using rotor push holes or jacking bolts to press the rotor off
Most rotors from the factory include two small threaded holes in the hat, positioned between the wheel studs. These exist specifically for this job. Threading matching bolts into them lets you apply controlled, even pressure that pushes the rotor straight off the hub face rather than the glancing force of a hammer.
- Clean out the threads in each push hole with a wire brush or a matching thread tap if rust has fouled them.
- Select bolts sized to the holes, commonly M8×1.25, long enough to bottom out against the hub once threaded in.
- Thread a bolt into each hole by hand first, confirming they're not cross-threaded before using a wrench.
- Tighten each bolt in quarter-turn increments, alternating between them so the rotor comes off square instead of at an angle.
- Tap the rotor hat between bolt turns. The combination of steady mechanical pressure and vibration is what actually breaks the oxide bond, not brute torque alone.
- Stop tightening the moment you feel resistance spike sharply. That resistance means you're at risk of stripping the bolt hole or cracking the hat rather than moving the rotor.
If your rotor has no push holes, a long bolt run through the caliper bracket mounting hole, with washers stacked against the rotor face and a nut threaded down to press against it, can work as an improvised jackscrew. Go slow, alternate sides, and stop the instant you feel the setup binding rather than advancing.
Pro Tip: Never crank one bolt down fully before starting the second. Uneven pressure is what cracks the hat, and it's the single most common way this method fails.
When and how to use a 3-jaw or hub puller
A puller earns its place when there are no push holes, or when the bolt method has broken the rotor loose slightly but it still won't slide free. This is a more forceful tool than anything you've used so far, so placement matters more than muscle.
- Size the puller to reach the rotor hat comfortably; a puller that's too small forces you to angle the jaws, which invites side-loading
- Set the jaws on the hat itself, never on the friction ring, since the hat is the reinforced section built to take this kind of load
- Thread lug nuts back onto two or three studs before hooking the jaws, giving the puller's arms something solid to grip without chewing up stud threads
- Centre the puller's screw directly on the hub's axis before tightening, then turn the centre screw in small increments while tapping the rotor hat between turns
- Watch for signs the wheel bearing is taking the load; if you feel resistance that seems to come from deeper in the hub rather than the rotor itself, back off immediately
If you don't have access to a puller, a C-clamp rigged through the caliper bracket bolt holes can substitute in a pinch, working the same way as the improvised bolt-and-washer press but with more even clamping force. It's slower than a proper puller, but it applies pressure the same controlled way, without risking a sideways yank on the bearing.
How to free a rear rotor stuck by parking-brake shoes
Rear drum-in-hat rotors add a wrinkle that front rotors don't have: the parking brake shoes live inside the rotor's hat, and if they've rusted against the drum surface, no amount of penetrant on the hub will help until you back them off.
- Look for a small rubber or plastic plug on the back of the brake backing plate, usually near the bottom
- Remove the plug and rotate the wheel until you can see the star-wheel adjuster through the access hole
- Use a brake spoon or a flathead screwdriver to turn the star wheel, backing the shoes off several clicks to shrink their diameter
- Try rocking the rotor by hand after each few clicks; a springy resistance that gives slightly means you're dealing with shoe contact, while a completely solid, unmoving rotor points to rust on the hub itself
- If the shoes are the culprit, back them off fully before attempting penetrant or bolts on the hub seam, since fighting both problems at once wastes your effort
Once the rotor comes free, inspect the inner lip where the shoes ride and dress off any rust ridge with a wire brush or fine sandpaper before it goes back on. Check the shoe surfaces too. Glazed or heavily worn shoes are worth replacing while everything's already apart, and DBC Brakes' parking brake shoe options cover common rear drum-in-hat applications if yours need it.
Targeted heat technique: exact limits and safety cautions
Heat is the last method on this list for a reason. It works by expanding the rotor hat faster than the steel hub underneath it, opening microscopic gaps in the rust bond that let penetrating oil finally reach the corrosion. But it's also the method most likely to cause expensive collateral damage if you get careless with where the heat goes.
- Apply heat only to the rotor hat, in the same area you've been tapping, never anywhere near the wheel bearing, hub seals, ABS tone ring, or the brake hose
- Use short bursts with a propane torch, a few seconds at a time, rather than one sustained blast
- Let the metal cool slightly between bursts and reapply penetrating oil while it's still warm, the temperature swing helps draw oil into the seam
- Heat can still damage bearings, seals, or ABS components if it's misapplied, so keep a fire extinguisher nearby and wear gloves and eye protection throughout
- If the rotor still hasn't budged after two or three heat-and-cool cycles combined with tapping, further heat probably won't help. That's your signal to stop and consider professional extraction
Pro Tip: Heat the hat unevenly around its circumference rather than all at once. Uneven expansion creates more stress at the rust bond than uniform heating does, which can break the seizure with less total heat.
Cleaning the hub, applying anti-seize, torque and bed-in checks
Getting the rotor off is only half the job. Skip the cleanup and you'll be fighting the same seizure again within a year or two.
Wire-brush the hub pilot, the raised centre section the rotor's hat slides over, down to bright metal, then do the same to the hub's mating face where the rotor sits flush. Blow out any loose rust or debris with compressed air before reassembly. Apply a thin smear of nickel or copper anti-seize compound to the pilot and mating face, keeping it well clear of the wheel studs and the rotor's friction surface, where anti-seize would compromise braking performance.
- Torque the caliper bracket bolts to the vehicle's specification before reinstalling the caliper
- Torque the wheel lug nuts in a star pattern, not a circular one, to seat the wheel evenly against the hub
- Replace any stud that shows thread damage from the removal process rather than reusing it
- Pump the brake pedal several times before moving the vehicle, seating the pads against the fresh rotor surface
| Step | What to do | Why it matters |
|---|---|---|
| Hub cleaning | Wire-brush pilot and mating face to bright metal | Removes rust that restarts the corrosion cycle |
| Anti-seize | Thin smear on pilot and face only | Prevents future seizure without affecting braking |
| Torque pattern | Star pattern on lug nuts | Seats rotor evenly, prevents hat distortion |
| Pedal check | Pump before driving | Seats pads against rotor surface |
Longer term, rinsing the undercarriage after winter driving cuts down on the salt exposure that starts the whole problem, and a light coat of anti-seize at every brake service keeps the next rotor swap from turning into a fight. DBC Brakes covers more of this ground in its guide to preventing rotor warping, and for wheels that see a lot of winter grime, this routine for cleaning coated wheels is a solid companion habit for keeping corrosion off the hub area generally.
Red flags and when to seek professional help
Some symptoms mean you're past the point where more DIY effort helps, and pushing further usually just adds a second repair bill on top of the first.
- Stripped stud threads — usually from overtightening jacking bolts or forcing a puller; the fix is stud replacement, not more torque
- A cracked or chipped rotor — from hammer strikes on the friction ring instead of the hat; the rotor needs replacement regardless of whether it eventually comes free
- Bearing play or grinding when you spin the hub — a sign the bearing took side-load during puller use; this can mean bearing replacement
- ABS light after reassembly — points to a disturbed or damaged tone ring, often from heat applied too close to the sensor
- No movement after a full round of penetrant, bolts, and careful heat cycles — at this point, continued force risks the hub itself rather than just the rotor
If you do end up calling a shop, tell them exactly what you tried: which penetrant, how many soak cycles, whether you used jacking bolts or a puller, and whether heat was applied. That saves the technician time diagnosing what's already been ruled out.
DBC technical assets and author note
DBC Brakes' rotor material comparison guide and brake kit installation walkthrough cover the torque specs and bed-in steps referenced above in more detail, useful once the stuck rotor is off and you're deciding what goes back on. DBC's cross-drilled rotors are engineered to resist warping and improve heat dissipation over standard replacement parts, and every kit ships with inclusive pricing and no hidden fees, plus free shipping within Canada on orders over $100.
Author: Sam, contributor at DBC Brakes.
What most guides get wrong about stuck rotors
Most videos on this topic treat the sledgehammer as step one, and that's backwards. The forum consensus (soak it, tap it, walk away, come back) actually works more often than the dramatic "hit it until it moves" approach that gets more views. The physics favours patience: rust is a chemical bond, and chemicals need time to work, not force.
The other thing conventional advice underplays is the rear parking brake. Plenty of guides walk through penetrant and pullers in detail, then treat the drum-in-hat shoes as a footnote. In practice, that star-wheel adjustment is often the actual blocker on rear rotors, and skipping straight to hammering the hub wastes time on a problem that isn't there.
If you take one thing from this guide, prioritize the anti-seize step on reassembly over everything else. It costs a few dollars and five minutes, and it's the difference between doing this job once and doing it again in three years. Once you're back on the road, a performance brake kit with cross-drilled rotors is worth considering if the rotor you just fought with was already showing rust pitting or uneven wear before it seized.
— Sam
Sources
- Brake rotor won't come off | TheToolStrunk
- Remove stuck brake rotor | Rick's Free Auto Repair Advice