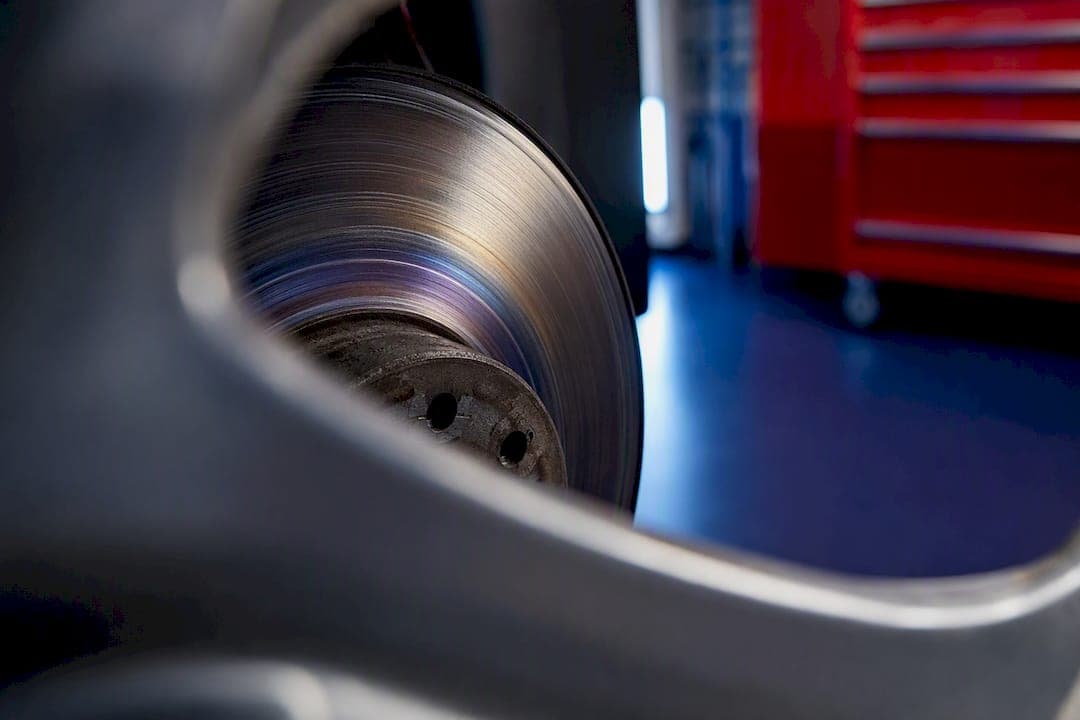
Most brake pulsation blamed on "warped rotors" is actually disc thickness variation caused by uneven pad transfer, not true bending. Preventing it comes down to three habits: proper bedding of new pads and rotors, correct wheel torque with clean hub surfaces, and regular caliper and slide pin maintenance. Matched, quality rotors and pads lower the risk further, and none of it requires special tools most drivers don't already own.
TL;DR:
- True rotor warping is rare; most brake pulsation results from disc thickness variation caused by uneven pad transfer.
- Proper bedding, correct wheel torque, and regular caliper maintenance prevent uneven pad deposits and reduce DTV risk.
- Avoid repeated hard stops, riding brakes downhill, and parking hot brakes in water to minimize thermal stress and pad imprinting.
- Matching high-quality, designed-for-pair rotors and pads, along with proper installation, significantly decreases the chances of pulsation.
- Regularly cleaning rotors and hubs, along with correct torque and checking for uneven rust, helps maintain rotor integrity and performance.
Table of Contents
- What causes rotor "warping" and how to recognize it
- High-impact prevention checklist: driving habits, parts, and maintenance
- Bed-in procedure for new pads and rotors
- Installation and shop checks: torque, hub prep, and caliper service
- Resurfacing, measuring thickness, and when to replace rotors
- How DBC Brakes' product choices reduce rotor problems
- Moisture, rust, and rotor integrity
- First-person technician notes and practical diagnostics
- Get matched rotors and pads built to resist DTV from day one
- Sources
What causes rotor "warping" and how to recognize it
The term "warped rotor" gets used for almost any brake pulsation, but true mechanical warping, where the rotor physically bends out of flat, is rare. What drivers actually feel is disc thickness variation, or DTV: uneven deposits of pad material building up on the rotor's friction surface. Modern non-asbestos pads shed resin and friction compound under heat, and that material transfers unevenly across the disc face. Very small high spots can be felt through the brake pedal.
Several everyday habits and mechanical faults drive this uneven transfer:
- Pad material transfer during hard or repeated stops, which deposits more compound in some spots than others
- Dragging calipers, where a sticky piston or slide pin keeps light pressure on the rotor even when you're off the brake, creating a localized hot spot
- Uneven lug torque, which can distort the rotor hat and translate into runout at the friction face over thousands of kilometres
- Debris or rust on the hub mating surface, which tilts the rotor slightly and produces a wobble that looks exactly like a bent disc
The symptoms are consistent enough that you can usually self-diagnose before a shop even puts the car on a lift. Pedal pulsation under braking is the classic sign: a rhythmic push-back you feel in your foot, often worse at highway speeds. Steering shake or a shimmy through the wheel, unusual grinding or scraping noise, and a noticeably longer stopping distance can all point the same direction.
The DirectBrakes technical breakdown on this topic maps severity to urgency well: a light shudder on the highway is a nuisance you can drive on for a while, moderate pulsing means book a service soon, and violent shaking or grinding means stop driving on it. Thermal stress and installation error account for most of these cases, which is good news. Both are preventable with the right habits, covered next.
High-impact prevention checklist: driving habits, parts, and maintenance
Preventing DTV starts behind the wheel, long before a wrench touches your car. How you drive determines how evenly your pads deposit material and how much thermal stress your rotors absorb over their lifespan.
Driving habits that matter most:
- Avoid repeated hard stops in quick succession, especially descending a long grade. Each stop adds heat before the last one has dissipated.
- Use engine braking on long downhill stretches instead of riding the brake pedal continuously.
- Never hold steady, light brake pressure at a stop with hot rotors. That's exactly the scenario that imprints uneven pad deposits.
- Give brakes a cooling period after aggressive driving before parking, and avoid driving through deep water or puddles right after hard braking. The thermal shock from cold water hitting a hot rotor is a known trigger for surface stress and pad imprinting.
Parts choices also shape your odds. Ceramic pads run cooler and produce less dust but often trade off some outright stopping power at very high temperatures. Semi-metallic pads handle heat more aggressively but transfer more material to the rotor face, which raises DTV risk if bedding is skipped. Matching pad compound to how you actually drive, commuting versus track days versus towing, matters more than chasing a premium label. A reliable brake kit pairs rotor metallurgy and pad compound so they wear together instead of fighting each other.
Maintenance intervals worth putting on a calendar:
- Replace brake fluid every 2 to 3 years. Moisture absorbed into the fluid lowers its boiling point, which raises the risk of heat-related brake and rotor damage under hard use.
- Inspect pads regularly and check for uneven wear across the pad face.
- Service caliper slide pins routinely at each brake job. A sticky pin causes drag long before you'd notice it in normal driving.
Pro Tip: If you've just driven aggressively, mountain pass, track day, towing a heavy trailer, keep the car moving at a slow, steady pace for a few minutes before parking. Rolling airflow cools the rotors evenly; parking hot lets one spot cool faster than the rest and can imprint pad material right there.
Bed-in procedure for new pads and rotors
Bedding exists for one reason: to lay down an even, thin transfer layer of pad material across the entire rotor face before you drive normally. Skip it, and the first hard stop you make deposits material unevenly, setting up DTV before the parts have even worn in.
The rebedding process MotorTrend documents works because it deliberately heats the pad and rotor together through repeated, controlled deceleration, then lets that heat spread evenly rather than concentrating in one spot.
A safe bed-in sequence looks like this:
- Find a quiet stretch of road with no traffic behind you.
- Accelerate to around 60 km/h, then brake moderately down to about 20 km/h without coming to a complete stop.
- Repeat this 8 to 10 times, giving the brakes a short recovery window between each stop so they don't overheat.
- After the sequence, drive normally for several kilometres without hard braking or stopping on an incline, letting everything cool gradually.
- Avoid sitting stopped with your foot on the brake immediately after bedding; that's the single fastest way to undo the work you just did.
Common mistakes include bedding too aggressively (full stops from high speed generate excess localized heat), stopping and idling with the brake held right after the sequence, and assuming new pads are bedded straight out of the box. Even pads marketed as pre-bedded benefit from this drive-in period once mated to a specific rotor.
You'll know bedding worked if the pedal feels firm and consistent, with no pulsation, across several stops afterward. For the full step-by-step version with photos and safety notes, the complete bedding guide walks through the process in more detail than fits here.
Installation and shop checks: torque, hub prep, and caliper service
Most DTV that shows up within the first few thousand kilometres of a brake job traces back to installation, not parts quality. The fixes are straightforward, but they get skipped more often than you'd think.
Torque and hub prep come first. Always use a calibrated torque wrench and tighten lug nuts in a star or alternating pattern, never in a simple circle. Overtightening or uneven torque can distort the rotor hat, and that distortion shows up as runout at the friction face over time, even though the rotor itself was flat when installed. Never finish a lug nut sequence with an impact gun; snug them with the gun, then finish to spec by hand with a torque wrench. Before mounting a new rotor, clean the hub mating surface thoroughly and remove any rust, corrosion, or old brake dust. A thin layer of debris tilts the rotor just enough to create measurable wobble.
Runout measurement is the objective check. Park Tool's guidance on rotor truing describes using a dial indicator kit mounted near the outer edge of the rotor to read lateral deviation in increments as small as 0.01 mm. Even small lateral runout at the rotor translates directly into pedal pulsation you'll feel at the wheel, because the pad is contacting an uneven surface with every rotation.
Caliper service closes the loop. Check for:
- Dragging or partially seized pistons, which keep light pressure on the rotor after you release the pedal
- Stuck slide pin hardware, which prevents the caliper from floating evenly over the rotor
- Wheel bearing play, which can mimic rotor runout symptoms even when the rotor itself is fine
- Proper wheel seating against the hub, with no gap that would let the wheel sit slightly off-plane
Technicians consistently flag caliper drag as one of the fastest routes to a localized hot spot, and servicing slide pins at every brake job heads off a large share of comeback complaints before they start.
Resurfacing, measuring thickness, and when to replace rotors
Every rotor carries a minimum thickness specification stamped into the metal or listed in the vehicle's service manual, and that number exists for a reason beyond just wear. Thinner rotors hold less thermal mass, which means they heat up faster and cool down slower, both of which raise the odds of future DTV.
Resurfacing, machining a thin layer off the rotor face to correct minor runout or surface imperfections, can work, but it comes with a real trade-off. A resurfaced rotor is thinner than it was, and many modern rotors are already designed close to their minimum thickness to save weight. That leaves little margin for a second resurfacing down the road, and shops should always measure and report the resulting thickness to the customer rather than machining blind.
Good shop practice on this front includes:
- Measuring thickness at several points around the rotor face, not just one spot, since wear is rarely perfectly even
- Checking runout with a dial indicator both before and after any machining
- Documenting the numbers so the customer knows exactly how much margin is left before the next service interval
Replacement, rather than resurfacing, is the right call when a rotor is below minimum thickness, shows heat cracks or deep scoring, or keeps developing DTV even after a proper bedding cycle. In most of those cases, it's worth replacing both rotors on the same axle together, and matching new pads to the new rotors, rather than mixing a fresh rotor with a half-worn pad on the opposite side. Mismatched wear between the two sides of an axle is a common, underrated cause of pulsation that gets misdiagnosed as a warped rotor months later.
How DBC Brakes' product choices reduce rotor problems
Cross-drilled rotor design exists to solve exactly the heat buildup that drives DTV. The drilled holes give trapped gas and heat somewhere to escape during hard braking, which supports more even cooling across the rotor face instead of one section running hotter than the rest. Pairing that rotor design with a pad compound engineered for the same kit, rather than mixing parts from different sources, removes one of the most common causes of uneven wear discussed earlier.
DBC Brakes manufactures its kits in Canada, prices them with no hidden fees, and backs orders with customer support from people who know the product, not a scripted chatbot. New kits ship with break-in guidance that mirrors the bedding sequence covered above, because the rotor and pad need that same controlled heat cycle to mate properly regardless of which brand supplies them.
Moisture, rust, and rotor integrity
Rotors sit exposed to road spray, salt, and standing water every time you drive, and that exposure has a direct effect on how evenly they wear. A light coat of surface rust forms on any rotor left parked for a few days, especially in humid climates or after winter road salt exposure. That's normal, and it usually scrapes off within the first few stops after you start driving again.
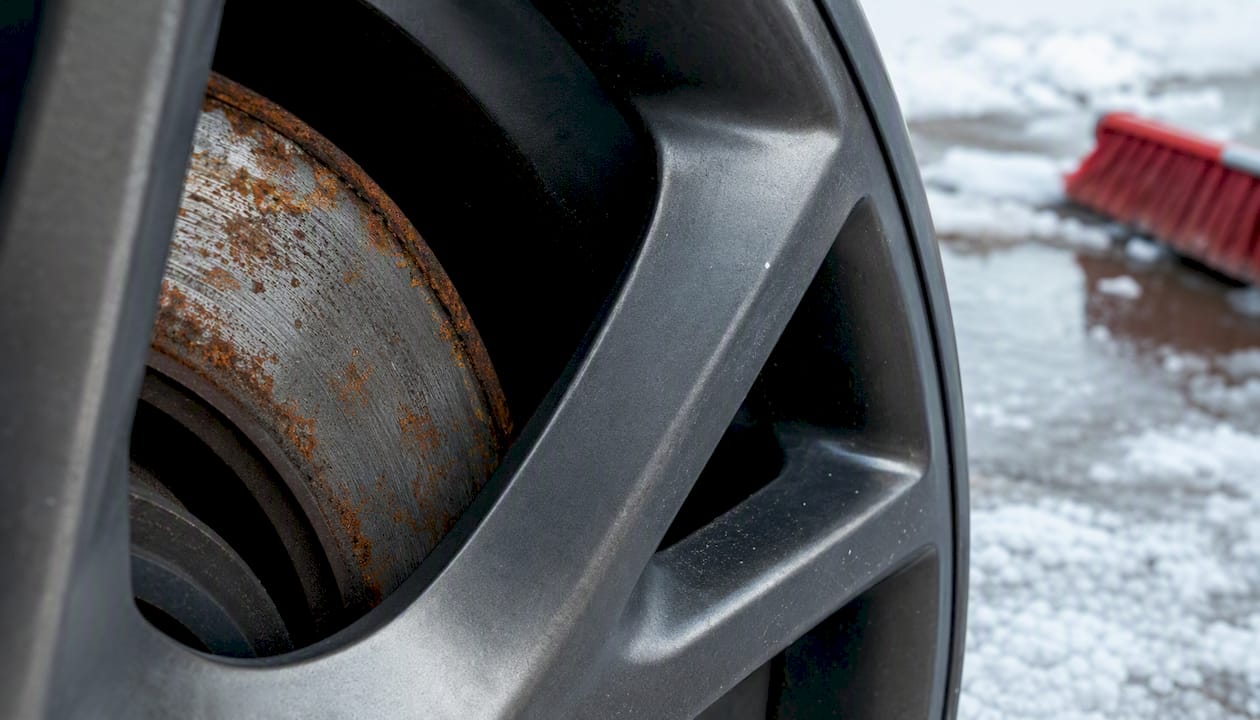
The problem is uneven rust. If a car sits with the parking brake engaged, or parked in one spot for weeks, rust can build up unevenly across the rotor face, thicker where moisture pooled, thinner where it didn't. That uneven surface behaves exactly like pad-transfer DTV once you start braking again: a high spot on one side of the rotor produces the same pulsation, even though no pad material caused it.
Coastal and winter driving conditions accelerate this cycle. Road salt in particular speeds up corrosion on both the rotor face and the hub mating surface, which ties back to the installation checks covered earlier. A corroded hub surface tilts the rotor just enough to create measurable runout even on a brand new part. Regularly cleaning brake dust and road grime off the wheel and rotor assembly, and avoiding long parking periods with the parking brake set on a rusty rotor, both reduce this risk. It's a small habit, but it's one of the few prevention steps that costs nothing and takes no tools.
First-person technician notes and practical diagnostics
When a customer describes a shudder, the first thing I check is whether it happens under braking specifically, or all the time. A vibration that's constant regardless of the brake pedal usually points to tire balance or suspension, not the rotor. One that only shows up when you brake, and gets worse the harder you brake, is almost always DTV.
A couple of shortcuts I rely on before pulling out a dial indicator: run a fingernail lightly across the cooled rotor face in a few spots. If you feel distinct ridges or lips, that's often pad transfer you can already feel by touch. Also check whether the shudder appears right after a long descent or repeated stops. That timing alone tells you thermal buildup is the trigger, not a bent rotor.
— Sam
Get matched rotors and pads built to resist DTV from day one
DBC Brakes builds its performance brake kits with rotors and pads matched at the factory, so you're not guessing which pad compound plays well with which rotor metallurgy. That matching, combined with cross-drilled rotor design for more even heat dissipation, addresses the two biggest causes covered above: uneven pad transfer and thermal stress.

Before you order, check kit compatibility against your vehicle's year and trim on the product page, every kit ships with the same break-in guidance detailed earlier in this article, so bedding is straightforward from the moment it arrives. Orders over $100 ship free within Canada, and support comes from people who actually know brake systems, not an automated queue. If your current rotors are already showing scoring, cracking, or repeat pulsation after a proper bed-in, browse the premium brake kit lineup and get a matched set on the way before the next long drive.
Sources
- Nuts & Bolts: Warped Rotor Myth (MotorTrend)
- Disc brake rotor truing (Park Tool)
- Warped rotors: can you drive safely? (DirectBrakes)
- How often should you perform a brake fluid flush in Canada? (Kenvo)