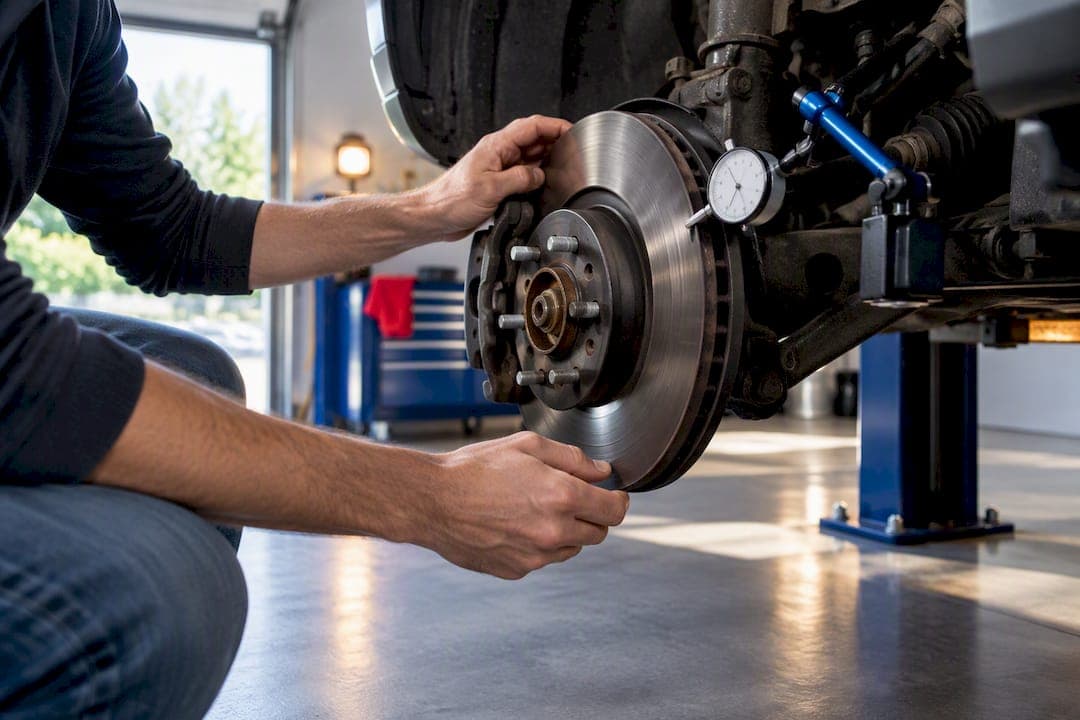
Yes, new brake pads and rotors need to be paired and bedded together as a set. Install clean, correctly torqued components, check rotor runout before your first drive, and follow a proper bed-in procedure. If you already have vibration or noise on an existing setup, inspect for uneven pad deposits and runout before you replace anything.
TL;DR:
- Proper bed-in procedures, including gradual heating and cooling, are essential to prevent uneven pad deposits that cause vibration and pedal pulsation.
- Runout measurements exceeding 0.10 mm can lead to vibrations regardless of rotor condition, and indexing or machining can fix typical issues without full replacements.
- Matching pad compounds to rotor surface type and driving conditions significantly extends component life and maintains braking performance.
- Using a matched brake kit ensures compatibility and reduces installation variables that can lead to uneven deposits or premature wear.
- Regular checks of rotor runout and proper installation practices help prevent warping and uneven pad transfers that cause vibrations and noise.
Table of Contents
- What is pad and rotor matching, and why does transfer film matter?
- How do you bed in new brake pads and rotors correctly?
- How do you check rotor runout and prepare for installation?
- Which pad materials pair best with which rotors?
- Vibration or noise: is it the pads, the rotors, or both?
- What the research actually tells DIYers to do
- When should you replace both parts instead of machining one?
- Skip the guesswork with a matched brake kit
- Sources
- FAQ
What is pad and rotor matching, and why does transfer film matter?
Pad and rotor matching starts with a layer of material transferred from the brake pad onto the rotor face during the first miles of use. Technicians call this the transfer film, and it is the actual surface your brakes grip every time you press the pedal after break-in.
The film is mostly iron oxide that comes from the rotor itself, not the pad. A 2021 SAE study on copper-free NAO brake pads found that certain pad fillers, such as potassium lithium titanate, help that iron oxide settle into a more uniform, stable layer. A well-designed pad formulation still produces even friction even without copper content, provided the transfer film forms correctly.
Braking uses two friction mechanisms working together: adherent friction, where the pad material bonds molecularly with the rotor surface, and abrasive friction, where harder particles cut and wear both surfaces. Bedding is the process of building that adherent layer evenly before you ask the brakes to do real work.

When the layer forms unevenly, you get thickness variation, meaning some points on the rotor carry more deposited material than others. That variation, sometimes just a few ten-thousandths of an inch, is what most drivers feel as pedal pulsation or steering wheel shake. Centric's technical research on disc behaviour identifies uneven pad deposits, not disc "warping," as the primary cause of brake judder and vibration in most real-world complaints.
Bedding does more than smooth out friction, too. Research into cast-iron disc metallurgy shows that controlled heat cycling during break-in changes the rotor's surface microstructure, improving ductility and crack resistance in the braking face. Skip this step and you are not just risking a shaky pedal. You are skipping a process that helps the rotor resist the kind of stress that leads to premature cracking.
A few things happen when transfer film forms unevenly:
- Hotspots develop where excess pad material builds up, and those spots harden faster than the surrounding rotor surface.
- Hardened spots resist wear differently than the rest of the disc, deepening the thickness variation over time.
- Pedal pulsation and steering shake follow, usually within a few thousand kilometres of poor break-in.
- Pad glazing can set in early, reducing bite and increasing stopping distances.
None of this requires a manufacturing defect or a bad rotor. It usually just means the first heat cycles were not controlled the way they should have been.
How do you bed in new brake pads and rotors correctly?
Bedding follows a simple logic: heat the pads and rotors gradually, let them cool without sitting still under load, and repeat. The exact sequence changes depending on whether you are running street pads or a performance compound, but the underlying goal never changes.
Standard street pad procedure:
- Find an empty stretch of road and accelerate to about 50 km/h, then brake moderately down to roughly 20 km/h. Repeat this eight to ten times.
- Drive normally for a few minutes to let everything cool between stop sets.
- Repeat the stop sequence a second time, for a total of two sets of ten partial stops, which mirrors the staged bed-in method StopTech recommends for stock-sized systems.
- Avoid hard braking or coming to a complete stop with your foot on the pedal for the rest of that drive.
- Expect full bed-in to complete gradually over the following normal driving period.
A widely used variation on this is the 30/30/30 method: 30 stops from 30 mph (roughly 48 km/h), with 30 seconds of cooling between each one. ADVICS, a major OE brake supplier, backs this approach for most street applications and notes that full bed-in performance typically shows up somewhere around 400 to 500 miles (roughly 650 to 800 km) of driving. Our own two-sets-of-ten bedding procedure walks through the same logic with Canadian road conditions in mind.
Performance and race pad procedures:
High-temperature compounds need higher peak temperatures to bed in properly, which means harder stops from higher speeds, done in a controlled setting away from traffic. These pads often need a second, hotter round of stops after the initial street-style sequence, since their resins do not fully cure at lower temperatures. If you are stepping up to a track-oriented compound, read through why performance brakes need a dedicated bedding process before your first session, since the wrong sequence can glaze an expensive pad in one afternoon.
The single most important warning applies to every pad type: never come to a complete stop with the brakes applied right after a hard stop or a hot lap. Heat concentrates at the exact contact point between pad and rotor, and that spot can deposit an uneven blob of material rather than a smooth layer.
Pro Tip: After your last hard stop in a bed-in sequence, keep the vehicle rolling at low speed for a minute or two before parking. That keeps heat moving around the rotor's circumference instead of baking into one spot.
How do you check rotor runout and prepare for installation?
Runout is the amount a rotor wobbles side to side as it spins, measured with a dial indicator clamped to a fixed point near the outer edge of the rotor face. Spin the wheel by hand and watch the needle. Most shops treat anything beyond 0.10 mm (0.004 in) as excessive, a threshold echoed in VehicleServicePros' technician guidance on rotor runout.
That number matters because runout above tolerance causes the caliper to push the pad back and forth with every rotation, which is a mechanical cause of vibration entirely separate from uneven transfer film. Confusing the two leads to a lot of unnecessary parts swapping.
A quick, low-cost fix worth trying before anything else: loosen the rotor, rotate it 90 or 180 degrees on the hub, and re-torque it. Some manufacturing runout is periodic with the bolt pattern, so changing the rotor's orientation on the hub can sometimes bring it back inside tolerance without machining or replacing anything. Shops that offer rotor-match machining services use a similar principle, truing the rotor to the actual hub it will spin on rather than assuming factory tolerances are close enough.
Runout checks catch problems cheaply. A five-minute dial indicator check, done before your first drive, can eliminate a vibration complaint that would otherwise send you chasing pads, callipers, or suspension parts for no reason.
Before you even get to runout, installation prep matters just as much:
- Wipe down new rotors with brake cleaner to remove the shipping coating, since some anti-corrosion coatings interfere with initial pad bite.
- Check the hub face and rotor hat for rust, burrs, or debris. Even a thin layer of surface rust between rotor and hub throws off your runout numbers.
- Torque wheel bolts in the correct star pattern, to spec, in two or three passes rather than one full-torque pass.
- Confirm the rotor seats flush against the hub boss before you tighten anything down.
- Recheck runout after final torque, since uneven clamping force can introduce runout that was not there before.
Our technician-vetted habits for preventing rotor warping cover a few more shop-floor details worth running through if this is your first time doing a full brake job solo.
Which pad materials pair best with which rotors?
Matching goes beyond fitment. The pad compound and the rotor surface need to suit the same driving conditions, or one of them wears out, or fails, faster than it should.
Ceramic pads run cooler and produce less dust than other compounds, making them a strong default for daily driving. They pair well with blank or lightly slotted rotors, and our breakdown of ceramic pads and dust reduction covers the wheel-cleanliness side of that trade-off in more detail.
Semi-metallic pads handle higher heat and heavier loads better than ceramic, which is why they show up more often on trucks, tow vehicles, and larger SUVs. Slotted rotors work well here since the slots help vent gas and debris under sustained heavy braking, a combination a pad-and-rotor pairing guide lists explicitly for towing and heat-heavy use.
NAO (non-asbestos organic) pads run quieter and gentler on rotors than either of the above, but they trade away some high-temperature performance. They suit light daily driving where noise and rotor longevity matter more than aggressive stopping power.
Rotor surface treatments layer on top of that pad choice rather than replacing it:
- Blank rotors are the simplest, most predictable surface, and they pair safely with nearly any street pad compound.
- Slotted rotors clear gas and debris better under repeated heavy stops, useful for towing or mountain driving.
- Cross-drilled rotors add cooling capacity and help shed water and debris, a design DBC Brakes engineers into its rotor lineup specifically to resist warping under repeated heat cycles.
- Coated rotors resist surface rust between drives, which matters most for vehicles that sit outside through Canadian winters. Our piece on coated rotor benefits for daily drivers goes into the corrosion side of that choice.
A few pairings genuinely cause problems rather than just underperforming. Race-compound pads designed for track temperatures often need to heat the street rotor was never built to handle, which glazes the pad and can crack the rotor early. Aggressive semi-metallic pads on heavily cross-drilled or drilled-and-slotted rotors can accelerate rotor wear faster than expected if you are not also managing brake dust and cleaning regularly. And on the regulatory side, several jurisdictions have phased down copper content in friction formulations, so if you are buying pads for an older vehicle, check that the compound still matches current material rules in your area before you install it.
Vibration or noise: is it the pads, the rotors, or both?
Most brake complaints trace back to one of three causes: uneven pad deposit, rotor runout, or straightforward pad glazing. Sorting out which one you are dealing with takes about ten minutes and no special tools beyond a dial indicator.
- Feel for the pattern. Vibration that only shows up under braking, and scales with how hard you press the pedal, points to pad deposit or runout rather than a suspension issue.
- Check pedal pulsation versus steering shake. A pulsing pedal usually means front rotor thickness variation. Shake through the steering wheel specifically, without pedal pulsation, sometimes points to a wheel balance or suspension issue instead.
- Pull a wheel and look at the pad edges. Pads with a shiny, glassy surface are glazed, usually from repeated hard stops without proper cooling. Pads with an uneven, blotchy transfer pattern on the rotor face point to a bad original bed-in.
- Run the dial indicator. Anything past 0.10 mm (0.004 in) of runout is a mechanical cause independent of the pads, and this step alone rules out or confirms a big chunk of possible causes.
- Review your bedding history. If you cannot remember doing a proper bed-in procedure after the last pad or rotor change, that is very likely your answer.
From there, work up the fix ladder in order rather than jumping straight to new parts. Start with a proper re-bed if the pads are not glazed and runout checks out fine. If the pads show glazing, light sanding can sometimes restore bite without a full replacement, though badly glazed pads are cheap enough that replacement is often the faster call. If runout is out of tolerance, try indexing the rotor first before paying for machining or a new rotor. Our quick diagnostic for pad deposit versus warped rotor walks through this same ladder with photos if you want a visual reference while you are under the car.
What the research actually tells DIYers to do
The technical literature on this topic is more consistent than the shop-talk usually suggests. SAE's research into transfer film composition confirms the film is rotor-derived iron oxide shaped by pad chemistry, and Centric's technical whitepaper on judder causes ties nearly every "warped rotor" complaint back to that same uneven deposit rather than actual warping.
None of that research requires a lab to apply at home. It translates into three habits: bed new parts in deliberately rather than driving normally from day one, check runout before you assume a rotor is bad, and match pad compound to how you actually drive rather than to whatever was cheapest at the counter.
DBC Brakes builds its rotor line, including the Performance XDB, around this exact research base, engineering cross-drilled surfaces specifically to resist the heat cycling that damages poorly matched components. That perspective, paired with practical, technician-reviewed procedures like the ones detailed above, is what shapes the guidance throughout this piece.
When should you replace both parts instead of machining one?
Runout past 0.10 mm (0.004 in) is your first decision point. Indexing the rotor is worth trying first since it costs nothing but a few minutes. If that does not bring it back inside tolerance, machining is usually cheaper than replacement and gets you a trued surface, provided the rotor still has enough thickness left to machine safely.
Reusing a rotor with new pads is fine when the old rotor is within spec on runout and thickness, and the surface is not glazed or heat-checked. Replace both together when the rotor shows heat cracking, is near its minimum thickness spec, or when you are stepping up to a noticeably more aggressive pad compound than what was on it before.
Usage changes the math. A commuter car can often get away with machining and reusing rotors more than once. A tow vehicle or a car that sees track days wears out that safety margin faster, and a matched kit removes the guesswork entirely.
Quick checklist: runout in spec, thickness above minimum, no visible cracking or hard spots, pad compound not changing dramatically? Machine and reuse. Fails on any of those? Replace both.
— Sam
Skip the guesswork with a matched brake kit
Every step above, from runout checks to bedding sequences to pad compound selection, exists because pads and rotors sold separately leave room for mismatch. A matched kit removes most of that risk before you even open the box. DBC Brakes ships its Performance XDB, Premium Black Kote, and Performance SS kits with verified fitment and cross-drilled rotors engineered specifically to resist the warping caused by uneven heat cycling.

Buying pads and rotors as a set also cuts down the installation variables that lead to uneven deposits in the first place. You are not guessing whether a semi-metallic pad from one brand will bed correctly with a rotor from another. Pricing is inclusive with no hidden fees, and orders over $100 ship free within Canada. If you are ready to stop mixing parts and start with a set built to work together, browse brake kits by vehicle and confirm fitment for your make and model before you order.
Sources
- Transfer film composition characteristics for copper-free NAO brake pads (SAE 2021)
- Centric / APC technical whitepaper — warped brake disc causes and friction mechanisms
- Brake rotor runout guidance (VehicleServicePros)
- Advics how-to: Bedding-in brake rotors & brake pads (Tire Review)
FAQ
Do brake pads have to match the rotors?
Yes. Pads and rotors need to be paired and bedded together so the transfer film forms evenly across the rotor face. Mismatched or unbedded combinations are a common cause of judder and vibration that has nothing to do with actual rotor warping.
How close should my brake pads be to my rotors?
There should be minimal clearance between the pad and rotor when the brakes are released, just enough that the pad is not dragging but close enough for quick, consistent contact. If you can hear constant light scraping with the pedal fully released, the caliper or pad is not seated correctly and needs a second look.
What is the 30/30/30 rule for brakes?
It is a bed-in method: 30 stops from 30 mph (about 48 km/h), with roughly 30 seconds of cooling between each stop. ADVICS recommends this approach for many street applications, with full bed-in performance typically settling in over the following several hundred kilometres.
Can I use different brand rotors and pads?
You can mix brands as long as the pad compound and rotor type suit your driving conditions and both parts are within fitment spec for your vehicle. That said, a matched kit like DBC Brakes' Performance XDB or Performance SS removes the guesswork of pairing a compound to a rotor surface designed for a different vehicle or use case entirely.