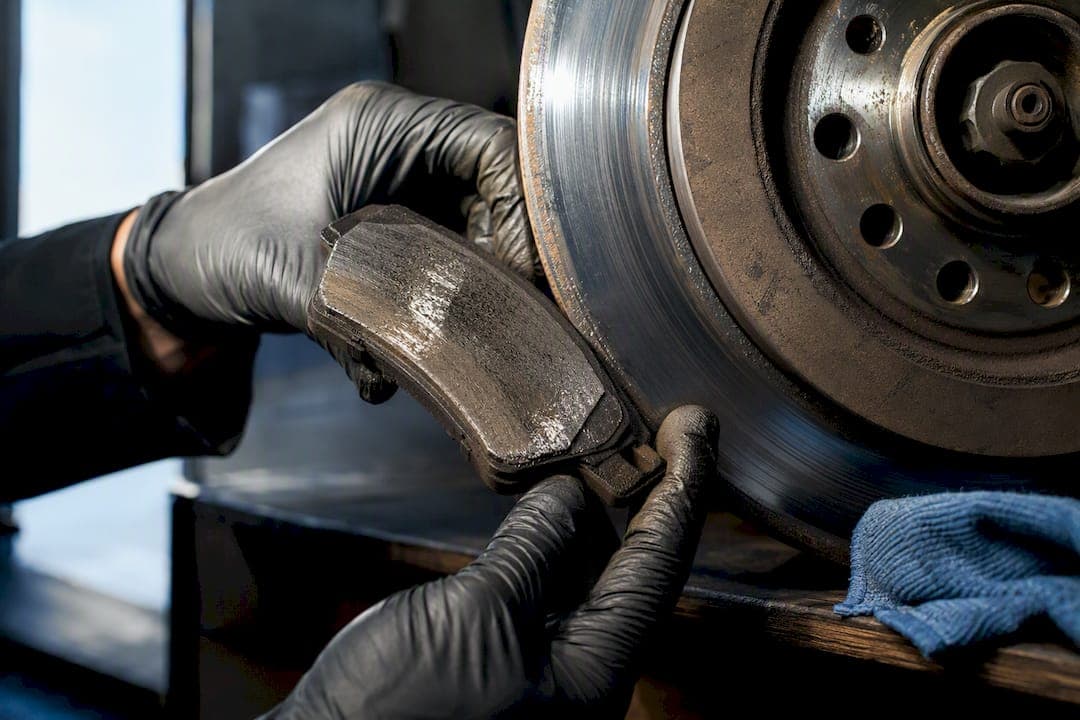
Most brake shudder blamed on "warped" rotors is actually uneven pad material transfer, known as disc thickness variation. If the vibration fades after a handful of moderate stops, the cause is almost certainly pad deposits. If it persists or worsens, measure DTV and lateral runout with a dial indicator or micrometre before you spend money on machining or new rotors.
TL;DR:
- Ensuring proper bedding of pads and rotors helps prevent uneven transfer layers that cause brake judder rather than replacing rotors unnecessarily.
- Measuring disc thickness variation and lateral runout with simple tools like a micrometre and dial indicator accurately distinguishes deposits from true warping.
- Avoiding aggressive stops on hot rotors and properly cleaning hub faces are essential steps to prevent deposit formation and false warping signals.
- Correct installation practices, including torquing and cleaning, combined with matching parts to driving habits, significantly reduce the risk of uneven pad deposits and disc thickness variation.
- Most "warped rotors" are caused by pad deposits or disc thickness variation, which can often be fixed through proper diagnostics and bedding rather than costly replacement.
Table of Contents
- Pad deposit vs warp: a diagnostic checklist
- How pros measure runout and disc thickness variation
- Why pad deposits form and rotors rarely warp
- How to fix pad deposits vs a distorted rotor
- How to prevent brake judder before it starts
- What technicians check before condemning a rotor
- The warped rotor myth won't die, but the fix is simple
- Get rotors and pads matched from the start
- Sources
- FAQ
Pad deposit vs warp: a diagnostic checklist
Before you assume anything about your rotors, walk through this sequence. It separates a five-minute fix from a real parts problem.
1. Note the timing and pattern. Pad deposits usually build up gradually, often after one hard stop from highway speed followed by sitting with the brake held. True structural distortion is rare, but when it happens, symptoms tend to show up right after the overheating event, not weeks later.
2. Run the redistribution test. Find a quiet stretch of road and do eight to ten moderate stops from about 50 km/h down to 20 km/h, with a cooldown period between each one. Pad deposits often smooth out or shift noticeably during this test. A rotor with genuine thickness variation will keep juddering no matter how many controlled stops you do.
3. Check the vibration channel. Steering-wheel shake usually points to the front rotors. A pulsing brake pedal, with no steering input, often points to the rear. Vibration felt through the whole chassis at moderate to hard braking, but absent at light braking, is a classic disc thickness variation signature.
4. Look for visual clues, but don't stop there. A few things to check on a cool, cleaned rotor:
- Dark, shiny patches (glazing) suggest overheated, hardened friction material rather than an even wear surface.
- Blueing or discolouration across sections of the rotor face points to localized overheating, a common precursor to uneven friction material deposits.
- Visible high and low bands, felt as a slight catch when you run a fingernail around the face, often correspond to measurable DTV.
- Deep scoring or cracking is a replacement signal on its own, regardless of what the DTV numbers say.
None of this replaces measurement. You genuinely cannot diagnose warp by eye, because a rotor can look flawless and still carry enough thickness variation to shake the wheel at 100 km/h.
Two things to avoid while you're troubleshooting: never hold the brake pedal down while stopped on a hot rotor, since that's exactly how localized deposits form in the first place, and don't throw new pads on a rotor you haven't checked. New pads on a deposit-laden rotor inherit the same uneven pattern within a few hundred kilometres.
How pros measure runout and disc thickness variation
A dial indicator and a micrometre settle the pad deposit vs warp question in about ten minutes, and neither tool is expensive or hard to use correctly.
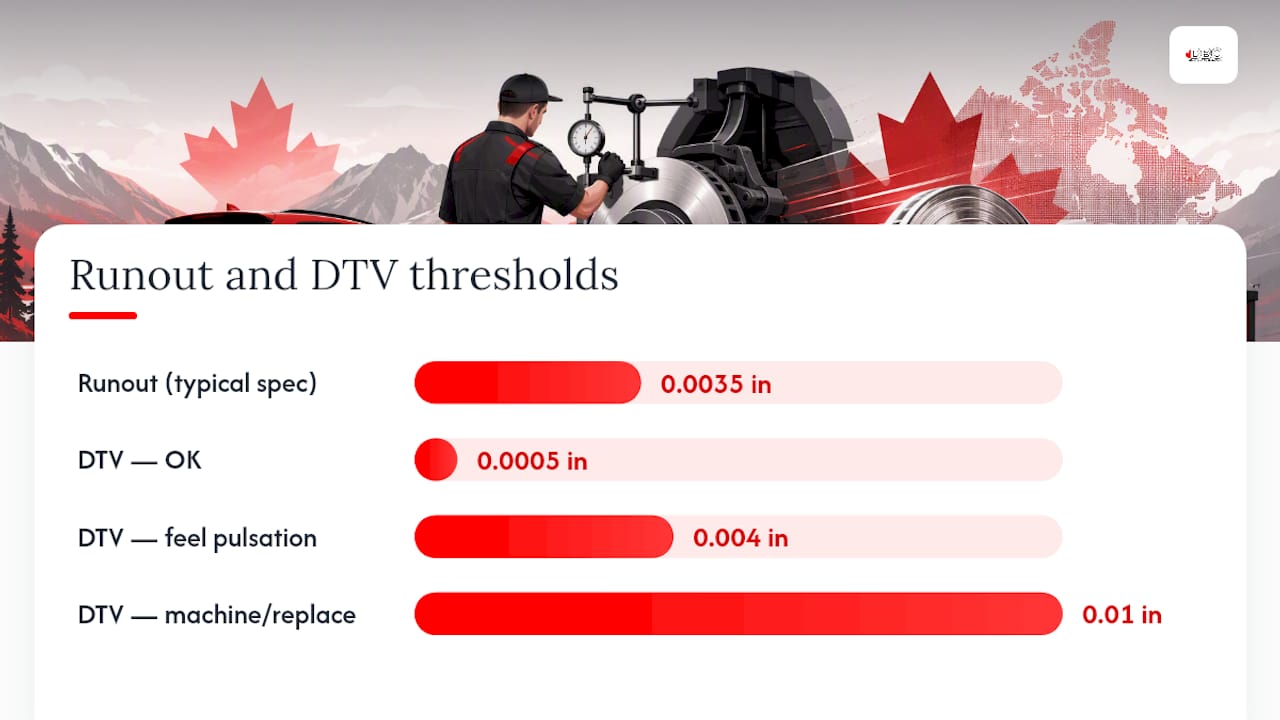
Lateral runout measures how much the rotor face wobbles side to side as it spins, checked with the wheel off and a dial indicator mounted to a fixed point, usually the caliper bracket or a magnetic base on the knuckle. Spin the rotor by hand and read the total movement. Most manufacturers list acceptable runout around 0.002 to 0.005 inches (roughly 0.05 to 0.13 mm), though the exact spec varies by vehicle.
Disc thickness variation is measured with a micrometre at eight to twelve points evenly spaced around the rotor's friction surface, at a consistent distance from the edge. Write down each reading. The difference between your highest and lowest numbers is your DTV figure.
- A DTV reading under roughly 0.0005 inches (about 0.013 mm) is generally fine.
- Once DTV climbs past 0.004 inches (about 0.1 mm), most drivers start to feel pulsation through the pedal or wheel.
- Anything approaching 0.01 inches (0.25 mm) usually means the rotor needs machining or replacement, not just cleaning.
Before you condemn the rotor, check the hub. A rusted or debris-coated hub face, or a wheel torqued down unevenly, can throw off your runout reading by mimicking a bent rotor even when the disc itself measures perfectly true. Clean the hub face and retorque before you take your final measurement. Our guide on getting an accurate rotor runout measurement walks through indicator placement in more detail.
Pro Tip: Take your DTV readings at the same distance from the rotor's outer edge every time. Moving the micrometre closer to the centre or the edge between readings will give you numbers that look like a problem even when the rotor is fine.
Why pad deposits form and rotors rarely warp
Brake pads grip a rotor two ways: abrasive friction, where the pad surface grinds material off the rotor, and adherent friction, where a thin layer of pad material actually transfers onto the rotor face and the pad grips against itself. That transfer layer is supposed to form evenly across the whole surface. When it doesn't, you get pad deposits, and pad deposits, not a bent disc, are behind most cases of brake shudder.
Uneven transfer happens for a handful of predictable reasons:
- Skipping or rushing the bedding-in procedure on new pads or rotors.
- One hard stop followed by sitting with the pedal held, which cooks a ring of extra pad material into one spot on a hot rotor.
- Pad chemistry that's mismatched to how the vehicle is actually driven, like aggressive track pads on a daily commuter.
- Contamination from brake fluid, grease, or road grime landing unevenly on the friction surface.
- Existing lateral runout, which forces the pad to contact certain sections of the rotor harder than others every single revolution.
True structural warping is possible, but it takes conditions far outside normal driving. Repeatedly overheating a rotor to the point of glowing, then hitting it with cold water or driving through deep puddles, can genuinely distort the metal. Severe, sustained overheating can also convert the rotor's surface into cementite, a much harder iron compound that resists machining and keeps producing judder even after a skim cut. That combination, extreme heat plus rapid cooling, explains why true warping shows up almost exclusively in racing, heavy towing, or mountain-descent abuse, not commuting.
How to fix pad deposits vs a distorted rotor
The right fix depends entirely on what your measurements show, not on how the rotor looks.
- Light deposits with DTV under about 0.002 inches (0.05 mm): a proper re-bedding cycle, following the bedding procedure of repeated moderate stops with cooldowns, often redistributes the transfer layer without touching the rotor at all.
- Moderate deposits or light glazing: hand-sanding the pad face with medium grit and re-bedding usually clears it up. Our guide on treating glazed pads covers the sanding and 10 to 15 stop bedding sequence step by step.
- DTV between roughly 0.004 and 0.01 inches (0.1 to 0.25 mm) with no hard spots: machining, also called skimming, can restore a flat, parallel surface. This works well when the rotor's core structure is sound.
- DTV from cementite hard spots after severe overheating: skimming only removes the high points temporarily. The hardened material underneath resists cutting evenly, and judder tends to return within a few thousand kilometres.
- Rotor at or near minimum thickness, deep scoring, or cracking: replacement is the only durable option, and pads should generally be replaced alongside the rotors.
| Symptom found | Likely repair | Expect to last |
|---|---|---|
| DTV under 0.002 in, vibration fades on test drive | Re-bed pads, no machining | Long term if bedding is done correctly |
| Glazed pad face, light deposits | Sand pads, re-bed | Long term |
| DTV 0.004 to 0.01 in, sound rotor core | Machine (skim) the rotor | Moderate, depends on remaining thickness |
| Cementite hard spots from overheating | Replace rotor; skimming is temporary | Short if skimmed only |
| Rotor near minimum thickness or cracked | Replace rotor and pads together | Long term |
Skipping straight to new pads without addressing the rotor is the most common mistake drivers make. New friction material bonds to whatever surface it's given, so a rotor with existing deposits or DTV passes the same problem straight to the new pads within a few hundred kilometres of driving.
How to prevent brake judder before it starts
Prevention comes down to three things: bedding the brakes correctly, matching parts to how you actually drive, and installing everything cleanly.
Bedding procedure. New pads and rotors need a controlled heat cycle to lay down that first, even transfer layer. The general sequence is 8 to 10 moderate stops from around 60 km/h down to 20 km/h, with brief cooldown periods between each, followed by a longer cooldown drive with no braking at all. Never come to a complete stop and hold the pedal while the rotors are still hot from this process. Full details are in our complete bedding guide.
Installation checklist:
- Clean rust and debris off the hub face before mounting a new rotor.
- Torque wheel bolts in the correct star pattern, to spec, not just snug by feel.
- Check hub runout before final installation, since a warped-feeling brake job often traces back to a dirty or rusted hub, not the rotor itself.
- Lubricate caliper slide pins so the pad retracts evenly and doesn't drag on one side.
Match pads to how you drive. A pad designed for track duty runs hotter than a street commuter pad needs, and running it cold and light for daily driving can actually promote uneven transfer. Choosing rotor and pad combinations suited to your actual use, not just your budget, cuts deposit risk significantly.
Driving technique matters too. On long descents or when towing, use engine braking and lower gears to avoid sustained hard braking that overheats the rotors. If you do end up braking hard from highway speed, avoid rolling to a complete stop and sitting there. Keep the vehicle moving at low speed for a bit longer if traffic allows, so heat dissipates evenly instead of baking into one spot.
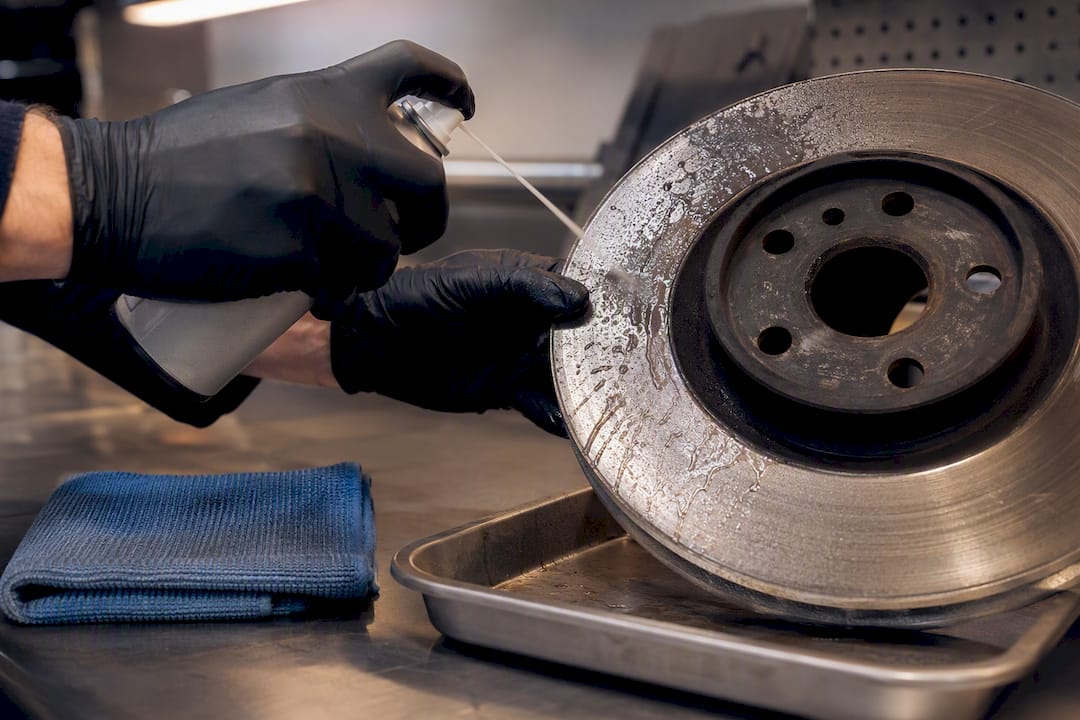
Pro Tip: If your brakes ever contact grease, cleaner overspray, or brake fluid, don't just wipe it off. A degreasing product with a short dwell time removes surface contaminants far more thoroughly than a rag, and it prevents that contamination from baking into the pad face on your next hard stop. A dedicated brake dust and contaminant remover with a two to five minute dwell time handles this cleanly.
What technicians check before condemning a rotor
Shops that diagnose judder correctly follow a short, consistent routine, and it's worth knowing what to ask for if you're paying someone else to look at your brakes.
- Clean and inspect the hub face for rust or debris before anything else, since that alone causes a surprising number of comeback complaints.
- Confirm wheel bolts were torqued in sequence to spec, not just tightened with an impact gun.
- Report actual numbers: lateral runout in thousandths of an inch or millimetres, and DTV readings from at least eight points around the rotor, not a verbal "feels fine."
- Lubricate caliper slide pins during any pad or rotor service, since a sticking caliper drags unevenly and creates new deposits within days.
- Never quench a hot rotor with cold water or drive through deep water immediately after aggressive braking. That's one of the few things that can genuinely distort the metal.
If a shop can't hand you runout and DTV figures on request, they're guessing the same way a driveway inspection would.
The warped rotor myth won't die, but the fix is simple
The "warped rotor" label survives because it's an easy story: something got bent, something needs replacing. The truth, that uneven pad transfer is doing almost all the damage, is less dramatic but far more fixable. Most drivers who chase a phantom warp end up paying for machining or new rotors when a proper bedding cycle and a clean hub would have solved it.
Measure before you spend. A dial indicator costs less than one machined rotor, and it tells you in minutes whether you're dealing with pad deposits or something structural.
— Sam
Get rotors and pads matched from the start
Cleaning deposits and re-bedding fixes plenty of cases, but once a rotor is scored, cracked, or carrying cementite hard spots from overheating, no amount of sanding brings it back. DBC Brakes builds cross-drilled rotor kits matched with pads chosen for even heat distribution, which cuts down the uneven transfer that causes DTV in the first place. Every kit ships with transparent, all-in pricing, no surprise fees at checkout, and free shipping on orders over $100 within Canada.

If your measurements point to replacement rather than a cleanup job, start with our premium brake kit page to check fitment for your vehicle, then follow the bedding procedure linked above once the new rotors and pads are installed. If you're not sure which kit fits your make and model, or you have questions about hub prep before installation, some brake parts suppliers provide direct expert support without automated chatbot responses.
Sources
These are the technical references behind the diagnostic thresholds and repair guidance in this article:
- ASE A5 disc brake diagnosis (Aviondemand)
- Understanding brake judder (NAPA)
- How to fix brake judder (Wagner Brake)
FAQ
Is it true that brake rotors don't warp?
Rotors rarely warp from normal driving. Nearly all "warped rotor" shudder is uneven pad deposit transfer, or disc thickness variation, not a physically bent disc.
Do pads need to be bedded again after changing rotors?
Yes. New rotors need a fresh bedding cycle even with used pads, and new pads need one even on used rotors, to establish an even transfer layer from the start.
Can you visually tell if a brake rotor is warped?
Not reliably. You need runout and thickness measurements taken with a dial indicator and micrometre, since a rotor that looks perfect can still have measurable DTV.
Do warped rotors ruin brake pads?
Uneven rotor surfaces, whether from true distortion or deposits, cause new pads to wear unevenly and inherit the same vibration pattern within a few hundred kilometres if the rotor isn't corrected first.