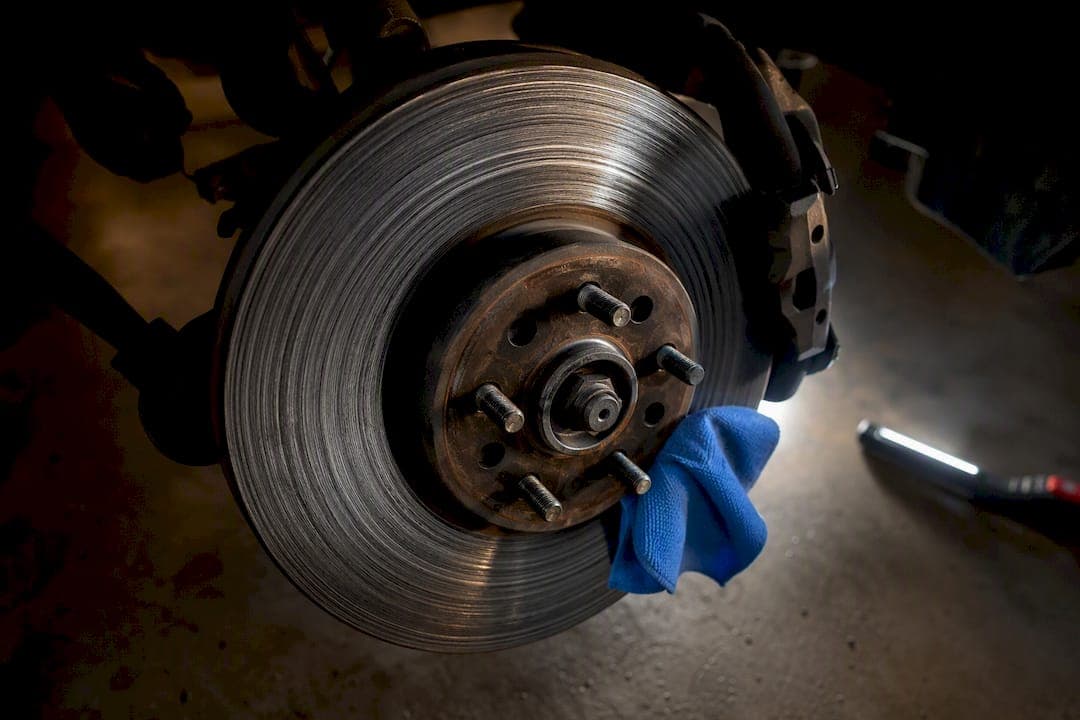
Grooved rotors are usually caused by trapped debris, worn-out pads exposing their metal backing, a dragging caliper, or rust ridges cutting into the surface during braking. Shallow grooves are often cosmetic and safe to drive on a while longer. Deep grooves, cracks, or grinding noise mean stop and inspect the brakes before the next drive. The checks below tell you which situation you're in.
TL;DR:
- Shallow grooves are usually cosmetic and safe, but deep grooves, cracks, or grinding noise require immediate brake inspection.
- Most grooved rotors result from trapped debris or worn pads contacting the backing plate, which are the most common and fixable causes.
- Resurfacing works only if the rotor remains above the minimum thickness; otherwise, replacement is necessary for safety and durability.
- Proper bedding-in, regular caliper maintenance, and cleaning dust shields help prevent grooves from reappearing.
- Correct rotor choice and installation, including slotted or cross-drilled designs, enhance heat dissipation and debris clearance to reduce grooving risk.
Table of Contents
- How serious are the grooves? Symptoms and quick checks
- Common causes of rotor grooving, ranked by frequency
- How to inspect and diagnose the root cause
- Resurface or replace? The safety rule that decides it
- How to prevent grooves from coming back
- What to do next
- Why rotor design and correct installation matter
- A technician's take on chasing rotor grooves
- Need replacement rotors? Here's what actually fits the job
- Sources
How serious are the grooves? Symptoms and quick checks
Not every groove means a trip to the shop. A shallow, hairline pattern that you can barely feel with a fingernail is often just cosmetic wear from normal pad contact. A groove deep enough to catch your nail, paired with a raised lip at the rotor's edge, is a different story. That lip forms when material wears unevenly and tells you the rotor has lost real thickness where it matters most.
Watch for these signs when deciding how urgent the problem is:
- Grinding or metallic scraping when braking, especially if it changes pitch with speed.
- Pedal pulsation or a pulsing sensation through the steering wheel during braking.
- Pulling to one side under braking, which points to uneven pad or caliper behaviour.
- A burning smell after repeated stops, suggesting overheating rather than simple debris.
- Heat spotting (dark blue or discoloured patches) on the rotor face, a sign of localized overheating.
A quick curbside check helps too. Look through the wheel spokes at the rotor surface. Once the car has cooled, a careful hand near (not on) the rotor can tell you if one side runs hotter than the other, which often points to a dragging caliper. Glancing at pad thickness through the caliper opening rounds out this initial triage before you commit to pulling a wheel.
Common causes of rotor grooving, ranked by frequency
Most grooved rotors trace back to one of seven mechanical or environmental problems, and they don't all carry the same urgency.
- Trapped debris between the pad and rotor. A small rock, road grit, or hardened brake dust caught against the pad face gets dragged across the rotor with every stop, cutting a groove almost instantly. This is the single most common cause and often the easiest to fix.
- Worn pads contacting the backing plate. Once friction material wears past its limit, the bare metal backing plate rides directly on the rotor, scoring it with every application.
- Sticking slide pins or a dragging caliper piston. Corroded slide pins or a piston that doesn't retract fully keeps one pad pressed slightly against the rotor at all times, wearing an uneven groove pattern and often causing uneven pad wear that requires replacing hardware alongside the rotor.
- Corrosion and rust ridges. Vehicles that sit outside or see road salt develop rust on the rotor's unswept edges. That rust, combined with grit, abrades a ring-shaped groove as pads sweep across it.
- Improper bedding-in. Skipping a proper bedding process after new pads or rotors leaves an uneven transfer layer of pad material on the rotor face, creating hot spots that evolve into grooving over time.
- Overheating and pad delamination. Sustained hard braking, especially towing or mountain driving, can overheat pad material to the point it delaminates and leaves hard deposits that gouge the rotor.
- Low-quality pads or rotor material. Cheap composites carrying abrasive fillers or a rotor casting shy on the finer alloying elements can wear grooves faster than a properly specced pair.
- Dust shield or backing-plate contact. A bent shield rubbing the rotor's inner face can mimic scoring noise without touching the friction surface at all, so it's worth ruling out early.
How to inspect and diagnose the root cause
Work through this order before you buy anything:
- Let the rotors cool completely, park on level ground, and chock the wheels before jacking.
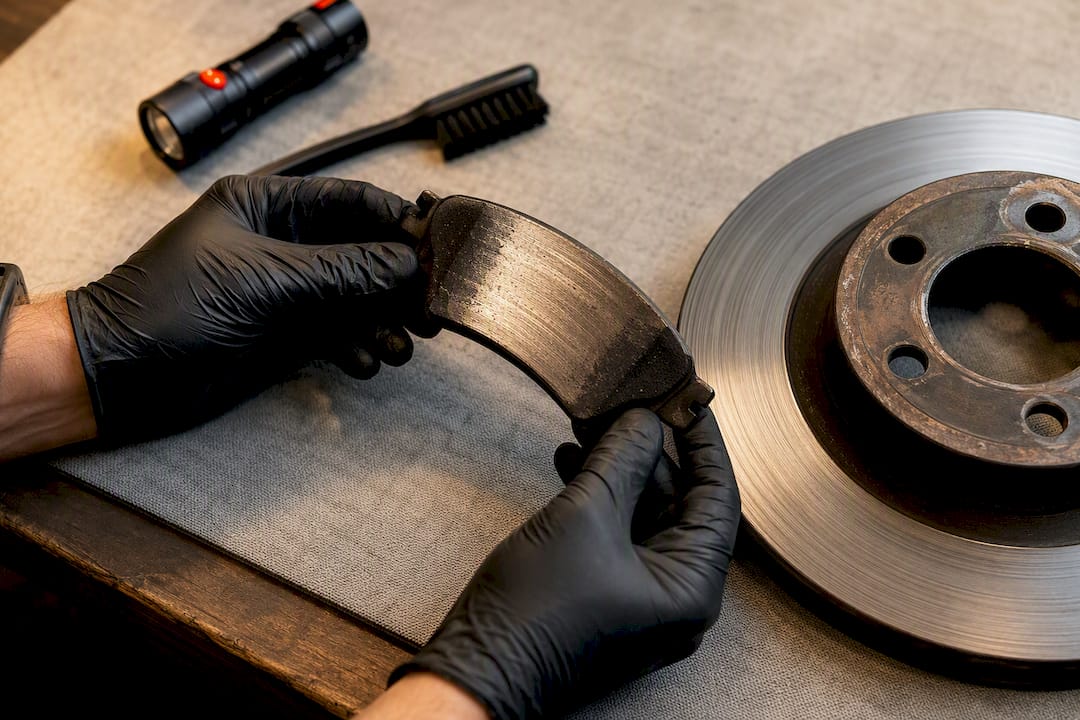
- Pull the wheel if you're comfortable doing so, and look at the pad's friction material, the backing plate, and the rotor face for embedded grit or metal shavings.
- Measure rotor thickness with a micrometre and compare it against the minimum thickness stamped on the rotor hub or hat.
- Check the caliper slide pins and piston by hand. They should move freely; resistance or a piston that won't retract points to hardware failure.
- Inspect the dust shield clearance, wheel bearing play, and lug nut torque, since any of these can produce noise that gets blamed on the rotor.
Pro Tip: A groove that runs as a tight, narrow, concentric ring usually means debris did the damage. A blotchy, uneven discolouration pattern with soft-edged transitions is the signature of a bad bedding-in job, not a rock.
For readers hearing scrape noises that sound worse than the rotor looks, checking pad wear patterns first often saves an unnecessary rotor swap.
Resurface or replace? The safety rule that decides it
Resurfacing removes a thin layer of metal to erase minor grooving, and it only works if the rotor stays above its stamped minimum thickness once that material is gone. If the number on your micrometre lands at or under the minimum spec, resurfacing isn't an option; the rotor goes in the recycling bin.
Replacement is the right call when you see:
- Rotor thickness at or below the minimum stamp.
- Visible cracks, even hairline ones, anywhere on the friction surface.
- Severe heat checking (a web of small surface cracks from repeated overheating).
- Grooves that come back quickly after a fresh resurfacing job.
That last point matters most. If a sticking caliper or embedded debris caused the original damage and you don't fix the underlying hardware issue, a freshly resurfaced or brand-new rotor will groove again within weeks. Resurfacing without diagnosing the cause is a temporary patch, not a repair. For a rotor already close to minimum thickness, most owners find full replacement cheaper in the long run than paying for a machining job that only buys a few thousand kilometres.
How to prevent grooves from coming back
A handful of maintenance habits keep rotors smooth for the life of the vehicle.
- Bed in new pads properly. A series of moderate stops from highway speed, without dragging the brakes to a complete stop each time, builds an even pad transfer layer instead of the patchy one that leads to hot spots and eventual grooving.
- Replace pads before they hit the backing plate. Waiting until you hear metal-on-metal contact guarantees rotor damage.
- Match pad compound to how you drive. A pad built for track days wears differently than one built for daily commuting.
- Clean and lubricate caliper slide pins at every pad service so they don't seize and drag.
- Clear dust shields after off-road or gravel driving, since packed dirt against the shield is a common source of scrape marks.
Pro Tip: Keeping brake dust and road grime off the wheels and rotor edges with a proper wheel and brake dust cleaning routine cuts down on the abrasive grit that ends up between the pad and rotor in the first place.
Owners who tow, haul, or drive mountain routes regularly should also review habits that prevent rotor warping, since heat cycling and grooving often show up together.
What to do next
If the debris check turns up a rock or grit and the pads still have life left, pulling the debris and re-seating the caliper hardware is a fair DIY fix. Call a shop when thickness measures at or near the minimum spec, when you find cracks, or when grinding and pedal pulsation show up together.
- Stop driving immediately if you hear metal-on-metal grinding, smell burning, or feel the pedal sink toward the floor.
- DIY-friendly fixes: clearing debris, swapping worn pads, cleaning and lubricating slide pins.
- Shop territory: rotor at minimum thickness, visible cracking, or a caliper that won't release.
- Pad and rotor replacement on one axle typically requires a few hours of labour; parts cost varies widely by vehicle and rotor design.
Why rotor design and correct installation matter
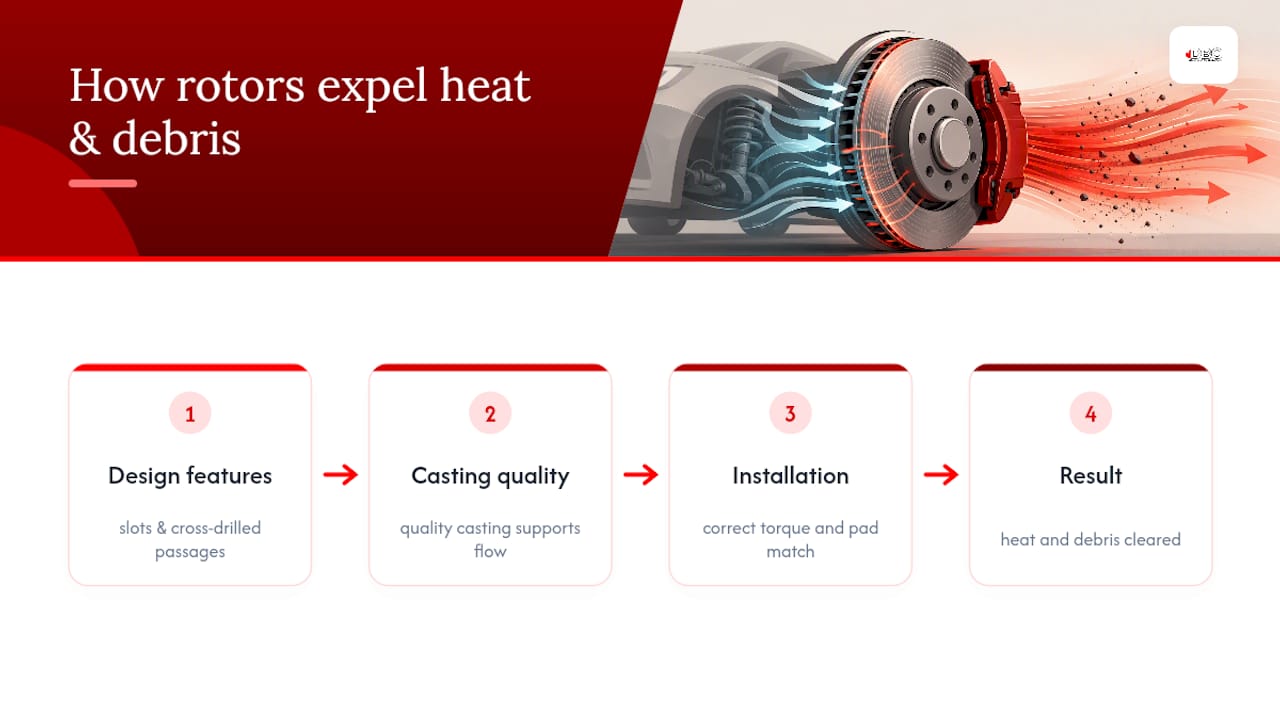
A rotor's ability to shed heat and clear debris depends on its design and the quality of its casting. Slotted and cross-drilled rotors are built to move gas and grit away from the pad face rather than let it collect and cut in. Correct installation, torque, and pad matching finish the job that good material starts. A rotor's ability to shed heat and clear debris depends on its design and the quality of its casting. Slotted and cross-drilled rotors are built to move gas and grit away from the pad face rather than let it collect and cut in. Correct installation, torque, and pad matching finish the job that good material starts.
A technician's take on chasing rotor grooves
Most owners jump straight to buying new rotors when a cheaper fix, like clearing debris or freeing a stuck caliper pin, would have solved it. Verify the cause before you spend money on parts. A five-minute inspection of pad wear and caliper movement tells you more than any online guess ever will, and it's the difference between fixing the problem once and fixing it again next month.
— Sam
Need replacement rotors? Here's what actually fits the job
Once you've confirmed the rotor is past saving, the fix isn't complicated: match the correct size and pad compound to your vehicle, and don't cut corners on the parts doing the stopping. DBC Brakes carries cross-drilled rotors built to move heat and debris away from the friction surface, along with combination cross-drilled and slotted options for drivers who want extra clearing power under heavier use.

Pricing is inclusive with no hidden fees added at checkout, support comes from people who actually know brakes rather than a script, and orders over $100 ship free within Canada. If you'd rather sort rotors and pads together instead of matching parts one by one, browse the complete brake kits built for a direct swap. Check your vehicle's fitment and place your order when you're ready to stop chasing the same groove twice.
Sources
- Rotor scoring severity and fixes: Diagnose, decide repair, and stop grinding for everyday drivers
- Why grooves form in brake rotors: Causes & prevention tips