
If you hear grinding, feel a longer brake pedal, or notice your car pulling to one side, stop and inspect your brakes now. Grinding almost always means metal is contacting the rotor, since the friction material has worn down to the backing plate. As a general guideline, most manufacturers recommend replacement once pad thickness drops to just above the minimum safe thickness, though your vehicle's specification may differ slightly. Below that point, stopping distance increases and rotor damage becomes likely.
Watch for these signs before you drive another kilometre:
- Grinding or metal-on-metal noise, constant or intermittent
- Brake pedal that sinks lower than usual or feels soft
- The vehicle pulling to one side when braking
- A dashboard brake warning light
Key Takeaways
Brake pad wear becomes a safety issue once thickness nears 3 to 4 mm, and grinding noise or a longer pedal means stopping to inspect immediately.
| Point | Details |
|---|---|
| Know the threshold | Plan replacement around 3 to 4 mm remaining thickness, adjusted for your vehicle's own specification. |
| Grinding means stop now | Metal-on-metal contact risks rotor damage and longer stopping distances if you keep driving. |
| Match sound to cause | Constant squeal usually means the wear tab is working; occasional squeal after rain is often just moisture. |
| Fix the root cause | Uneven wear patterns often trace back to a sticking caliper, not just an aging pad. |
| Upgrade with DBC Brakes | DBC Brakes offers cross-drilled rotor kits with inclusive pricing built to resist the glazing that shortens pad life. |
Table of Contents
- What does brake pad wear look like when you check it yourself?
- Why is my car making noise when I brake?
- Why do brake pads wear unevenly?
- How long do brake pads actually last?
- When should you actually replace your brake pads?
- What's a fast way to check brake pad condition right now?
- Sources
What does brake pad wear look like when you check it yourself?
You don't need a lift to get a useful read on pad condition. Most wheels have enough gap between the spokes to see the caliper and pad edge with a flashlight.
- Look through the wheel spokes. Find the caliper and locate the pad pressed against the rotor. Compare the remaining friction material to the metal backing plate; if the material looks level with or thinner than the backing plate, replacement is close.
- Check for the wear groove. Many pads have a machined groove that disappears as the pad wears down, giving you a rough visual gauge without removing anything.
- Measure directly if the wheel is off. With the vehicle safely jacked and supported on stands (never on a jack alone), use a ruler or a dedicated brake-thickness gauge across the pad's friction surface.
- Listen for the acoustic tab. A small metal tab bends inward as the pad thins and scrapes the rotor once thickness gets low, producing a deliberate squeal that's designed to catch your attention, as described in Firestone's breakdown of wear indicators.
- Note any dashboard alert. Some vehicles use electronic sensors embedded in the pad material, and certain systems even provide a two-stage warning, an early estimate followed by a final low-thickness alert.
Pro Tip: Check pad thickness with the same flashlight angle every time. A consistent viewing angle makes it much easier to notice gradual wear between checks.
Why is my car making noise when I brake?
Not every noise means the same thing, and treating them all as identical wastes time or, worse, delays a real problem.
- Squeal that happens every time you brake usually means the acoustic wear tab is doing its job.
- Occasional squeal after rain or overnight parking often points to surface rust or moisture rather than thin pads, and it typically clears after a few stops.
- Grinding, any time, any speed means stop driving and inspect immediately.
- A longer or spongy pedal suggests air in the lines, worn pads, or a fluid issue.
- Vibration or judder under braking often signals glazing or an uneven rotor surface rather than thin pads alone.
- The car pulling to one side can mean a sticking caliper on the opposite wheel.
Clicking noises, meanwhile, are frequently loose hardware rather than wear at all, which is one more reason a visual check beats guessing from sound alone.
Why do brake pads wear unevenly?
Pads rarely wear in a perfectly flat, even line, and the pattern you see is often a better diagnostic clue than the thickness number itself.
| Pattern | Likely cause | Practical remedy |
|---|---|---|
| Tapered wear (one edge thinner) | Sticking caliper piston or worn guide pins | Clean and lubricate slides; replace guide pins if seized |
| Glazing (shiny, hardened surface) | Sustained overheating from dragging brakes or aggressive driving | Light sanding for minor cases; full pad replacement if severe |
| Cracking | Repeated heat cycling breaking down the friction material | Replace pads; check for a warped rotor |
| Rust and separation | Moisture intrusion or age | Replace pads and inspect backing plate adhesion |
Diagnostic charts from HELLA tie almost all of these patterns back to a mechanical root cause, not just an aging pad. Replacing pads alone without freeing a sticking caliper just repeats the same wear pattern within a few thousand kilometres. Always replace pads in axle sets, and if the rotor surface looks scored or blued, have it inspected before fitting new friction material.
How long do brake pads actually last?
Lifespan varies enormously depending on how and where you drive, which is why a single number is never the full answer. Heavy city driving, frequent towing, and stop-and-go traffic wear pads faster than steady highway cruising, sometimes by a wide margin.
- Organic pads wear fastest but run quieter
- Semi-metallic pads balance durability and heat tolerance
- Ceramic pads typically last longest under normal driving but cost more upfront
Heat is the hidden factor most drivers underestimate. Academic research on brake pad wear mechanisms shows that sustained high temperatures can glaze the friction surface and reduce stopping power well before the pad is physically depleted, which is why a pad can measure "fine" on a ruler and still perform poorly. Salt exposure, dirt intrusion, and towing all accelerate this thermal cycle, as does letting caliper slides go dry and unlubricated.
When should you actually replace your brake pads?
The decision point is straightforward once you know the thresholds. Replace pads at or below roughly 3 to 4 mm of remaining friction material, the moment you hear grinding, or as soon as a dashboard wear light appears.
- Confirm thickness. A shop will measure remaining pad material on all four corners, not just the ones that sound noisy.
- Check rotor condition. Technicians inspect for scoring, runout, and heat spotting, since a damaged rotor often needs machining or replacement alongside new pads.
- Test caliper movement. Sticking pistons or seized guide pins get flagged here, and skipping this step is exactly why some new pads wear unevenly within months.
- Decide DIY versus shop. Visual checks and thickness measurements are reasonable for most owners with basic tools. Full pad replacement is doable if you're mechanically confident, but caliper rebuilds, rotor machining, and brake line work belong with a technician.
Pro Tip: Get two or three local quotes before committing to rotor machining versus replacement. Prices vary more than most drivers expect, and machining isn't always the cheaper option once you factor in reduced rotor thickness.
For a full safety walkthrough before you commit to DIY work, this brake replacement safety checklist covers the steps in more detail.
What's a fast way to check brake pad condition right now?
Run through this sequence and you'll have a solid read on brake condition inside fifteen minutes.
- Look through the wheel spokes with a flashlight and compare pad thickness to the backing plate.
- Listen for consistent squeal versus occasional squeal after damp mornings.
- Take the car for a slow, controlled brake test in an empty lot, noting pedal feel and any pull.
- Test the parking brake for excessive travel or looseness.
- If you're comfortable removing the wheel, measure pad thickness directly with a ruler or gauge.
You'll need a flashlight, wheel chocks, and jack stands if you're removing a wheel; never rely on a jack alone. Stop immediately and get the vehicle inspected if you notice grinding, a hard pull to one side, smoke, or a burning smell. A quick refresher on dashboard brake warning lights is worth bookmarking if your car has thrown an alert recently.
A technician's view on pad wear and performance trade-offs
Regular inspection catches problems while they're still cheap to fix. DBC Brakes builds cross-drilled rotors specifically to resist warping under the heat cycling that glazes pads early, and backs every kit with inclusive pricing and support from staff who know the parts, not a script.
Higher-friction performance pads often run louder than stock organic pads. That's a material trade-off for better bite under heat, not a defect.
— Sam
Already found worn pads or a scored rotor?
DBC Brakes gives you a straightforward upgrade path once inspection confirms you need new parts, with cross-drilled rotors engineered to resist the warping and glazing that cuts pad life short in stop-and-go driving.

Every kit ships with inclusive pricing (no surprise fees at checkout), support from staff who can talk through fitment instead of reading a script, and free shipping on orders above a minimum purchase threshold. If your inspection turned up thin pads or a damaged rotor, check fitment on the premium brake kit page or browse the full brake kit collection to match your vehicle before you order.
How often should you actually check your brakes?
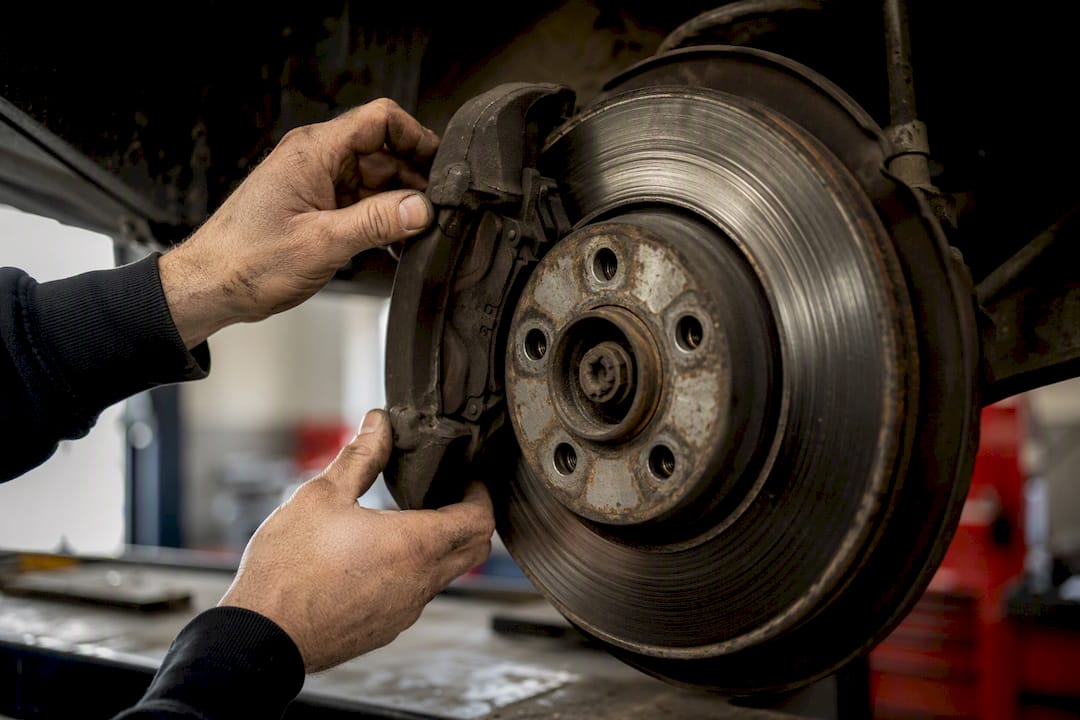
Check pad thickness at every oil change, before long trips, and always after towing or hard driving. Keep caliper slides clean and lubricated, avoid riding the brakes downhill, and call a technician when a noise or feel doesn't match anything you recognize.
Sources
- Motor Vehicle Brake Pad Wear—A Review
- Failure modes of brake discs and brake pads | HELLA
- What Brake Wear Indicators Are Trying to Tell You | Firestone Complete Auto Care