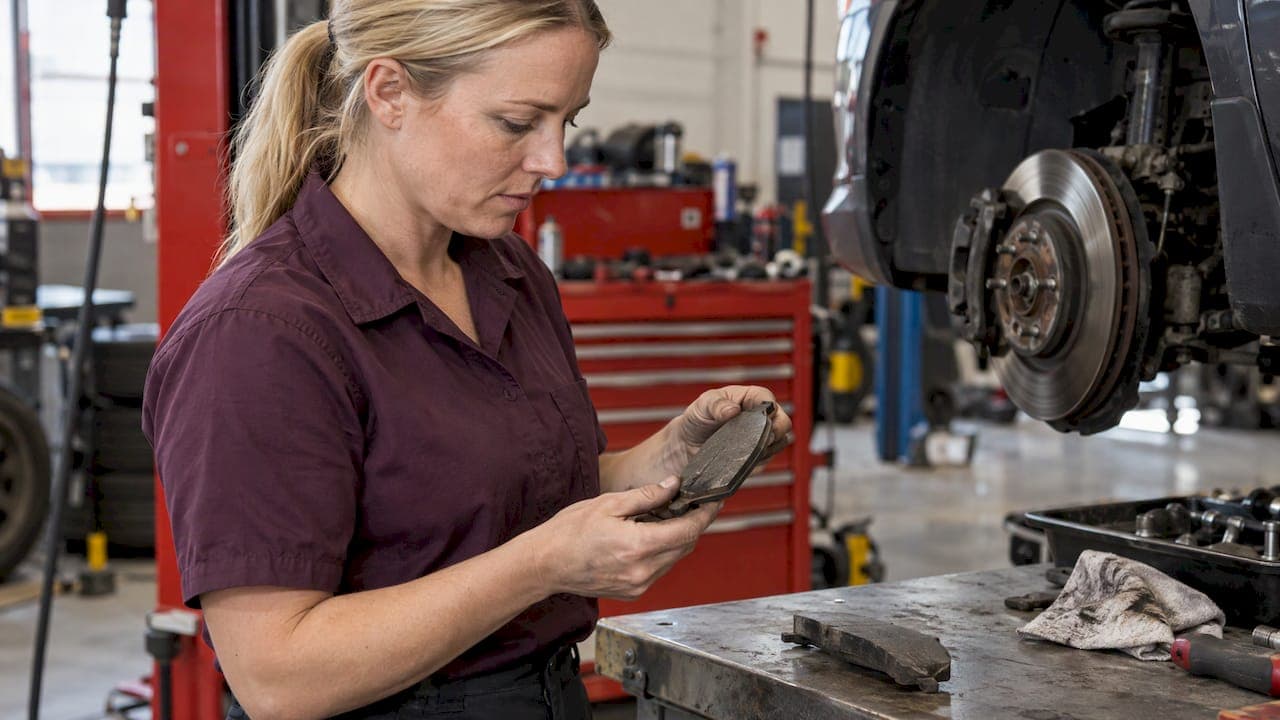
Pad taper wear is a brake pad worn into a wedge: thick at one end, thin at the other. A small difference between the inner and outer pad can be normal. A clear wedge usually points to a caliper that moves too much, or a pad that sticks in its bracket. Fix the cause, not only the pads, or the new set wears the same way.
This guide covers how to identify taper wear, what causes it, how to measure it, whether it is safe to drive, and how to stop it from coming back.
TL;DR
- Taper wear is a wedge-shaped pad. It is different from a pad that is simply worn thin.
- Common causes: sticking slide pins, seized pads in the bracket, worn hardware, and a caliper with too much movement.
- Some vehicles use pads that are tapered by design. Check the manufacturer's specification first.
- Measure the pad at both ends. Replace pads and service the caliper hardware together.
- Uneven wear needs a professional inspection before further driving on the affected axle.
Table of Contents
- What taper wear looks like
- Normal taper or a fault?
- What causes pad taper wear
- Symptoms and safety
- How to inspect and measure taper
- How to fix pad taper wear
- How to prevent taper wear from returning
- Our perspective
- Brake kits matched to your vehicle
- FAQ
- Sources
What taper wear looks like
A normal pad wears flat. The friction material stays about the same thickness from one end to the other. A tapered pad is thicker at one end, so the profile looks like a wedge. The taper can run leading edge to trailing edge, or from the top of the pad to the bottom.
Taper is different from inner-versus-outer wear. That second pattern compares the two pads on one wheel. Taper is about the shape of one pad.

A wedge-shaped pad indicates that the caliper may have excessive movement, or that one side of the pad is seized in the bracket, according to Brake & Frontend's pad diagnostics guide. The pad is no longer applied with even force across its face.
Quick visual check
- Remove the wheel.
- Look at the pad edge-on, from the side of the caliper.
- Compare the friction thickness at the leading end and the trailing end.
- Repeat for the inner and outer pads.
- Compare left and right sides of the same axle.
If one end is clearly thinner, record the measurement before anything is cleaned or removed.
Normal taper or a fault?
Not every taper is a fault. Two cases matter.
Taper by design. Some vehicle applications use pads that are engineered to be tapered. Technicians are advised to check vehicle-specific service information to tell normal design from abnormal wear. The same applies to floating calipers: Brake & Frontend notes that a small inner-versus-outer difference can be normal on those calipers, and that the vehicle maker's specification decides whether a given taper is acceptable (Brake & Frontend).
Taper from a fault. A pronounced wedge, a taper that differs from side to side, or a taper that appears quickly after a pad change is not a design feature. It needs a cause.
| Observation | Likely meaning | Action |
|---|---|---|
| Slight inner pad wear ahead of outer pad | Often normal on floating calipers | Monitor at each service |
| Pad worn in a wedge, one end much thinner | Caliper movement or pad binding | Inspect hardware and slides |
| One wheel worn far more than the other | Sticking caliper or slide on that side | Service or replace that caliper |
| Taper shown in manufacturer specification | Design feature | Compare against specification |
| Taper returns soon after new pads | Cause was not fixed | Check bracket, pins, hardware |
What causes pad taper wear
Sticking slide pins
On a floating caliper, the caliper slides on guide pins so it can centre itself over the rotor. When the pins stick, the caliper cannot centre. Sticking or seized slides, guide pins and pistons lead to a pull when braking, brake drag, overheated rotors and uneven pad wear, as explained in this brake guide pin study guide. The same source links the problem to damaged pin boots and environmental contamination, which is a common issue where road salt is used in winter.
Pads seized in the bracket
Pads sit in the caliper bracket and must move freely. Rust and dirt build up on the bracket abutments. The pad then hangs on one side, and pressure is applied unevenly. This is one of the two main causes named in the Brake & Frontend guide above.
Worn or missing hardware
Clips, shims and bushings hold the pad in position and let it return. Worn bushings allow extra movement. Hardware kits can replace worn bushings, and tapered wear is corrected by making sure the hardware and caliper apply the pads with equal force (Brake & Frontend).
A caliper piston that does not retract
A piston that sticks keeps one pad pressed against the rotor. That pad runs hot and wears faster. Usually the symptoms show on one wheel only.
Rotor condition
Rotor thickness variation and runout also change how the pad contacts the disc. If you plan to renew rotors, our page on replacing rotors without pads covers thickness and runout checks.
Symptoms and safety
Taper wear often shows up as noise or feel before the pad is visibly thin. Typical signs:
- Squealing or grinding when braking
- Pulling to one side
- Pads that wear out sooner than expected
- Uneven pedal feel
- Heat or a burning smell from one wheel after driving
A manufacturer's service chart lists premature pad wear, uneven braking pressure and increased noise as warning signs of tapered pads (Wagner's trouble tracer chart).
Is it safe to keep driving? Mitsubishi Motors Canada states that worn pads can cause longer stopping distances, more pedal effort, vibration, squealing or grinding, and reduced braking effectiveness. It also states that pads below the specified thickness are unsafe to drive on, and that uneven wear or damage calls for a professional inspection (Mitsubishi Motors Canada). Book an inspection with a licensed technician as soon as taper is found. Do not wait for the pad to reach the wear indicator.
For more on noise and thickness, see what brake pad wear tells you.
How to inspect and measure taper
Canada's Technical Standards Document No. 135 requires that the wear condition of service brakes be indicated by an acoustic or optical warning, or that lining wear can be checked visually. Wheel removal is allowed for that check (Transport Canada, TSD 135). A visual check is therefore a normal part of brake inspection.
Tools
- Jack and stands, or a hoist
- Wheel wrench
- Calipers or a brake pad thickness gauge
- Wire brush and brake cleaner
- Torque wrench
- The vehicle's service manual
Steps
- Park on level ground. Support the vehicle on stands, never on a jack alone.
- Remove the wheel.
- Measure friction thickness at both ends of each pad. Write the numbers down.
- Check that the caliper slides by hand once the pad retaining parts allow it. It should move without binding.
- Inspect pin boots for tears, and the bracket for rust build-up.
- Check the rotor for grooves, a lip, and heat marks.
- Compare with the opposite wheel.
When cleaning brake dust from the wheel and caliper area, follow a safe method. This guide on removing brake dust safely explains dwell times for wheel cleaners, which helps keep cleaner away from friction surfaces.
What counts as too much?
There is no single number for every vehicle. One manufacturer's technical service bulletin for specific trucks defines an uneven wear condition as an inboard-to-outboard thickness difference of 3 mm or more in normal driving, and 6 mm or more in heavy-duty use (technical bulletin, NHTSA archive). That figure applies to those trucks only. Use it as an example of an evidence-based approach, then look up the limit for your own vehicle.
If the vehicle is leased, pad thickness can also matter at return. A guide to lease excess wear standards lists what lessees should check before handing a vehicle back.

How to fix pad taper wear
The fix has three parts: find the cause, restore free movement, and replace worn parts.
1. Replace the pads
A tapered pad cannot be corrected. Replace pads as a set on the axle. Never replace one side only.
2. Service the slides and bracket
Clean the bracket abutments. Remove rust. Clean slide pins and bores, and replace pins and boots that are pitted or torn. Use brake grease made for slide pins.
3. Replace worn hardware
Fit a new hardware kit with every pad change. Clips and shims wear and lose tension. Our pads ship with hardware kits, which makes this step simple.
4. Replace the caliper if needed
A seized piston or a damaged bore means the caliper needs replacing. Replace calipers in pairs, since mixing old and new components can cause braking imbalance or pull (MOTOR magazine). For caliper basics, see what a brake caliper looks like.
5. Check the rotors
If a rotor is below its minimum thickness, scored or uneven, replace it. Fresh rotors and pads together give an even bedding surface. The brake replacement safety checklist lists the steps to verify before the vehicle goes back on the road.
6. Check wheel bearings
A worn wheel bearing can let the rotor wobble and affect pad contact. Check for play when the wheel is off.
How to prevent taper wear from returning
- Assemble correctly. Seat pads in the bracket with all clips and shims in the right position.
- Clean and lubricate slides. Use the right grease on the pins. Keep grease off the pad friction surface and the rotor.
- Confirm free movement. Pads must slide in the bracket without force. The caliper must move on its pins.
- Replace boots. A torn pin boot lets in water and salt.
- Inspect on a schedule. Look at the pads every time the wheels come off, such as at a seasonal tire change.
- Match the pad grade. Do not mix pad types across an axle.
- Torque to specification. Bolts and pins must be tightened to the manufacturer's value.
For wider part choices, see the Canadian buyer's guide to car brake parts and the list of brake upgrade mistakes enthusiasts make.
Our perspective
Taper wear is rarely a pad problem. It is a system problem. A pad is only as even as the caliper, slides, hardware and rotor that hold it against the disc.
We build brake kits as complete sets for that reason. Rotors, pads and a hardware kit are matched to the vehicle, so the parts that control pad movement are fresh when the pads go on. Our cross-drilled rotors are engineered to resist warping and last longer, which supports even pad contact over the life of the kit.
We also see that the best result comes from a full service. Replace the pads, renew the hardware, clean the slides, and check the rotor. Doing only one of those steps leaves the cause in place.
Questions about fitment are answered by people who know the parts, not an automated reply. As a Canadian manufacturer, we know what salt and winter do to slides and boots, and we recommend checking them every season.
Sam
Brake kits matched to your vehicle
When pads are worn unevenly, a matched kit removes guesswork. DBC supplies rotors, pads with hardware kits, and complete brake kits for cars, trucks and performance vehicles. Pricing is inclusive, with no hidden fees. Shipping is free in Canada on orders over $100. Expedited shipping is $29.99 per order.
Select the vehicle make and model to see parts that fit. Browse brake pads with hardware kits, complete brake kits, or start from the DBC home page.
Wheel bearings and hubs are also available in the wheel bearings and hubs collection.
FAQ
What causes brake pads to wear in a taper?
The usual causes are sticking slide pins, a pad seized in the bracket, worn hardware, and a caliper with excess movement. Each one stops the pad from being pressed flat against the rotor. A technician can find the cause by checking the slides, bracket and pad fit.
Is tapered pad wear ever normal?
Sometimes. Some vehicles use pads that are tapered by design, and floating calipers can show a small inner-versus-outer difference. Check the manufacturer's specification. A wedge that is not in the specification needs inspection.
Can I keep driving with tapered brake pads?
Have them inspected soon. Uneven wear can mean longer stopping distances and reduced braking effectiveness, and pads below the specified thickness are unsafe. Arrange an inspection with a licensed technician before regular driving continues.
Do I need new rotors with new pads?
Not always. The rotor must be above minimum thickness and free of deep grooves, lips or runout. If the rotor is worn or uneven, replace it with the pads so the new pads bed evenly.
How do I stop it happening again?
Clean the bracket and slide pins, lubricate the pins with the correct grease, replace worn boots and hardware, and keep grease off friction surfaces. Check the pads every time the wheels come off.
Sources
- Brake Pad Diagnostics, Brake & Frontend
- Sticking Brake Caliper Guide Pins, Free ASE Study Guides
- Disc Brake Trouble Tracer Chart, Wagner
- Signs You Need New Brake Pads, Mitsubishi Motors Canada
- Light Vehicle Brake Systems, Transport Canada TSD 135
- Technical bulletin on uneven front brake pad wear, NHTSA
- Brake Shop: Uneven Brake Pad Wear, MOTOR
- Remove brake dust safely
- Lease excess wear standards