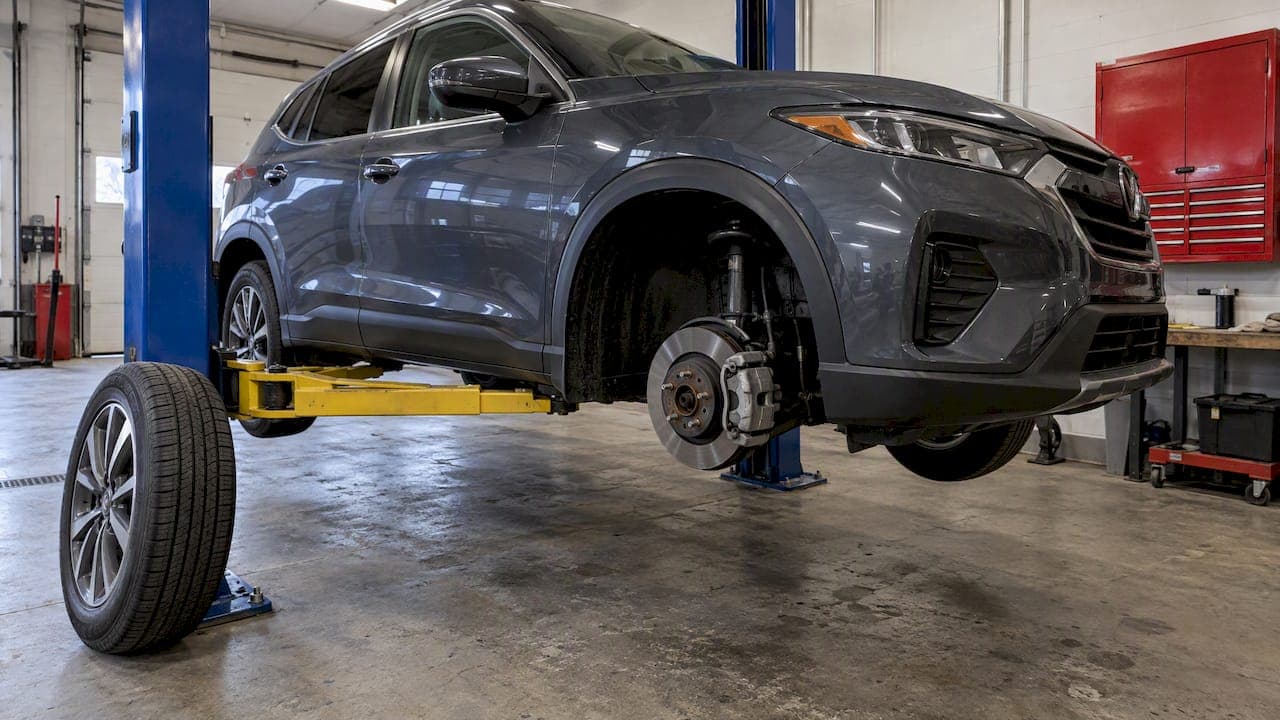
Winter brake storage comes down to five things: dry the brakes before parking, leave the parking brake off, check the brake fluid, keep moisture away from the rotors, and test the brakes before driving in spring. Done in that order, these steps limit rust, seized calipers and stuck pads on a car that sits through a Canadian winter.
TL;DR
- Do not leave the parking brake engaged. Use wheel chocks, and Park (automatic) or gear (manual).
- Do not wash the car and park it right away. Drive it first so the brakes dry.
- Check brake fluid before storage. Change it if the service is due.
- Indoor, dry storage is the best option. A dehumidifier helps in a garage.
- In spring, inspect for leaks, check pedal feel and do a controlled test drive before normal use.
Table of Contents
- Why brakes suffer in winter storage
- Before you park: a brake checklist
- Parking brake: leave it off
- Where you store matters
- Moving the car during storage
- Performance and classic cars
- Taking the car out of storage in spring
- A note on the 30/30/30 rule
- Our perspective
- Brake parts ready for storage or spring
- Quick reference: storage dos and don'ts
- FAQ
- Sources
Why brakes suffer in winter storage
Brake rotors are bare cast iron. Moisture reaches the surface within hours. On a car that is driven daily, the pads wipe that film off. On a parked car, nothing does.
The result is surface rust at first. Left for months, it can become pitting, pad material fused to the rotor, or a caliper that no longer releases. Driving.ca reports that road salt and moisture can build rust on caliper sliders and pins. That causes dragging brakes, faster wear and, in severe cases, seized wheels.
The same source says light rust on rotors after about a week of sitting is normal and wears off after a few minutes of driving. Rust on the working surface is not only cosmetic, though. A full winter is a different case from a week.
The AMA's vehicle storage guidance lists three failure points. Depending on the vehicle and the storage place, the parking brake can freeze, the pads can rust, and brake shoes can distort the drums.

Before you park: a brake checklist
The order matters. Work through these steps in sequence on the last day of use.
- Inspect the pads and rotors while the wheels are off or visible. Replace anything near its wear limit now, not in April.
- Check the brake fluid level and its service date.
- Wash the car if needed, then drive it before parking.
- Park on level ground, chock the wheels and release the parking brake.
- Control moisture in the storage area.
Replace worn parts before storage
A worn pad stored against a rotor can rust into the surface and leave a ridge. Replacing pads and rotors before storage means the car comes out in spring with clean friction surfaces. Our brake inspection guide lists what to look at: pad thickness, rotor surface, hoses and fluid condition.
If a replacement is due, the brake rotors collection and the brake pads collection list parts by vehicle. Fitment is selected by make, model and year.
Check and change the brake fluid
Brake fluid absorbs moisture over time. Moisture inside the system corrodes calipers and lines from the inside, and winter storage gives it months to work.
The guidance varies by source:
| Source | Advice |
|---|---|
| CAA North & East Ontario | For storage longer than a month, check and top off brake fluid. |
| AMA | For storage over 45 days, check the fluid and change it if it is due. |
| DeLorean Motor Company | Brake fluid absorbs moisture and should be flushed every 2 to 3 years. |
The same DeLorean page warns that a system neglected for many years can fail when it is finally flushed. If the fluid has never been changed on an older vehicle, have a licensed technician assess the system before storage rather than doing it at home.
Top up only to the marked level, with the fluid type printed on the reservoir cap or in the owner's manual. A low reservoir can also mean worn pads or a leak, so find the cause first.
Wash, then drive, then park
Washing the wheels is good before storage. Brake dust holds moisture and attacks the finish. But a wet car going straight into a garage is a common mistake.
The Globe and Mail advises against washing a vehicle and storing it immediately, because the moisture encourages rust. It suggests driving at least 10 kilometres before storage to dry the brakes and boil off moisture.
For the wheel-cleaning step itself, this guide to removing brake dust safely covers dwell times and what to avoid on wheel finishes. Rinse well and keep cleaner off the rotor faces where possible.
Parking brake: leave it off
This is the most searched part of winter brake storage, and the answer is consistent across Canadian sources.
Plain rule: do not store the car with the parking brake applied.
CAA North & East Ontario says that prolonged use of the parking brake can make it stick to the rotors. It recommends tire stoppers to hold the vehicle in place. The AMA guidance adds that depending on conditions the brake can freeze, and it recommends:
- Automatic transmission: Park, with chocks.
- Manual transmission: first gear or reverse, with chocks.
The Ford storage procedure for owners also says to make sure the brakes and parking brake release fully. A parking brake left on in a damp garage holds the pad against a wet surface for months. That is how pads fuse to rotors.
Use wheel chocks the right way
- Park on level ground. If the surface slopes, choose another spot.
- Place chocks in front of and behind at least one wheel, preferably two.
- Use rubber or solid chocks rated for the vehicle weight.
- Pull the car forward or back slightly after chocking to confirm the brakes are free.
If the vehicle is in a shared garage or on a slope you cannot avoid, store it elsewhere. A vehicle that can roll is a safety problem that no rust protection offsets.
Where you store matters
Indoors is better than outdoors. CAA North & East Ontario says indoor storage is ideal for long periods in cold climates, with climate control and security as priorities.
Outdoor storage exposes rotors to snow, freeze-thaw cycles and, in many provinces, road salt carried in on tires. Calipers can freeze. The DeLorean storage page states that outdoors, discs can rust and calipers can freeze up.
If the car must stay outside:
- Use a breathable cover, not plastic sheeting that traps moisture.
- Park on gravel or pavement, not grass or bare dirt.
- Brush snow from around the wheels so it does not melt and refreeze against the brakes.
- Plan to move the car if conditions allow. See the next section.
In a garage, a dehumidifier can help remove moisture and slow rust on vehicle components. An unheated garage that sweats in a thaw is a common rust source, so watch humidity in March and April.
Moving the car during storage
The ideal is a short, safe drive now and then. The NHTSA's long-term storage guidelines recommend driving the vehicle and using the brakes normally at least once every eight weeks. The aim is to limit severe rust buildup and brake vibration. This is a United States guideline, but the physics is the same in Canada.
In practice, many Canadian winters make that hard. Roads may be salted and the car may be buried. If you cannot drive it:
- Do not run the engine in place for a few minutes. It does not move the pads and adds moisture to the exhaust.
- If you do drive, go long enough to warm the brakes and dry them, then park again with the same steps.
- Avoid driving on heavily salted roads just to move the car. A salt-covered car then needs another wash and dry cycle.
A Canadian car that stays parked from December to March may have one or two chances to move. Plan them for a dry, above-freezing day.
Performance and classic cars
Higher-friction pads and cross-drilled or slotted rotors do not change the basic rule: moisture and a clamped pad cause the damage. A few points apply more to these cars.
- Older vehicles are higher risk. Hagerty stresses that the risk of a seized parking brake or fused pads is particularly high in older vehicles and in humid storage.
- Leave the hand brake disengaged. The DeLorean page gives the same instruction for long-term storage of that car.
- Drilled rotors need a clean look in spring. Holes can hold moisture and dirt. Inspect them and clean before driving.
- Coated rotors resist surface rust better. Our post on coated rotor benefits explains how the coating protects non-contact areas.
Classic and performance owners often keep cars for six months or more. For these cases, fluid service and rotor condition before storage matter more than for a daily driver.
Taking the car out of storage in spring
CAA-Quebec's storage guidance says to check tire pressure, look for fluid leaks and visible damage, and have the brakes included in an annual mechanical inspection.
Follow these steps:
- Walk around and look under the car. Check for drips near the wheels. Brake fluid on a friction surface is a stop sign, and the car should not be driven until it is checked.
- Check tire pressure. Low pressure after a cold winter is common.
- Check the fluid level and condition.
- Press the pedal before starting. It should feel firm. A soft or sinking pedal needs a technician.
- Release the chocks and roll slowly. Listen for grinding. Feel for dragging.
- Test at low speed in a safe area. Brake gently several times to clear surface rust.
Clearing surface rust safely
The NHTSA guidance gives controlled-stop sets for removing slight surface rust, on a level, safe road: 5 stops from 95 km/h, 10 stops from 65 km/h, 20 stops from 50 km/h, or 30 stops from 30 km/h. Choose one set, leave traffic out of it and keep a clear following distance.

If the rust does not clear, or you feel vibration in the pedal or steering wheel, the rotor surface may be damaged. Read our guides on surface film versus damage, rust causes and prevention and brake vibration diagnosis.
Signs that need a technician
Transport Canada recommends a thorough brake check for winter driving. It says pulling to one side, a change in pedal feel, or unusual squealing or grinding may mean the brakes need repair. It also recommends following the manufacturer's maintenance schedule and using a licensed facility for a winter inspection.
Book a shop visit if you see any of these after storage:
- The car pulls to one side under braking.
- One wheel is hot after a short drive, which suggests a stuck caliper.
- The parking brake does not release or does not hold.
- Pedal travel is long or spongy.
- Grinding or deep scoring on the rotor.
A stuck rotor on a car you plan to service yourself is a separate job. Our guide to freeing stuck rotors covers the soak method and tools.
A note on the 30/30/30 rule
The 30/30/30 rule is a bed-in routine for new pads and rotors: 30 stops from about 30 mph (roughly 50 km/h) with about 30 seconds between stops. It is not a storage procedure. It applies after new brake parts are installed, not after a car sits.
If you replace parts before or after storage, follow the bed-in instructions that come with the pads and rotors. For a car coming out of storage with the original parts, the controlled-stop sets above are the relevant procedure.
Our perspective
We make and sell brake kits in Canada, and the same questions arrive every spring. A car comes out of storage with a pulsing pedal or a wheel that drags. The cause is usually one of three things: the parking brake was left on, the car was parked wet, or the fluid was old.
Our view is plain. Storage damage is cheaper to prevent than to repair. A rotor that spent months wet may clean up. A rotor that pitted under a clamped pad will not, and it gets replaced with the pads.
Two habits cover most of the risk. Chock the wheels and leave the parking brake off. Drive the car before parking so the brakes are dry. Everything else on this page adds margin.
If parts are due, replace them before storage, not after. The car then sits on clean surfaces and is ready in spring. Our support team answers fitment questions directly, with no automated replies.
— Sam
Brake parts ready for storage or spring
If the inspection shows worn or rusted parts, DBC supplies rotors, pads and complete kits for cars, trucks and performance vehicles. Our brake kits collection lists kits by vehicle, with guaranteed fitment and inclusive pricing. Shipping is free in Canada on orders over $100. Expedited shipping is $29.99 per order. Details are on the shipping information page.
Ordering in autumn means parts are on hand when the car comes out in spring, or fitted before it goes in.
Quick reference: storage dos and don'ts
| Do | Do not |
|---|---|
| Release the parking brake | Store with the parking brake on |
| Use wheel chocks on level ground | Rely on the parking brake to hold the car |
| Drive to dry the brakes before parking | Wash and park immediately |
| Check fluid and change it if due | Ignore old brake fluid |
| Store indoors in a dry place | Cover with plastic that traps moisture |
| Test brakes at low speed in spring | Return to highway speed without a test |
FAQ
Should I leave the parking brake on for winter storage?
No. CAA North & East Ontario says prolonged parking brake use can make it stick to the rotors. Use wheel chocks instead, and leave an automatic in Park or a manual in gear.
How do I stop brake rotors from rusting in storage?
Drive the car for at least 10 kilometres after washing so the brakes dry, then park it in a dry place. A dehumidifier helps in a garage. If possible, drive and brake normally at least once every eight weeks.
Should I change the brake fluid before storing a car?
Check it, and change it if the service is due. The AMA says vehicles stored more than 45 days should have the fluid checked and changed if due, because deteriorated fluid can contribute to rust and corrosion. Follow the interval in your owner's manual.
What should I check on the brakes after winter storage?
Look for fluid leaks and visible damage, check tire pressure and test the pedal feel before driving. Then brake gently at low speed in a safe area. Pulling, grinding or a soft pedal calls for a licensed technician.
Sources
- CAA North & East Ontario: preparing your car for long periods without use
- AMA: vehicle storage tips for your idle automobile
- NHTSA: long-term vehicle storage guidelines
- The Globe and Mail: brake rust is inevitable
- Driving.ca: why brakes must be in top shape for cold weather driving
- DeLorean Motor Company: long term storage
- Hagerty: car storage mistakes to avoid
- CAA-Quebec: storing and taking a vehicle out of storage
- Transport Canada: preparing your vehicle for winter
- Diamondbrite: remove brake dust safely