
Brake system balance, also called brake bias, is the distribution of braking force between the front and rear axles, expressed as a front percentage or ratio. Improper balance increases stopping distance, causes uneven tyre wear, and can trigger rear-wheel lockup. Getting it right is not optional for safe, predictable braking.
Table of Contents
- What brake balance means and why the physics make it dynamic
- How to recognise when brake balance is off
- Practical ways to adjust brake balance
- What brake migration means for performance drivers
- How to test brake balance safely and when to call a professional
- How premium brake kit upgrades affect balance, and what to check before buying
- Seasonal maintenance tips for Canadian drivers
- Key takeaways
- A note from Sam
- DBC Brakes: matched brake kits for correct balance
- Useful sources
What brake balance means and why the physics make it dynamic
Brake balance is reported as a front percentage, for example 70/30, meaning 70% of total brake force goes to the front axle and 30% to the rear. The industry-standard definition used by performance engineers goes further: a perfectly balanced system brings all four tyres to their independent maximum coefficient of friction at the same moment. That is harder to achieve than it sounds.
The reason is weight transfer. Under braking, forward momentum shifts mass toward the front axle, increasing front tyre load and reducing rear tyre load. Maximum brake force at any corner equals corner weight multiplied by the tyre's coefficient of friction. Because corner weights change dynamically during a stop, a bias that works at low deceleration may be wrong at maximum deceleration. Static weight distribution alone does not determine the correct bias.
OEM engineers account for this by building in a front-heavy bias from the factory. Front-wheel-drive vehicles commonly run around 80% front bias; rear-wheel-drive vehicles typically sit in the 60–70% front range. Those numbers reflect both the static weight distribution and the expected dynamic weight transfer for each platform.
Pro Tip: Brake migration refers to the intentional or unintentional shift of bias during a braking event. On street cars it is mostly unintentional; on performance vehicles it can be tuned deliberately.
How to recognise when brake balance is off
Symptoms are usually the first signal. Common signs of imbalance include:
- The vehicle pulls to one side under braking
- Front pads wear significantly faster than rear pads, or vice versa
- Rear wheels lock before fronts during hard stops
- Stopping distances increase without an obvious cause
- Pedal feel becomes inconsistent or spongy
- Vibration through the pedal or steering wheel during braking
Excessive front bias increases stopping distance and accelerates front-component wear. Excessive rear bias is more dangerous: rear-wheel lockup causes the vehicle to rotate, which can result in a spin. Symptoms alone can be misleading, though. A pulling sensation, for instance, can come from a seized caliper, uneven tyre pressure, or worn suspension components rather than a bias problem. Professional measurement with a brake force meter or decelerometer is the only way to confirm the root cause when symptoms are ambiguous.
Practical ways to adjust brake balance
Adjustment options range from simple pad swaps to electronic recalibration. The right choice depends on the vehicle, the use case, and how far off the current balance is.
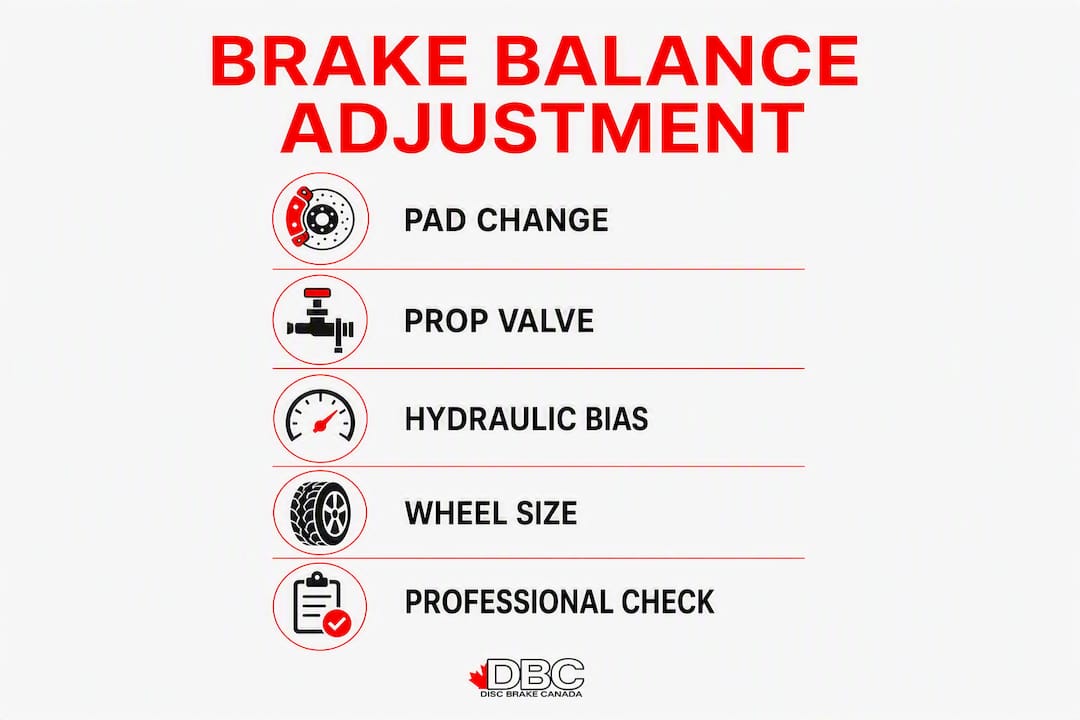
- Change pad compound. A higher-friction pad on the front raises effective front bias; a softer compound on the rear reduces rear contribution. This is the lowest-cost adjustment.
- Match rear hardware to upgraded fronts. Upgrading front rotors and calipers without touching the rear shifts bias forward. Matching rear components restores proportion.
- Install an adjustable proportioning valve. This device limits hydraulic pressure to the rear circuit above a set threshold. Proportioning valves belong in the rear brake line only; restricting the front circuit reduces total braking force and defeats the purpose.
- Use ABS/EBD (Electronic Brake Distribution). Modern vehicles with EBD use wheel-speed sensors to modulate rear pressure in real time, effectively replacing the mechanical proportioning valve.
- Adjust pedal ratio or master cylinder bore. Less common on street cars, but relevant for track builds where precise hydraulic pressure split is required.
| Method | Pros | Cons | Best use |
|---|---|---|---|
| Pad compound change | Low cost, reversible | Limited range of adjustment | Street tuning, mild track use |
| Matched hardware upgrade | Restores OEM balance after front upgrade | Higher cost, more labour | Enthusiast builds |
| Adjustable proportioning valve | Precise, tunable | Requires careful setup; rear line only | Track and performance builds |
| ABS/EBD (electronic) | Automatic, adaptive | Not user-adjustable; requires scan tool for faults | Modern street vehicles |
| Master cylinder/pedal ratio | Maximum precision | Complex, expensive | Dedicated race builds |
Pro Tip: When tuning an adjustable proportioning valve, start heavily biased to the front and slowly increase rear pressure until the fronts lock just before the rears under maximum straight-line braking. Never begin with equal pressure front and rear.
What brake migration means for performance drivers
Brake migration is the dynamic shift of effective bias during a single braking event, used deliberately in racing to manage vehicle rotation through a corner. On entry, less rear contribution stabilises the car; near the apex, more rear braking maximises rotation and helps the vehicle turn in. Brake-by-wire systems and in-cockpit bias adjusters let drivers change the split mid-lap.
For street use, the takeaway is simpler: keep bias conservative and front-weighted. Race tactics that induce rear-wheel slip are unsafe on public roads, where surface conditions are unpredictable and ABS calibration is designed for normal driving, not threshold braking at a circuit. Understanding vehicle performance dynamics helps put these concepts in context, but applying race-level rear bias on a public road is a real safety risk.
How to test brake balance safely and when to call a professional
A basic on-road check requires a private road or empty car park. Follow these steps:
- Check tyre pressures and confirm they match the vehicle's placard.
- Perform three progressive stops from 50 km/h, increasing pedal pressure each time.
- Observe whether the vehicle tracks straight or pulls during each stop.
- After a controlled maximum stop, inspect all four wheels for heat distribution (carefully, by feel near the wheel, not touching the rotor).
- Check pad wear at each corner and compare front versus rear.
Seek professional measurement if you notice inconsistent ABS activation under normal braking, unexplained lockup at one axle, or a measurable increase in stopping distance. A brake force rig measures actual force at each corner; a decelerometer logs deceleration rate; ABS wheel-speed sensor logs can reveal which axle is reaching its limit first.
| Drivetrain | Typical front bias | Notes |
|---|---|---|
| Front-wheel drive (FWD) | ~80% | High front weight; rear bias very limited |
| Rear-wheel drive (RWD) | 60–70% | More balanced; rear can contribute more |
| All-wheel drive (AWD) | 65–75% | Varies by torque split and weight distribution |
These ranges reflect typical OEM calibrations. Aftermarket upgrades can shift actual bias outside these bands if components are not matched.
How premium brake kit upgrades affect balance, and what to check before buying
Upgrading only front brakes without addressing the rear is one of the most common mistakes enthusiasts make. Larger front rotors, higher-friction pads, or multi-piston calipers all increase front braking force. Without a corresponding rear upgrade or proportioning adjustment, the system becomes more front-biased than the OEM calibration intended, which can increase stopping distance and reduce stability. A guide on common brake upgrade mistakes covers this in detail.
Before purchasing a brake kit, confirm:
- Rotor diameter and thickness match the caliper's designed swept area
- Caliper piston size and count are compatible with the master cylinder bore
- Pad compound suits the intended use (street, track, or mixed)
- Hardware fits within the wheel's inner diameter clearance
- Front and rear upgrades are matched or a proportioning adjustment is planned
- Brake fluid is rated for the heat range the new pads and rotors will generate
Bedding-in matters too. New pads and rotors need a controlled break-in sequence to transfer an even friction layer across the rotor face. Skipping this step produces uneven pad deposits, which show up as vibration and inconsistent pedal feel, both of which mimic balance problems. Fresh brake fluid is part of the same preparation: degraded fluid with absorbed moisture lowers the boiling point and introduces compressibility, which affects pedal feel and measured bias.
DBC Brakes offers matched brake kits with cross-drilled rotors engineered to resist warping, paired with compatible pads and hardware. Fitment support is available directly, and the team can confirm compatibility for Canadian models before purchase.
For a detailed compatibility checklist, the brake kit compatibility guide covers rotor sizing, caliper selection, and fitment notes by vehicle type.
Seasonal maintenance tips for Canadian drivers
Canadian winters add corrosion, thermal cycling, and road salt to the list of brake stressors. A maintenance schedule that accounts for those conditions keeps balance stable year-round.
- Inspect pad thickness and rotor condition at the start and end of each winter season.
- Check caliper slides for corrosion and seized pins, which cause uneven pad contact and pull symptoms.
- Flush brake fluid every two years or per the manufacturer's interval. Moisture absorption is accelerated by repeated freeze-thaw cycles. A brake fluid upgrade to a higher dry boiling point fluid is worth considering for vehicles driven hard.
- Inspect brake lines and hoses for salt-induced corrosion after each winter.
- After 20,000 km or any winter with heavy salt exposure, perform a full balanced-system inspection including a brake force check at each corner.
Service triggers: any pulling sensation after winter, ABS activation on dry pavement, or rear-wheel lockup during moderate braking all warrant immediate inspection before the next drive.
Key takeaways
Brake system balance is a dynamic property, not a fixed setting, and matching front and rear hardware is the single most important step when upgrading brakes.
| Point | Details |
|---|---|
| Balance is front/rear force distribution | Expressed as a front percentage (e.g., 70/30); FWD cars typically run with a strong front bias, while RWD cars have a moderately front-biased brake balance. |
| Balance shifts dynamically under braking | Weight transfers forward during deceleration, so static corner weights alone do not set correct bias. |
| Wrong bias has real safety consequences | Excessive rear bias risks rear lockup and spin; excessive front bias increases stopping distance. |
| Match rears when upgrading fronts | Upgrading only front components shifts bias forward and can worsen overall braking performance. |
| DBC Brakes offers matched Canadian kits | Cross-drilled rotor kits with compatible pads and fitment support; free shipping on orders over $100. |
A note from Sam
The detail most buyers miss is that brake balance is not a single number you set once. It changes with load, speed, and surface conditions on every stop. That is why matched hardware matters more than any single component upgrade. A larger front rotor with no rear adjustment does not make a car stop shorter; it shifts the balance point and often makes things worse.
The other thing worth saying plainly: proportioning valve placement is not a preference. The valve goes in the rear line. Putting it anywhere else reduces total braking force and creates a system that is both slower and less predictable. If you are unsure about your current setup or planning an upgrade, reach out for fitment guidance before ordering. Getting the balance right from the start saves time, money, and wear.
DBC Brakes: matched brake kits for correct balance
Stopping shorter starts with components that work together. DBC Brakes supplies premium matched brake kits with cross-drilled rotors, compatible pads, and the hardware needed to preserve or restore correct front-to-rear balance. Cross-drilled rotors reduce heat buildup and resist warping, which keeps rotor geometry consistent and bias predictable over time.

Every kit includes fitment support from a knowledgeable team, not an automated response. Pricing is transparent with no hidden fees, and orders over $100 ship free within Canada. If you are upgrading fronts and need guidance on matching the rear, or want confirmation that a kit fits your specific vehicle, contact DBC Brakes directly before placing your order. Visit CrossDrilledRotors.ca to browse kits by vehicle make and model.
Useful sources
- Brake balance — Wikipedia: bias definitions, OEM front-bias ranges, and brake migration overview
- scR motorsports: Brake Balance: expert definition of the ideal balanced system and corner-weight equation
- Understanding Brake Proportioning — FlyinMiata Help: proportioning valve placement rules and tuning sequence
- Brake balance 101 — Motorsportstuffing: consequences of upgrading fronts without matching rears
- Brake bias adjustment for performance vehicles: 2026 guide: step-by-step tuning guidance from DBC Brakes
- Brake kit compatibility guide: fitment checklist for Canadian vehicle owners