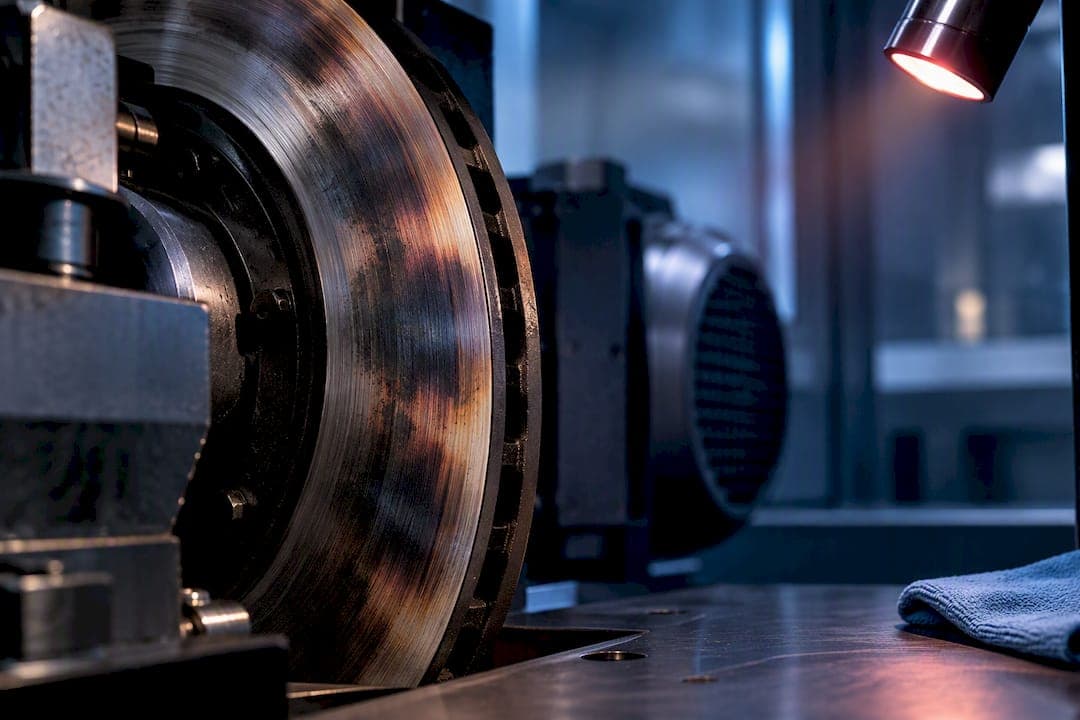
A hot spot on a rotor is a small region of permanently elevated surface temperature and metallurgical change. It can cause pedal pulsation or steering vibration during braking. If you feel judder, inspect the rotor or have a technician check it before the condition worsens.
TL;DR:
- Hot spots form from uneven heat distribution during braking, leading to metallurgical changes like martensite that are resistant to resurfacing.
- Visible signs include dark ringed patches, raised areas, pedal pulses, and steering vibration that worsen with brake pressure or speed.
- Hot spots are more likely after high-speed braking, poor pad bedding, uneven hub surfaces, or installation errors like incorrect torque and excessive runout.
- Resurfacing becomes ineffective once martensite has formed or the rotor thickness drops below minimum specifications, requiring replacement for safety.
- Proper brake bedding, hub cleaning, correct torque, and regular inspections can prevent hot spots, while some high-performance rotors help manage heat distribution.
Table of Contents
- What causes a hot spot to form on a rotor
- How to spot a hot spot before it gets worse
- What causes hot spots to form in the first place
- Why hot spots matter for braking performance and safety
- How technicians diagnose hot spots on a rotor
- Preventing hot spots before they start
- Deciding between resurfacing and rotor replacement
- Checklist for owners and technicians
- Maintenance habits versus component upgrades
- Reducing hot spot risk with the right rotor and fit
- Sources
- FAQ
What causes a hot spot to form on a rotor
A rotor hot spot begins with thermoelastic instability, a process where heat during braking does not spread evenly across the disc surface. Instead, small zones expand faster than the surrounding material. Those zones carry more of the clamping load, which generates more heat in the same spot, and the cycle repeats. Bench testing with thermal imaging shows this pattern clearly: dynamometer research records hot bands forming and migrating across the rotor face before they concentrate into fixed hot spots.
Engineers classify hot spots into four types. Asperity hot spots are tiny, high points on the surface. Focal hot spots are concentrated points of extreme heat. Distortional hot spots follow a wave pattern across the disc. Regional hot spots cover a broader section of the rotor face. This classification comes from engineering literature on friction-induced heating, which also links focal hot spots to martensite formation on cast iron.

Martensite is a hard, brittle metallurgical structure. It forms when a small area of the rotor reaches a very high temperature and then cools rapidly. Once martensite forms, the affected area behaves differently than the surrounding cast iron. It does not wear the same way, and it does not respond to resurfacing. Pad deposits play a role too. Friction material can transfer unevenly onto the rotor surface, especially with new pads, and those uneven deposits become a starting point for thermal concentration, as shown in infrared imaging studies of friction-induced hot spots.
Vane geometry and vent design matter as well. Uneven venting inside a rotor produces temperature differences across the disc radius, and dynamometer testing recorded vane-related temperature variation of roughly 16°C at certain radii, enough to drive localized deformation.
How to spot a hot spot before it gets worse
Hot spots leave visible marks and produce specific in-car symptoms. Knowing both helps you separate a real hot spot from ordinary surface staining.
- Dark circular patches on the rotor face, often clustered rather than spread evenly.
- Thermal banding: light and dark rings that follow the direction of rotor rotation.
- Raised or slightly bulged sections that you can feel with a fingertip once the rotor is cool.
- Pedal pulsation that increases with brake pressure and speed.
- Steering wheel vibration under braking, more noticeable at highway speeds.
- A low-frequency drone or hum from the brakes that was not present before.
Not every dark mark is a hot spot. Pad outline staining looks similar but is temporary and often fades with regular driving, since it comes from pad deposits rather than a metallurgical change in the rotor itself. A quick inspection guide walks through how to tell the two apart before assuming the worst.
To check at home, let the vehicle cool fully, then look at the rotor face in good light for the dark, ring-shaped marks described above. Run a light stop from low speed and note whether the pedal pulses. A burning smell after normal driving, not just after hard braking, is also worth investigating.

Pro Tip: Check rotors after a highway trip with several hard stops, since hot spots often show up first after sustained high-speed braking rather than everyday city driving.
What causes hot spots to form in the first place
Hot spots rarely come from one factor alone. They usually build from a combination of driving conditions, hardware, and installation quality.
- High-energy braking from speed, particularly braking events above roughly 120 km/h under high clamping pressure, which research on high-speed brake judder identifies as a common trigger point.
- Pad compound and bedding state, since improperly bedded or glazed pads deposit friction material unevenly.
- New, lapped pad surfaces, which in some test configurations promote hot spots more than worn pads because the fresh surface encourages uneven deposit patterns, according to infrared testing of friction systems.
- Dirty or corroded hub faces, which create a gap between the rotor and hub and cause the rotor to run unevenly.
- Incorrect wheel bolt torque, which can distort the rotor slightly and concentrate contact pressure in specific spots.
- Caliper mounting issues and lateral runout, both of which cause the pad to contact the rotor unevenly across each rotation.
- Rotor design factors like vane profile and casting homogeneity, since uneven material density or airflow inside the rotor changes how heat spreads.
Installation errors deserve particular attention because they are preventable and often overlooked. A soiled hub face or a wheel bolt tightened out of sequence can seem minor, but a technical breakdown of rotor wear patterns notes that thermal load is cumulative. A small installation error amplifies uneven contact over time and can convert a minor, temporary temperature rise into a permanent hot spot.
Repeated high-energy stops compound all of these factors. Each hard stop adds heat to whatever unevenness already exists in the rotor, whether from pad deposits, runout, or vane design. Over enough cycles, that repeated thermal load is what pushes a rotor from mild banding into a fixed hot spot.
Why hot spots matter for braking performance and safety
Hot spots are not a cosmetic issue. They change how the vehicle brakes and, in some cases, threaten the rotor's structural integrity.
The most immediate effect is thermal judder, a vibration felt through the pedal or steering wheel that stems from the uneven surface created by the hot spot. Bench testing shows this progression clearly: hot bands appear first, then concentrate into discrete hot spots that produce measurable noise, vibration, and harshness, based on experimental testing of hot spots and thermal judder.
Braking performance also becomes inconsistent. A rotor with hot spots does not transfer clamping force evenly, so the pedal can feel firm in one moment and soft the next, a form of brake fade tied to the uneven surface rather than pad wear alone. Over time, the metallurgical changes at focal hot spots, particularly martensite formation, create hard, brittle zones that resist wear differently than the rest of the rotor. In the presence of existing cracks, full-scale braking research shows that hot spots can concentrate heat at those cracks and accelerate their growth.
Hot spots are also commonly misdiagnosed. Owners and even some shops mistake the vibration for warped rotors from mechanical bending, when the actual cause is thermal and metallurgical rather than a simple shape change.
How technicians diagnose hot spots on a rotor
Diagnosing a hot spot correctly requires more than a visual check, since surface staining and true hot spots can look similar at a glance. Technicians typically combine a few methods to confirm what they are dealing with.
- Thermal imaging during or immediately after braking reveals characteristic banding and hot spot patterns, showing temperature differences across the rotor face that correspond to the visible marks.
- Disc thickness variation (DTV) measurement checks whether the rotor's thickness is consistent around its circumference, since uneven thickness often accompanies hot spot formation.
- Lateral runout (LRO) measurement confirms whether the rotor wobbles slightly as it spins, which can cause or worsen uneven pad contact.
- Surface inspection under magnification or strong light identifies the dark banding, raised areas, and colour changes associated with martensite formation.
- Dynamometer testing, used in a lab setting rather than a shop, adds controlled conditions that isolate hot spot behaviour from other variables like road surface or ambient temperature.
Thermal imaging in particular tends to show patterns tied to the rotor's internal vane structure, since dynamometer studies link vane geometry to periodic temperature bands that precede discrete hot spots. A competent technician should be able to explain what the DTV and runout numbers mean for your specific rotor, not just report a pass or fail.
Preventing hot spots before they start
Most hot spot prevention comes down to how the brakes are installed and used, not the rotor material alone.
- Follow a proper bedding procedure on new pads and rotors, since this builds an even transfer layer instead of patchy deposits.
- Clean the hub face thoroughly before installing a rotor, removing rust and debris that create gaps and uneven contact.
- Torque wheel bolts to the correct specification and in the proper sequence, since uneven torque can distort the rotor slightly.
- Check caliper mounting and lateral runout during installation rather than assuming a new part is automatically true.
- Choose a pad compound suited to your driving, since a track-oriented pad on a daily-driven car can glaze and deposit unevenly at normal temperatures.
- Avoid repeated high-energy stops from high speed when possible, particularly back-to-back hard braking that does not allow the rotor to cool.
A proper bedding procedure matters more than most owners expect. A complete bedding guide explains the process in detail, and a short bedding routine using two sets of ten partial stops gives a practical structure to follow. If pads have already glazed, a pad glazing guide covers when sanding is enough and when replacement is the better option.
Scheduled inspections catch small issues before they become hot spots. Ask a technician to check lateral runout and hub face condition at every brake service, not just when a problem is already noticeable.
Deciding between resurfacing and rotor replacement
Resurfacing removes a thin layer of material to restore a flat surface, but it only works within limits. Every rotor has a minimum thickness specification, and machining below that point weakens the rotor's ability to handle heat and stress safely.
Resurfacing is not appropriate once martensite has formed. That hardened material sits below the visible surface in some cases, so machining away the top layer does not remove it, and the hot spot tends to return. Engineering research on hot spotting identifies martensite formation at focal hot spots as a change that calls for replacement rather than resurfacing.
Signs that point toward replacement include visible cracking, rotor thickness already close to the minimum specification, or hot spots that return shortly after resurfacing. A discussion of drilled rotor cracking covers related failure modes worth checking during this decision. Cost is a factor, but safety should decide the outcome: a rotor at or below minimum thickness cannot dissipate heat the way it was designed to, regardless of how the surface looks.
Checklist for owners and technicians
A few steps consistently prevent avoidable hot spots. Clean the hub face before every rotor installation, torque wheel bolts to specification in the correct sequence, and confirm lateral runout after mounting.
- Bed new pads and rotors using a proper break-in sequence rather than driving normally from the first stop.
- Inspect the hub face for rust or debris before mounting any rotor.
- Confirm wheel bolt torque with a calibrated tool, not by feel.
- Check lateral runout after installation, especially on performance or heavier vehicles.
Pro Tip: Keep a simple record of when rotors and pads were installed and bedded, since that history helps a technician diagnose a new vibration faster.
DBC Brakes' prevention guide covers these same steps in more detail for anyone installing rotors at home.
Maintenance habits versus component upgrades
Most drivers can prevent hot spots through habit changes alone: proper bedding, clean hub surfaces, and avoiding repeated hard stops from high speed. These steps address the root causes directly and cost nothing beyond attention.
Component upgrades make more sense for a specific duty cycle, such as track use or towing, where thermal load is consistently higher than a rotor's original design anticipated. For everyday driving, fix the habits first. For repeated or heavy-duty demands, a design-level change is worth considering.
— Sam
Reducing hot spot risk with the right rotor and fit
Engineered rotors will not fix bad habits, but the right hardware and correct fitment reduce how often hot spots form in the first place. Some brake kit manufacturers design cross-drilled rotors to manage heat more evenly across the disc face. This matters most for drivers who brake hard often or carry extra load.

- Certain brake kit product lines focus on consistent venting and material quality rather than a one-size fitment.
- Some brake kits are offered with guaranteed fitment and transparent pricing without hidden fees.
- Orders over $100 include free shipping, and expedited or international shipping options are listed on the shipping information page.
Pair a new rotor with a proper bedding routine, since even a well-designed rotor develops uneven deposits without it. Browse the rotor collection or the performance brake kits to find a fit for your vehicle, and reach out to DBC Brakes' support team for help matching the right rotor to your driving.
Sources
For deeper technical detail, see the SAE study on brake judder mechanisms and DBC's bedding procedure guide. For safe wheel and hub cleaning, see this brake dust removal guide.
- A study: mechanism causing high-speed brake judder (SAE)
- University of Huddersfield repository — experimental dynamometer work on thermal judder
- QIRT 2016 paper on friction-induced hot spots
- Hot spotting in automotive friction systems (ScienceDirect)
FAQ
What do overheated rotors look like?
Overheated rotors often show dark, ring-shaped discolouration and, in more severe cases, small circular patches called hot spots. These marks reflect uneven heat distribution rather than a single overheating event, and they may be accompanied by a faint burning smell after driving.
What does a hot spot on a rotor look like?
A hot spot typically appears as a small, dark, sometimes slightly raised patch on the rotor's braking surface. It differs from general staining because it does not fade with normal driving and often lines up with pedal pulsation or steering vibration.
Is it normal for your rotors to get hot?
Yes, rotors are designed to get hot during braking since that heat is a normal part of converting motion into stopped energy. The concern is uneven heat concentrated in specific spots rather than the overall temperature rising during a stop.
What are signs that your rotors are bad?
Common signs include pedal pulsation, steering wheel vibration under braking, visible dark banding or patches on the rotor face, and inconsistent stopping feel. A quick inspection routine can help confirm whether the cause is a true hot spot or temporary pad staining before assuming the rotor needs replacement.