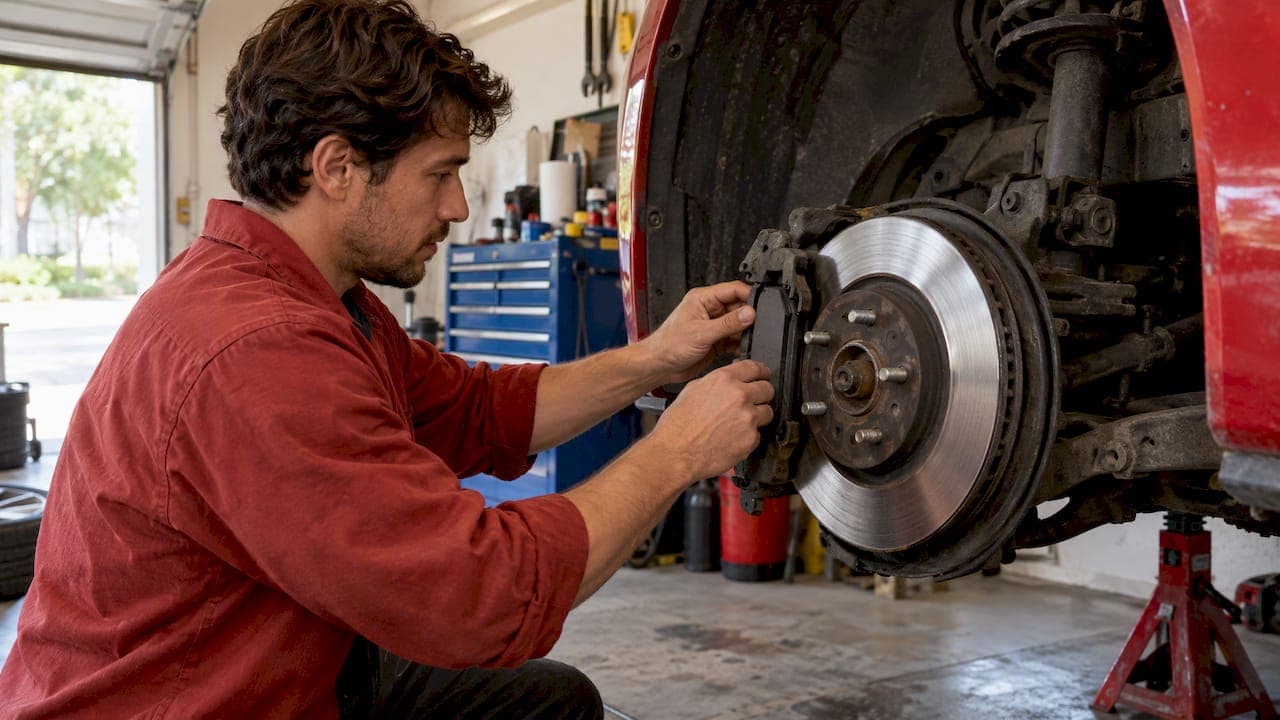
Brake pulsation after a pad change usually points to the rotors or the mounting, not the new pads themselves. The most common causes are rotor thickness variation, runout at the hub, rust between the rotor and hub, uneven wheel-nut torque, pad material smeared onto the rotor, or a sticking caliper. The fix depends on measurements. Guessing leads to repeat jobs.
This guide lists the causes in the order to check them, the specifications to measure, and the decision between resurfacing and replacing rotors.
TL;DR
- Pulsation after new pads is normally a rotor or mounting problem. New pads often expose it rather than create it.
- Measure before replacing parts. Check rotor runout, hub runout, rotor thickness and wheel-nut torque.
- Check for rust on the hub face, a sticking caliper or guide pin, and worn suspension parts.
- Resurface or replace rotors based on measured thickness and the vehicle maker's specification.
- Follow the pad maker's bedding steps. Avoid holding the pedal down on hot pads after a hard stop.
Table of Contents
- What pulsation is and how it feels
- Why pulsation appears after new pads
- Is it normal right after the job?
- Is it safe to drive?
- Diagnosis in order
- Resurface or replace the rotors?
- Pad material transfer and bedding
- Installation mistakes that cause pulsation
- Our perspective
- Brake kits for Canadian drivers
- Checklist before the next visit
- FAQ
- Sources
What pulsation is and how it feels
Pulsation is a rhythmic pulse in the brake pedal, the steering wheel, or the whole vehicle under braking. It is often called judder. The pulse repeats once per wheel revolution, so it speeds up as the vehicle speeds up.
The pedal feels the pulse because of hydraulics. A Canadian GMC dealer's brake FAQ explains it this way: where the rotor is thicker, it pushes the caliper piston and brake fluid back as it passes through the caliper. The driver feels that push at the pedal. The thickness variation can be a few hundredths of a millimetre.
Note where the pulse shows up:
- Pedal only: usually rotor thickness variation at one or more axles.
- Steering wheel shake: usually the front axle.
- Seat or floor vibration: usually the rear axle.
- Only at highway speed: often runout or an imbalance that braking makes noticeable.
- Only after a long stop or highway descent: heat-related, such as a sticking caliper or pad material transferred unevenly.
Related symptoms are covered in the guide to rotor runout symptoms and the broader brake vibration causes and repair guide.
Why pulsation appears after new pads
A new pad is flat and has full contact. That is the reason old pads can hide a rotor problem and new ones reveal it. Worn pads and discs also lose damping ability, according to a manufacturer technical bulletin. The same bulletin states that pulsation can have several causes, including driving style, environmental conditions and service history.
The usual causes after a pad change:
- Rotors were not measured or machined. The old rotors had thickness variation or runout, and the new pads now press on it evenly enough to feel it.
- Rust or dirt on the hub face. Debris between the rotor and hub tilts the rotor slightly. This shows up as lateral runout and then as thickness variation over time.
- Uneven wheel-nut torque. Wheel fasteners tightened unevenly or with an impact gun can distort the rotor. The Canadian GMC FAQ names improper installation and wheel torque as causes of thickness variation.
- Pad material smeared on the rotor. The manufacturer bulletin names smearing from repeated aggressive braking without cooling as a condition that can create disc thickness variation (DTV).
- Moisture and parked-vehicle marks. A separate service bulletin says prolonged moisture exposure can leave pad marks that produce judder. It recommends regular driving with several stops to warm and dry the brakes before parking again.
- A sticking caliper or seized guide pin. One section of the rotor overheats and the pads wear unevenly.
- Worn suspension parts. Ball joints, links, tie rods and bushings can amplify braking vibration, or make a non-brake vibration noticeable during braking, per the first bulletin.
Is it normal right after the job?
Some noise is normal. The service bulletin notes that new pads and rotors can squeak from contact vibration while they seat and build a transfer film. It advises against changing rotors only because of noise. Noise and pulsation are different symptoms, though.
A steady pedal pulse that does not fade after the pads have been bedded in is not a seating effect. Treat it as a fault to diagnose. For noise that continues after the first few hundred kilometres, see the new brake noise checklist.
Is it safe to drive?
Light pulsation allows careful short-distance driving to a shop. Do not ignore it. The manufacturer bulletin warns that rust or pad-mark build-up can permanently damage discs and pads if left unattended. Pulsation can also lengthen stopping distances on slippery roads when it is combined with other faults.
Stop driving and get the vehicle inspected the same day when:
- The pedal sinks or feels soft. See the soft brake pedal test.
- The vehicle pulls to one side under braking.
- A burning smell comes from one wheel after normal driving.
- One wheel is much hotter than the others, which suggests a stuck caliper.
- A grinding or metal-on-metal sound begins.
Diagnosis in order
The manufacturer bulletin gives a clear method. Reproduce the symptom at its characteristic speed, brake pressure and component temperature. Check repair history and brake and suspension condition. Then measure runout.

Step 1: Confirm the symptom
Road-test the vehicle. Note the speed range, whether the pulse is in the pedal or steering wheel, and whether it appears cold or only after heat. Note whether it began immediately after the pad change or grew over days.
Step 2: Inspect the mounting
- Remove the wheel and rotor if possible and look at the hub face for rust, scale or debris.
- Check the rotor's mounting face and the hat section for corrosion.
- Confirm that the caliper slides move freely and the guide pins are not seized.
- Confirm that the pads move in their brackets and that hardware is fitted.
Motor Magazine's brake-service guidance recommends checking rotor and hub runout, cleaning rust and corrosion from the mating surfaces, and torquing the rotor correctly before deciding whether to machine or replace it. It describes pulsation as largely a measurement and mounting problem, not automatic proof that a rotor must be replaced.
For rust, the guide on surface film versus damage on brake rotors explains what can be cleaned and what cannot. A light cleaning of wheels and brake dust before inspection helps see the surfaces clearly. This guide on how to remove brake dust safely covers the cleaning of wheels and deposits without damaging the finish.
Step 3: Measure runout
The manufacturer bulletin lists maximum runout values for its vehicle: 0.06 mm at the disc braking surface, 0.03 mm at the disc hub and 0.02 mm at the wheel hub. These are that maker's figures. Always use the specification for the exact vehicle from its service manual.
Use a dial indicator on a stable base. Measure the rotor face with the wheel hub nut or lug nuts clamping the rotor in place. A magnetic base on the knuckle works well. Measure the hub flange separately with the rotor removed.
The Counterman technical forum notes that replacing a rotor will not cure pulsation caused by excessive hub runout. Runout must be checked with a dial indicator before choosing the remedy. The guides on accurate rotor runout measurement and on matching pads and rotors give the shop-floor details.
Step 4: Measure thickness
Use a micrometer at several points around the rotor, at the same distance from the edge. Compare the readings with each other and with the minimum thickness stamped on the rotor. Variation between points is what the pedal feels. The minimum thickness decides whether the rotor can be machined at all.
Step 5: Check the suspension
If the brakes measure within specification and the pulse remains, check the suspension and steering parts named above. A loose component can turn a small imbalance into a noticeable shake.
Resurface or replace the rotors?
The published guidance leans toward measuring first.
| Situation | Typical action | Basis |
|---|---|---|
| Pulsation, rotor above minimum thickness | Refinish (resurface) | GM bulletin: refinish, not replace, for pulsation complaints |
| Pulsation, rotor at or below discard thickness, or would go below it after machining | Replace | GM bulletin and Counterman forum |
| No pulsation, rotor well above discard thickness | May keep rotor with new pads | Canadian GMC FAQ: at least 1 mm above discard |
| Hub runout above specification | Fix the hub, bearing or mounting surface first | Counterman forum |
| Rust or corrosion between rotor and hub | Clean the mating surfaces, remeasure | Motor Magazine |
A GM corporate bulletin says that for pulsation complaints rotors should generally be refinished, not replaced, because pulsation usually results from thickness variation caused by lateral runout or corrosion. It adds that the vehicle manufacturer's specifications and the measured condition of the rotor control the decision. Replace rotors only if they do not meet the minimum-thickness specification.
The Counterman forum adds that rotors in relatively good condition with minimal wear may not need resurfacing, and that rotors worn to discard thickness, or that cannot be resurfaced without going below it, should be replaced.
The Canadian GMC FAQ says a rotor need not automatically be machined or replaced with new pads when there is no pulsation or steering-wheel vibration and the rotor remains at least 1 mm above discard thickness. When pulsation exists, that exception does not apply.
On many modern vehicles rotors are thin. Machining removes the margin quickly, and a machined rotor runs hotter and warps more easily afterwards. A fresh, matched rotor and pad set is often the practical choice when the measured margin is small. The article on replacing rotors without pads lists the thickness and runout figures to request.
Pad material transfer and bedding
Pad material can transfer to the rotor unevenly. This happens when the pads are held against a hot rotor while stopped, for instance after a hard stop from high speed and holding the pedal at a light. The pad leaves an imprint in that spot. The next stop passes over a high spot and the pedal pulses. The ranking forum threads describe this as imprinting.
To reduce the risk:
- Bed in new pads using the pad maker's own procedure. Pads vary by compound.
- Avoid hard stops from high speed in the first drive without cooling intervals.
- After a hard stop, roll slowly or keep moving rather than holding the pedal down.
- Let the brakes cool before parking after heavy use.
The bedding steps and the glazing risk are covered in the guide on sanding or replacing glazed pads and the 10 to 15 stop bedding.
Do pedal pumps matter?
Pumping the pedal after the job is separate from bedding. It pushes the caliper pistons back out so the pads touch the rotor. One vehicle-specific repair procedure for a 2018 to 2024 Honda Accord 1.5L turbo says to pump the pedal firmly 10 to 15 times and not move the vehicle until the pedal is firm. The count differs by vehicle, so follow the manual for the exact model. The key point is that the pedal must be firm before the vehicle moves.
Installation mistakes that cause pulsation
Most post-job pulsation traces to a short list of shop or garage habits:
- Installing the rotor over a rusty hub face without cleaning it.
- Tightening wheel nuts in a circle, or with an impact wrench without a torque stick or final hand torque.
- Mixing new pads with old rotors that have a worn lip or uneven track.
- Reusing seized slide pins or missing pad hardware.
- Leaving the protective coating or oil film on new rotor faces. Clean new rotors with brake cleaner unless the maker says otherwise.
Tighten wheel nuts in a star pattern, in stages, to the specified torque. Recheck torque after the first drive.
Our perspective
Pulsation after a pad change is rarely a mystery. In most cases the rotor, the hub face or the torque sequence was not given the same attention as the pads.
We build our brake kits around that idea. Rotors and pads are designed to be fitted as a matched set, with a rotor design intended to resist warping and improve durability under heat. A matched set removes one common variable: a new pad running against a worn or mismatched rotor.
Fitting still decides the result. Clean the hub, measure runout, torque the wheel nuts in sequence and follow the bedding steps. If a part number or fitment question comes up, our support team answers it directly, with no automated replies.
Sam
Brake kits for Canadian drivers
When measurements show rotors at or near discard thickness, replacing rotors and pads together is the cleaner repair. DBC supplies brake kits and components for cars, trucks and performance vehicles, with cross-drilled rotors engineered to prevent warping and improve durability. Pricing is inclusive, with no hidden fees, and orders over $100 ship free within Canada. Expedited shipping is $29.99 per order.
Browse brake kits, brake rotors or brake pads. Where the hub or bearing is the cause, see wheel bearings and hubs. Shipping terms are on the shipping information page.
Checklist before the next visit
- Note when the pulse occurs: speed, temperature, pedal or steering wheel.
- Inspect the hub face and rotor mounting face for rust.
- Check caliper slides and pad hardware.
- Measure rotor runout and hub runout against the vehicle specification.
- Measure rotor thickness at several points and compare with the discard figure.
- Resurface only if the rotor stays above minimum. Otherwise replace rotors, preferably with pads.
- Torque wheel nuts in a star pattern.
- Bed in the pads using the pad maker's steps.
- Retest the vehicle and recheck wheel-nut torque.
FAQ
Why do my brakes pulsate after I changed the pads?
The rotors most likely have thickness variation or runout that old pads masked. Rust on the hub face, uneven wheel-nut torque and pad material transfer are other common causes. Measure runout and thickness to find which applies.
Do new brake pads need rotors replaced too?
Not always. A Canadian GMC dealer FAQ says rotors need not be machined or replaced when there is no pulsation and they remain at least 1 mm above discard thickness. When pulsation exists, measure and then resurface or replace the rotors.
Will the pulsation go away as the pads settle in?
Seating can cause squeaks, but a steady pedal pulse usually does not fade by itself. Pad marks or rust build-up can also permanently damage discs and pads if ignored, according to a manufacturer bulletin. Diagnose it instead of waiting.
Is it normal for new pads to make noise?
Some squeak is normal while pads and rotors seat and form a transfer film. A service bulletin advises against changing rotors only because of noise. Grinding, or noise that continues past the first few hundred kilometres, needs inspection.
How many times should the pedal be pumped after changing pads?
Pump until the pedal is firm before moving the vehicle. One procedure for a 2018 to 2024 Honda Accord 1.5L turbo says 10 to 15 firm pumps. Check the manual for the vehicle.
Sources
- Manufacturer technical bulletin on brake pulsation and runout limits (NHTSA, 2021)
- Manufacturer service bulletin on judder, moisture and squeak (NHTSA, 2020 to 2021)
- GM corporate bulletin on rotor refinishing versus replacement (NHTSA, 2013)
- Motor Magazine brake service article (2016)
- Counterman 17th Annual Technical Forum: Rotors
- Brakes and Brake System FAQ, Wolfe GMC Buick
- Brake Pads and Rotors, Front: 2023 Honda Accord repair procedure