
Brake modulation is the rider's ability to control braking force precisely between full release and maximum engagement, building pressure gradually rather than switching between nothing and full lock.
- Modulation keeps you at the traction limit without locking the wheel.
- It makes braking predictable: small lever movements produce small, consistent changes at the wheel.
- Poor modulation feels binary. Good modulation feels like a dial, not a switch.
Authorities including BikeRadar and TRP Cycling treat modulation as a distinct performance metric, separate from raw stopping power.
Table of Contents
- What does brake modulation mean versus raw stopping power?
- Why does modulation matter for safety and performance?
- What factors affect how your brakes modulate?
- How do you improve brake modulation at home?
- Riding drills to build modulation in your fingers
- Common brake problems and how to fix them
- Key takeaways
- The part most riders skip
- Useful sources for further reading
What does brake modulation mean versus raw stopping power?
These are two different things, and confusing them leads to poor brake choices.
Raw stopping power is the maximum force a brake can generate. Modulation is how controllably that force builds across the lever stroke. A brake can have high peak power but poor modulation, meaning it goes from nothing to full lock with almost no usable range in between. That is the on/off brake feel riders describe as grabby or unpredictable.
A well-modulated system maps small lever inputs to small, predictable increases in braking force. Think of the difference between feathering the front brake into a loose corner versus grabbing a handful and feeling the wheel skip. The second scenario has more raw force applied, but the first gives the rider control. For a deeper look at how clamping force and controllability trade off, the power vs. controllability breakdown explains the mechanics clearly.
A progressive response means the brake ramps up smoothly. Hydraulic disc brakes generally offer this by default because fluid is incompressible and caliper pistons move consistently. Mechanical rim brakes depend more on cable tension, housing condition, and pad compound to achieve the same feel.
Why does modulation matter for safety and performance?
Good modulation directly affects how safely and quickly you can stop in real conditions.
On a wet technical descent, a binary brake forces a choice between too little and too much. A well-modulated brake lets you stay at the traction limit repeatedly, shortening stopping distances without triggering a skid. In crit bunch riding, the ability to scrub speed smoothly without locking up protects both the rider and the group around them.
Wheel lockup is the key safety risk. When a wheel locks, steering control drops immediately because a sliding tyre generates less lateral grip than a rolling one. Modulation prevents that transition.
Over a long descent, high-quality modulation reduces mental load. Riders stay more relaxed and sustain higher speeds because they trust the brakes to behave predictably. Reduced hand fatigue is a direct result: squeezing harder to compensate for unpredictable feel tires the hands faster than controlled, lighter inputs.
What factors affect how your brakes modulate?
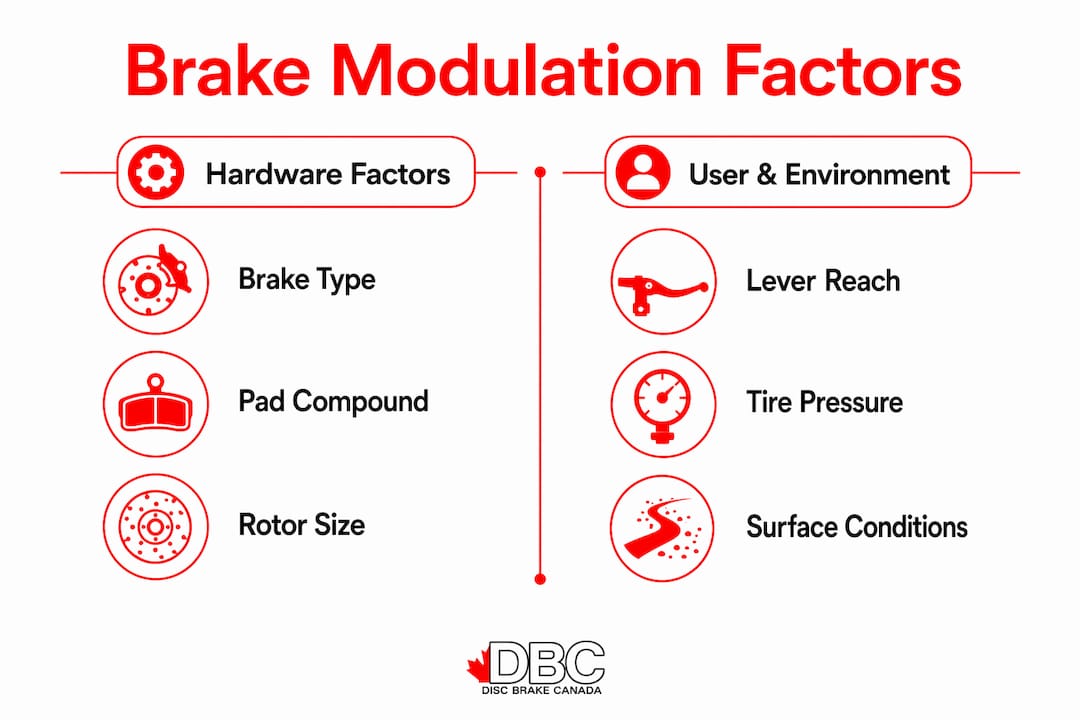
Several hardware, setup, and environmental factors all influence perceived modulation. Most are inspectable at home.
Brake architecture. Hydraulic disc brakes offer the most consistent modulation because fluid pressure is direct and uniform. Mechanical disc and rim brakes rely on cable and housing condition, which degrades over time.
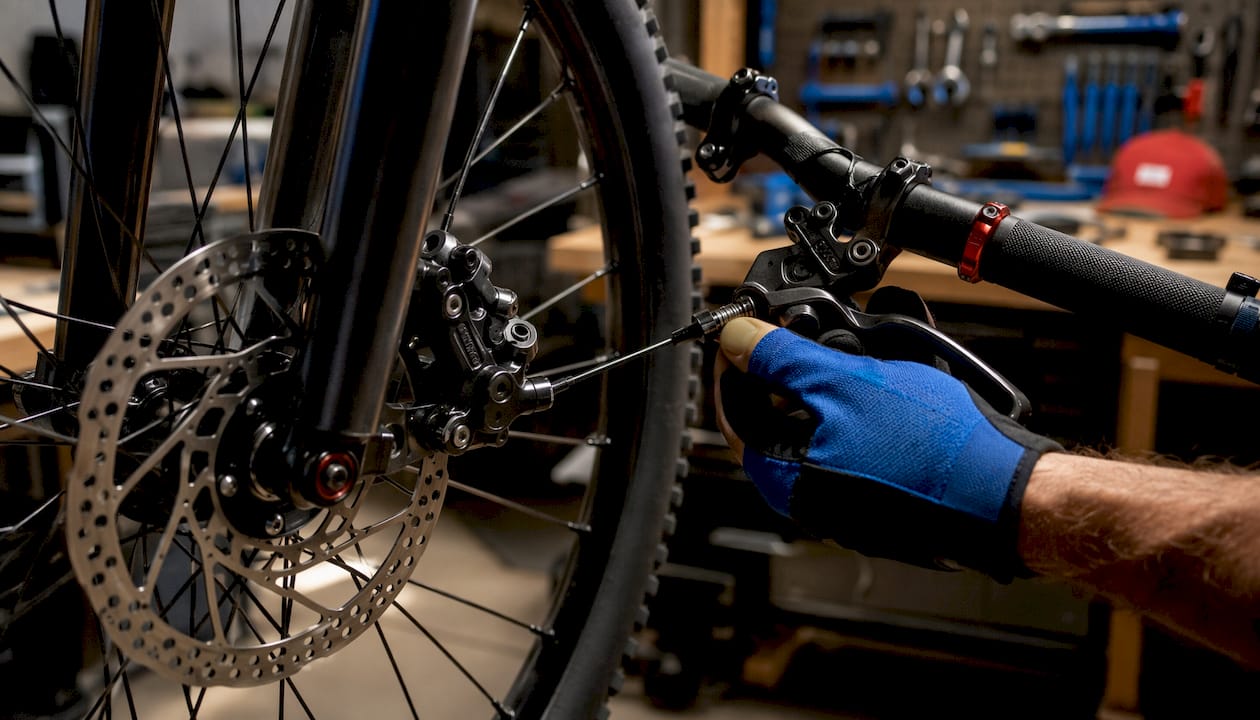
Lever feel and reach. A lever set too far from the bar forces riders to use the tips of their fingers, reducing fine control. Adjust reach so the lever sits at the first joint of the index finger.
Pad compound. Organic (resin) pads offer better initial modulation and quieter operation. Sintered (metallic) pads handle heat better but can feel more abrupt at low speeds. See the pad compound guide for a full breakdown.
Rotor size and condition. Larger rotors dissipate heat better and maintain consistent feel longer. A warped or contaminated rotor causes shudder and inconsistent pad contact.
Fluid quality and air in lines. Air in hydraulic lines introduces compressibility that makes the lever feel mushy and reduces modulation. A proper bleed restores direct feedback.
Cable and housing condition. Frayed cables or compressed housing add friction and dead travel, making mechanical brakes feel vague.
Tyre pressure. Lower tyre pressure increases the contact patch and widens the margin before traction breaks, making brakes feel more forgiving. Check pressure before every ride.

Weather and surface. Wet or muddy conditions reduce tyre grip, narrowing the window between controlled braking and lockup. Brake earlier and with less force.
| Brake category | Typical modulation | Common limitation |
|---|---|---|
| Hydraulic disc | Excellent, consistent | Requires periodic bleeding |
| Mechanical disc | Moderate | Cable/housing wear degrades feel |
| Hydraulic rim | Good | Rim condition affects pad contact |
| Mechanical rim | Variable | Cable tension and pad alignment critical |
Pad inspection, tyre pressure checks, and lever reach adjustments are all rider-level tasks. Caliper rebuilds, hydraulic bleeds, and hose replacement are best handled by a shop if you are not confident with the procedure.
How do you improve brake modulation at home?
Start with the symptom, then work through the sequence below.
If the lever feels mushy or vague, the first check is fluid and air. If braking feels grabby or inconsistent, check pads and rotor condition first. If feel is generally poor, begin with lever reach and tyre pressure before touching anything else.
Logical sequence:
- Inspect lever reach. Set it so the lever contacts the first joint of the index finger. This alone improves fine control for many riders.
- Check tyre pressure. Run the correct pressure for your tyre width and terrain. Overinflated tyres reduce grip and make brakes feel harsher.
- Inspect pads. Look for glazing (a shiny surface), oil contamination, or uneven wear. Contaminated pads cannot modulate well.
- Bed in new pads and rotors. Follow the manufacturer bedding-in steps to achieve consistent pad transfer. A common approach is a series of controlled stops from moderate speed, allowing cooling between each.
- Bleed hydraulic lines. If the lever still feels spongy after pad checks, air in the system is the likely cause. This is a DIY task with the right kit, but a shop bleed is faster and more reliable if you are new to it.
- Replace cables and housing on mechanical systems if there is noticeable dead travel or a gritty feel.
- Consider pad compound or rotor size as a final step if feel is still inconsistent after the above.
Pro Tip: Lightly sanding glazed pads with 120-grit sandpaper, then wiping the rotor with isopropyl alcohol, often restores modulation without replacing any parts. Do not ride until both surfaces are fully dry.
Never ride with brakes that feel unsafe. If a bleed or caliper service is beyond your current skill level, book a shop appointment before the next ride.
Riding drills to build modulation in your fingers
Technique matters as much as hardware. These drills build the finger control that makes modulation reliable.
Drill 1: Progressive slope stops (most effective starting point) The goal is to feel the full range of the lever stroke and identify where traction begins to break.
- Find a gentle, clear slope with a flat runout.
- Roll at a slow walking pace.
- Squeeze the front brake gradually from zero to full engagement over three to four seconds.
- Note where the wheel begins to skid. That is your traction limit.
- Repeat ten times, stopping just before the skid point each time.
Drill 2: Threshold braking
- Mark a braking zone with two cones or chalk lines, five metres apart.
- Approach at moderate speed.
- Apply maximum braking without locking either wheel.
- Track how far before the first marker you can stop consistently.
- Move the start marker back as stopping distance shortens.
Drill 3: Single-brake modulation
- In a safe, flat area, practice braking with the rear brake only.
- Apply gradually until the wheel just begins to slide, then release slightly.
- Repeat with the front brake, noting how much more sensitive it is.
- This builds independent finger awareness for each hand.
Drill 4: Corner entry feathering
- Set up a gentle curve on a quiet path.
- Enter at a speed that requires some braking.
- Apply light, consistent pressure through the corner rather than braking before it.
- The goal is to exit with no skid and a smooth speed reduction.
Drill 5: Cadence and braking
- While pedalling at a comfortable pace, apply light rear brake pressure for two seconds, then release.
- Alternate with front brake.
- This builds the habit of controlled, brief inputs rather than sustained squeezing.
Measurable progress markers: reduced skid frequency, consistent stopping within a marked zone, and noticeably less hand fatigue after a descent.
The same principles apply across vehicle types. Braking control in small-vehicle contexts follows the same logic: progressive input and traction awareness transfer directly to bicycle technique.
Common brake problems and how to fix them
| Symptom | Likely cause | Immediate check | Next step |
|---|---|---|---|
| Grabby or sudden engagement | Contaminated or glazed pads | Inspect pad surface for shine or oil | Sand pads, clean rotor; replace if contaminated |
| Spongy or mushy lever | Air in hydraulic line or worn hose | Squeeze lever repeatedly; check for travel increase | Bleed system; replace hose if cracked |
| Shudder or vibration | Warped or contaminated rotor | Spin wheel and watch rotor for wobble | True or replace rotor; clean with isopropyl alcohol |
| Fading on long descent | Overheated pads or rotor | Check rotor colour after ride (blue tint = overheating) | Switch to sintered pads; consider larger rotor |
| Inconsistent feel | Cable stretch or housing compression | Check for slack in cable; compress housing by hand | Replace cable and housing |
Grabby brakes and spongy levers are the two most common complaints. Both are usually fixable at home. Persistent shudder that returns after rotor cleaning often means the rotor needs replacement, which varies in cost and is sometimes the correct fix for the problem rather than repeated cleaning.
For cold-weather or wet-condition braking issues specific to Canadian riding, the brake performance in cold weather guide covers setup adjustments for those conditions.
Key takeaways
Brake modulation is the single factor that separates controlled, confident braking from unpredictable stops, and most riders can improve it through simple checks and consistent practice.
| Point | Details |
|---|---|
| Modulation vs. power | A brake with high peak power but poor modulation is harder to control than a lower-power, well-modulated system. |
| Check the basics first | Lever reach, tyre pressure, and pad condition affect modulation before any major component change is needed. |
| Bed in new pads | Follow manufacturer bedding-in steps to achieve consistent pad transfer and stable feel. |
| Practice progressive stops | Repeated slope drills build the finger control that hardware alone cannot provide. |
| Know when to see a shop | Hydraulic bleeds, hose replacement, and caliper rebuilds are best handled professionally if you are not confident. |
The part most riders skip
Most brake-feel problems get blamed on hardware. A new set of pads, a rotor upgrade, a full bleed. Sometimes that is the right call. But the more common issue is that riders have never actually practised using the full range of their lever stroke.
A brake that feels grabby on a descent is often a rider squeezing too fast, not a brake that is technically defective. The drills in this guide are not beginner content. They are the same exercises that experienced riders use to recalibrate after a new brake installation or after a long off-season. The lever reach adjustment and the progressive slope drill together take about twenty minutes and cost nothing. For most riders, that is the correct starting point before spending money on components.
One habit worth keeping: before any ride with significant descending, squeeze each lever three times at a standstill and note the feel. Spongy? Investigate before you roll. Firm and consistent? You are ready. That thirty-second check catches most problems before they become a safety issue on the trail.
Useful sources for further reading
- Brake modulation explained, Velopedia — concise technical definition and modulation theory; good starting reference.
- How to improve brake modulation, BikeRadar — practical drills, technique guidance, and hardware tips from a major cycling authority.
- What is modulation and why does it matter, TRP Cycling — manufacturer perspective on modulation versus stopping power, with real-world examples.
- MTB braking basics, Trek — step-by-step braking exercises and safety reminders from a major bike brand.
- Bedding-in brake rotors and pads, AISIN — manufacturer bedding-in procedure for consistent pad transfer and stable modulation.
- Park Tool — authoritative workshop guides for brake bleeding, cable replacement, and pad service.
- Brake pedal feel guide — covers how rotors, pads, calipers, and fluid influence lever feel across brake systems.