
Brake pad clips are not optional. Replace them every time you change your pads. Skipping the hardware is one of the most common reasons a brake job comes back to the shop with noise, drag, or uneven wear. Here is what you need to know before you order parts:
- Clips keep pads aligned in the caliper bracket and provide a low-friction surface so pads slide cleanly
- Yahoo Autos confirms that clips reduce noise, vibration, and parasitic drag, and that modern spring-style clips can actively retract pads from the rotor after release
- Tire Review notes that heat cycles weaken clip springs over time, making clips a consumable item, not a reusable one
- Buy vehicle-specific clips or a full hardware kit when you order new pads; DBC Brakes carries brake kits for Canadian drivers with hardware matched to the pad set
Key takeaways
Brake pad clips are consumables that must be replaced with every pad change to prevent noise, drag, and bracket damage.
| Point | Details |
|---|---|
| Replace clips with every pad change | Heat cycles weaken spring tension; reusing old clips with new pads causes premature noise and drag. |
| Stainless clips for Canadian roads | Road salt corrodes standard steel clips quickly; specify stainless or coated hardware for any province that salts roads. |
| Confirm fitment before ordering | Use your VIN and OE part number to verify clip compatibility; asymmetric clips are not interchangeable left to right. |
| Clean bracket lands before installing | Wire-brush the caliper bracket channels and inspect for grooving; grooved lands prevent new clips from seating flat. |
| DBC Brakes for matched kits | DBC Brakes at CrossDrilledRotors.ca offers brake kits with hardware matched to the pad set and free shipping over $100 in Canada. |
Table of Contents
- What are brake pad clips and why do they affect braking performance?
- What types of brake pad clips are there and what are they made of?
- How do you choose the correct brake pad clips for your vehicle?
- How do you install brake pad clips correctly?
- What happens when brake clips are missing or broken?
- When should you replace clips and where do you buy them in Canada?
- Why skipping the hardware step costs more than the clips themselves
- DBC Brakes brake kits for Canadian drivers
- Sources
What are brake pad clips and why do they affect braking performance?
Brake pad clips sit between the pad ears and the caliper bracket rails. They are small stamped-metal parts, but they do several jobs at once. The primary role is alignment: clips hold each pad in the correct lateral position so it contacts the rotor face squarely. They also create a smooth, low-friction channel so the pad can slide in and out freely as the caliper piston extends and retracts.
The role of brake hardware kits goes beyond simple alignment. Without clips, the bare steel pad ear sits directly against the cast-iron bracket. That contact point corrodes quickly, especially in Canada where road salt is present for months at a time. Once the channel corrodes, pads bind, drag against the rotor, and wear unevenly.
Modern clip designs add a spring feature that pushes the pad slightly away from the rotor after the piston releases. According to Yahoo Autos, this active retraction reduces parasitic drag and can improve fuel economy compared with older flat clips. The difference is measurable on vehicles that spend a lot of time in stop-and-go traffic.
Key point: Clips reduce brake noise, limit vibration, and prevent the pad from dragging on the rotor between stops. A worn or missing clip removes all three of those protections at once.
What types of brake pad clips are there and what are they made of?
Not every vehicle uses the same clip configuration. The four types you will encounter most often are:
- Abutment clips (also called retainer clips): the most common type; they wrap around the caliper bracket rail and form the channel the pad ear rides in
- Anti-rattle spring clips: flat or formed springs that press against the pad backing plate to eliminate vibration-induced noise
- Pad-separator or push-back clips: spring-loaded clips that actively push the pad away from the rotor on release; found on newer European and some Asian platforms
- Wear indicator or squealer clips: thin metal tabs attached to the pad that contact the rotor when the pad wears to minimum thickness, producing the familiar squeal
Material matters, particularly in Canada. Most quality clips are made from stainless steel or hardened spring steel. Stainless resists the pitting and surface rust that road salt causes. Hardened spring steel offers slightly more spring force but can corrode faster if the coating is damaged. For Canadian winters, stainless or coated clips are the better choice.
| Clip type | Location in assembly | Typical material | Primary function |
|---|---|---|---|
| Abutment clip | Caliper bracket rail | Stainless steel | Alignment and low-friction pad channel |
| Anti-rattle spring clip | Pad backing plate or bracket | Spring steel | Vibration damping, noise reduction |
| Pad-separator clip | Bracket rail, spring-loaded | Stainless steel | Active pad retraction, drag reduction |
| Wear indicator clip | Pad backing plate edge | Hardened steel | Audible wear warning |
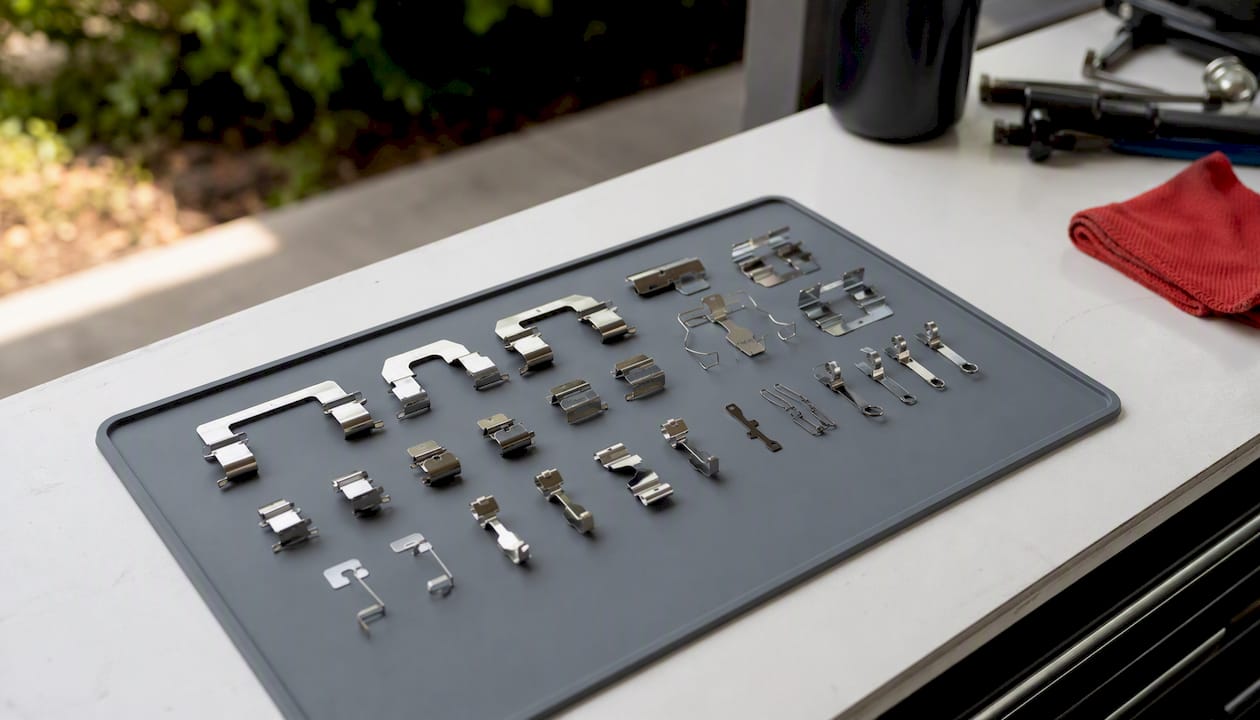
Not every vehicle uses all four types. A basic economy car may use only abutment clips and a wear indicator. A performance vehicle may use all four. Check the OE part documentation for your specific application before ordering.
How do you choose the correct brake pad clips for your vehicle?
Fitment is the only thing that matters when buying clips. A clip that is close but not exact will either bind the pad or allow too much lateral movement, and both outcomes cause problems.
Fitment checklist before you order:
- Locate your vehicle's VIN and have it ready; most Canadian parts suppliers use VIN lookup to confirm compatibility
- Note the OE part number from your existing clips or from the OEM parts catalogue (for example, Volkswagen lists abutment clip sets like 5WA698157B with full fitment data)
- Confirm left/right orientation if the clips are asymmetric; some brackets use handed clips
- Note whether your pads include a wear sensor or squealer clip, and match the hardware kit accordingly
- Confirm the pad model you are installing; aftermarket pads sometimes use slightly different ear geometry than OEM
OEM vs aftermarket: OEM clips guarantee an exact fit and are worth the premium when the vehicle is newer or when the bracket geometry is unusual. Aftermarket hardware kits from reputable suppliers are acceptable for most applications and often include the full set of clips, shims, and lubricant packets in one box. The trade-off is that you need to verify the part number carefully rather than relying on the OEM catalogue.
Buying formats: Individual clips work if you only need to replace one damaged piece. A full hardware kit is the better choice for a complete pad change because it covers all four corners and includes any shims or anti-squeal components the system needs. Pads-with-clips bundles simplify ordering but limit your choice of pad compound.
Pro Tip: In Canada, specify stainless steel clips when ordering. Coated spring-steel clips are acceptable, but check the coating description. A clip listed only as "steel" with no corrosion-resistance note will pit within one winter in most Canadian provinces. The brake kit compatibility guide covers fitment confirmation in more detail.
How do you install brake pad clips correctly?
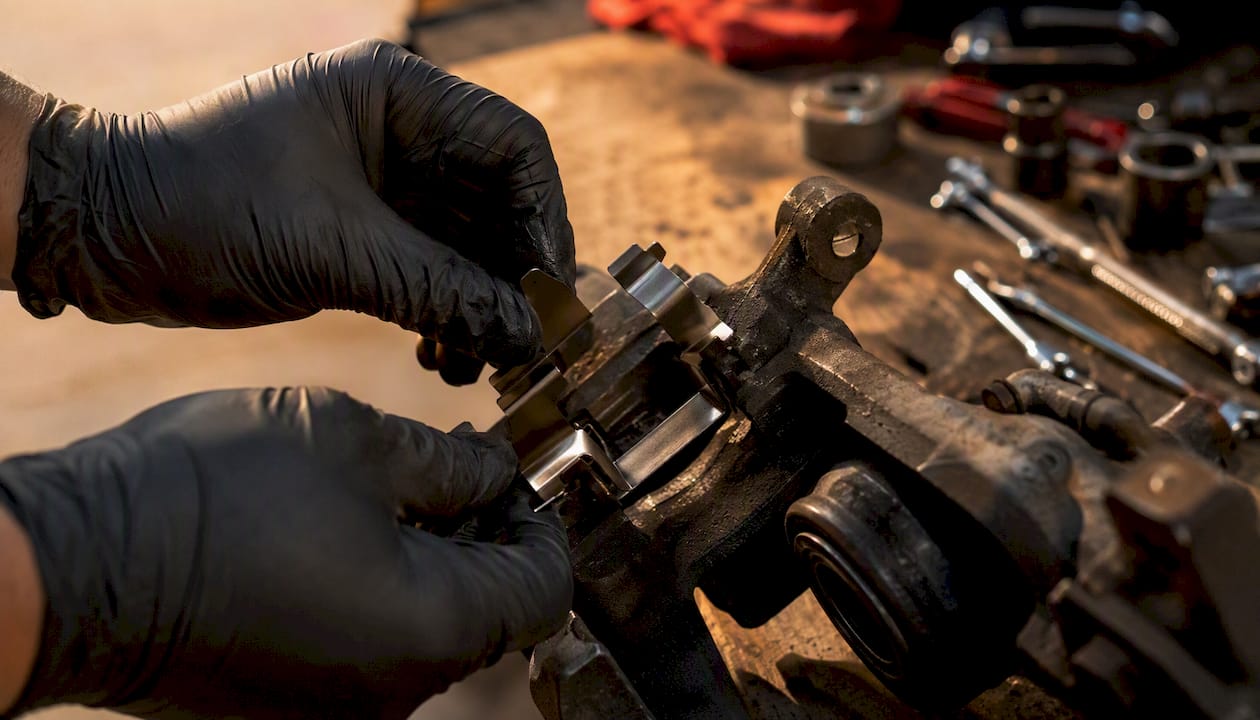
Clip installation takes about 15 minutes per axle when the caliper is already off, and following proper protective steps ensures the best results as explained in How Long To Leave Tape On New Windshield? - Speedy Windshield Repair - San Diego, CA. Do it right the first time and you avoid the most common causes of brake noise and comeback jobs.
Tools required:
- Socket set (typically 10 mm, 12 mm, 14 mm, and 17 mm for caliper and bracket bolts)
- C-clamp or dedicated piston retraction tool
- Wire brush (brass or steel) for cleaning bracket lands
- High-temperature brake lubricant (non-petroleum based)
- Torque wrench
- Gloves and eye protection
Step-by-step installation:
- Raise the vehicle on jack stands and chock the rear wheels. Never work under a vehicle supported only by a floor jack.
- Remove the wheel and set it aside.
- Loosen and remove the caliper slide bolts. Hang the caliper from the spring or a hook; do not let it hang by the brake hose.
- Remove the caliper bracket bolts and pull the bracket free. Set it on a clean surface.
- Remove the old clips from the bracket rails. Note the orientation before pulling them off; photograph them if needed.
- Use a wire brush to clean the bracket lands (the flat channels where the clip ears seat). Remove all rust, scale, and old lubricant. In Canadian vehicles, this step often takes longer than expected due to salt corrosion.
- Inspect the bracket lands for grooving. If the channel is visibly grooved from pad wear, the bracket needs resurfacing or replacement before new clips will seat flat.
- Apply a thin film of high-temp brake lubricant to the bracket lands only. Keep lubricant off the rotor face and pad friction material.
- Press the new clips into the bracket rails. They should seat firmly with hand pressure. Refer to CarsBibles' clip placement guide if you are unsure which way the clip faces; most abutment clips have a formed lip that hooks over the bracket edge.
- Slide the new pads into the clips. The pad ear should move smoothly with light finger pressure. If the pad feels tight, do not force it.
- Retract the caliper piston using a C-clamp or piston tool. Open the bleeder screw slightly while retracting if the system is sensitive to back-pressure.
- Reinstall the caliper bracket and torque the bracket bolts to the vehicle manufacturer's specification. Use a torque wrench; do not estimate.
- Reinstall the caliper and torque the slide bolts to spec.
- Reinstall the wheel and torque the lug nuts in a star pattern to the vehicle's specification.
- Pump the brake pedal firmly several times before moving the vehicle. The pedal should feel firm before you drive.
Pro Tip: If a pad feels tight in the clip channel, file the pad ears lightly with a flat file rather than forcing the pad in. Aftermarket pads are sometimes slightly oversized due to coatings. Forcing a tight pad causes binding and hot spots. A few strokes with a file solves the problem cleanly. See Yahoo Autos' brake clip explainer for more on pad-to-clip fit.
Torque reminder: Caliper bracket bolt torque varies by vehicle, typically in the range of 80–130 Nm for most passenger cars and light trucks. Always confirm the specification in your vehicle's service manual or a verified OEM source before tightening.
What happens when brake clips are missing or broken?
MaxBrakes documents the direct consequences of missing or corroded clips clearly. The pad loses its guided channel and begins to move laterally under braking load. That movement produces noise and accelerates wear in ways that are difficult to reverse without replacing both pads and hardware.
Common symptoms of clip problems:
- Rattling or clunking when driving over bumps, especially at low speed
- Squealing or grinding that persists even with new pads installed
- Brake drag: one wheel runs hotter than the others, the vehicle pulls to one side, or fuel economy drops noticeably
- Uneven pad wear: the inner pad wears faster than the outer, or one corner wears faster than the rest
- Hot rotor smell after normal driving, with no obvious cause
The mechanical damage compounds over time. A pad that cannot retract cleanly grinds a groove into the caliper bracket rail. Once that groove is deep enough, even new clips will not seat flat. At that point, the bracket needs to be replaced, which adds significant cost to what started as a simple pad change. The brake noise and performance trade-off article covers how noise symptoms relate to hardware condition in more detail.
Stop driving immediately if: the brake pedal feels soft or spongy, the vehicle pulls hard to one side under braking, or you hear grinding that does not stop after a few brake applications. Those symptoms suggest a problem beyond clips and require immediate inspection.
When should you replace clips and where do you buy them in Canada?
Replace clips every time you change pads. Industry expert Andrew Markel, writing in Tire Review, identifies neglected brake hardware as a leading cause of shop comebacks. Heat cycles weaken the spring tension in clips over the same service life as a set of pads, so reusing old clips with new pads gives you hardware that is already partially fatigued.
Canadian-specific considerations:
- Road salt accelerates clip corrosion significantly. Clips that look intact in October may be pitted and stiff by April.
- Inspect the caliper bracket lands every time you change pads. Grooves deeper than about 1 mm indicate bracket damage that new clips alone will not fix.
- Stainless or coated clips are worth the small price premium in any province that salts roads.
A full hardware kit for a single axle typically costs a modest amount at most Canadian parts suppliers, depending on the vehicle and whether shims are included. Kits that bundle clips with ceramic brake pads cost more but simplify the job. The brake parts worth splurging on guide covers when a premium kit makes financial sense over buying components separately.
Where to buy in Canada: DBC Brakes at Crossdrilledrotors offers brake kits with hardware matched to the pad set, with free shipping on orders over $100. Local auto parts stores carry individual clips for common applications, but fitment verification is your responsibility when buying off the shelf.
Pro Tip: Keep your old clips on the workbench as a shape reference while installing the new set. Do not reinstall them. Old clips are useful for confirming orientation and identifying whether the replacement matches the original geometry, nothing more.
Why skipping the hardware step costs more than the clips themselves
The shop comeback scenario is predictable. A driver replaces pads but reuses the original clips. Within a few months, the old clips lose their spring tension, the pads begin to rattle, and the vehicle returns to the shop. The second visit costs more than the first because the bracket lands are now grooved and the new pads are already unevenly worn.
Tire Review's industry guidance on this point is consistent: clips are consumables, not reusable hardware. The cost of a hardware kit is small relative to the cost of a repeat brake job. For Canadian drivers, the argument is even stronger because salt-season corrosion compresses the effective life of any clip that survives one winter already installed.
DBC Brakes builds kits with this in mind. Matching clips to the pad set at the point of purchase removes the guesswork about compatibility and ensures the hardware is fresh when the pads are fresh.
DBC Brakes brake kits for Canadian drivers
DBC Brakes at Crossdrilledrotors offers premium brake kits built for Canadian conditions. Kits include cross-drilled rotors engineered to resist warping, pads, and matched hardware, with inclusive pricing and no hidden fees.

Free shipping applies to orders over $100 within Canada. Support is handled by knowledgeable staff, not automated responses, so fitment questions get a real answer. For drivers replacing pads and clips at the same time, ordering a matched kit from DBC Brakes means the hardware is confirmed compatible before it ships. Check Crossdrilledrotors for your vehicle make and model to confirm availability and current pricing.
Sources
The following sources were used for claims in this article and are useful starting points for vehicle-specific fitment data and installation guidance:
- What Is The Clip On A Brake Pad For? — Yahoo Autos
- 7 brake hardware items, including abutment clips, shims - Tire Review
- 5WA698157B - Disc. kit. brake. abutment clip set. — Volkswagen parts
For vehicle-specific torque specifications, consult your OEM service manual or a verified source such as ALLDATA or Mitchell1. Do not rely on generic torque figures for caliper bracket bolts.