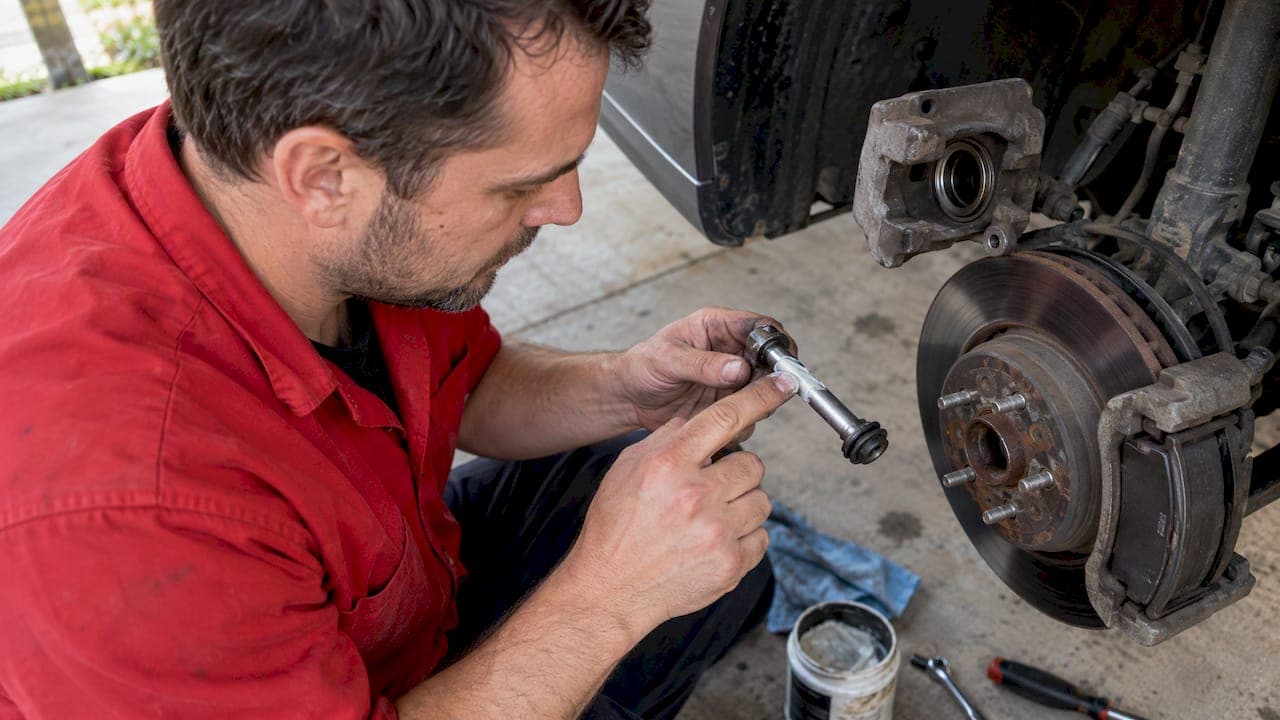
Brake grease goes on the metal contact points and rubber parts of the caliper. It never goes on the pad friction material or the rotor face. Use a thin film of high-temperature, rubber-safe lubricant on the slide pins, the pad ears where they sit in the clips, and the back of the shims. Clean every surface first. Wipe off any excess.
This guide covers each lube point, the correct grease type, the full application steps, and what clips, shims and chamfers do.
TL;DR
- Apply a thin film only to hardware contact points: slide pins, pad ears, bracket clips, shim backs.
- Keep grease off the pad face, the rotor and the piston edge that touches the rotor side of the pad.
- Use a silicone-based, rubber-safe grease on pins and boots. Use high-temperature paste on metal-to-metal abutment points.
- Do not use general-purpose lithium or graphite grease in a caliper.
- Replace clips and shims with new pads. Reuse is the common cause of noise and sticking.
Table of Contents
- What brake grease does
- Where to put brake grease
- Where brake grease must never go
- Which brake grease to use
- How to apply brake grease: step by step
- Brake clips: are they necessary
- Brake shims: purpose and when you need them
- Brake pad chamfers: do not grind them off
- Our view on brake grease
- Brake kits and pads with hardware from DBC
- Greasing brakes in a Canadian winter
- Common mistakes
- FAQ
- Sources
What brake grease does
A disc brake has parts that must move and parts that must stay still. Grease keeps the moving parts free and quiet.
The caliper slides on two pins. The pads slide a small distance in the bracket. Both movements happen under heat, water, road salt and brake dust. Without lubrication, parts seize or stick. A stuck pin can cause a pad to drag, wear unevenly or overheat.
Grease also damps vibration between metal parts. That reduces some squeal. AutoZone's brake lube page notes that brake lube minimizes squealing noises caused by parts vibrating or moving against each other.
Grease does not fix worn pads, glazed pads or a warped rotor. If the noise comes from those, see what brake pad wear tells you.
Where to put brake grease
The lube points sit in two groups: rubber-contact points and metal-to-metal points. Technician guidance on the AGS product page describes the same split: silicone for pins and boots, high-temperature paste for abutment points.
| Lube point | Grease | Amount |
|---|---|---|
| Caliper slide pins | Silicone-based, rubber-safe | Thin film over the full pin |
| Pin boots and bushings | Silicone-based, rubber-safe | Light coat on the inside |
| Pad ears (the tabs that sit in the bracket) | High-temperature paste | Thin film on the contact surface |
| Bracket abutment clips | High-temperature paste | Thin film where the ears slide |
| Back of the pad or shim (metal side only) | High-temperature paste | Thin film, if the pad maker allows it |
| Pad friction face | None | None |
| Rotor face | None | None |
Check the pad maker's instructions for the back plate. Some pads ship with shims that are not meant to be greased. Others call for paste between the shim and the caliper piston. Follow the sheet in the box.
Slide pins
Pull each pin. Wipe off old grease and dirt. Check for rust or grooves. Coat the clean pin with a thin film. Push it back in and slide it by hand. It should move with light resistance and no grit.
A pin that is bent, pitted or rusted needs replacing. Do not lube over damage.
Pad ears and bracket clips
The pad ears ride on the bracket or on stainless clips fitted to it. Clean the bracket where the clips sit. Fit the clips. Put a small amount of paste on the clip surface where the pad ear slides. The pad should slide in and out with a light push.
Too much paste runs and ends up on the pad or rotor. A thin film does the job.
Shim backs
Shims sit between the pad back plate and the caliper piston or caliper fingers. Some are rubber-coated steel. Some are bare steel. Where the pad maker allows grease, a thin film goes between the shim and the metal it touches. Never put it on the friction side.

Where brake grease must never go
Grease on the friction surface is a safety failure. It cuts braking force.
Transport Canada's technical standard for hydraulic brake systems (TSD No. 135) sets the performance requirements for vehicle brakes in Canada. Lubricant on a friction surface works against every one of them.
Keep grease off these points:
- The pad friction material.
- The rotor face and the rotor hat where the wheel seats.
- The side of the piston that presses on the pad, other than where the pad maker says to apply paste.
- The brake hose and the ABS sensor tip.
If grease lands on a rotor, clean it with brake cleaner until the surface is dry and clear. If grease lands on a pad face, replace the pad. The friction material absorbs it and cleaning does not remove it.
Which brake grease to use
The wrong grease fails fast. Two things matter: temperature and rubber compatibility.
Temperature
Caliper temperature can reach 300°C under hard driving, according to this caliper grease guide. The grease must withstand that without running or burning off.
Rubber compatibility
Pin boots and bushings are rubber. Mineral oil-based greases swell and degrade EPDM rubber, per the same guide. A swollen boot grabs the pin and the caliper sticks.
AGS lists its silicone lubricant at -29°C to 218°C, compatible with EPDM and nitrile rubber, for caliper pins, boots and hardware. Check the label of any grease you buy for a brake-specific rating and a rubber-safe statement.
Greases to avoid in a caliper
- General-purpose lithium grease.
- Graphite grease.
- Petroleum jelly.
- Engine oil or penetrating oil.
- Copper anti-seize on pins and boots. It is a metal-contact product and is not rated for rubber.
Industry guidance explicitly warns against standard graphite and general-purpose lithium greases in calipers. They cannot take the heat and they attack the dust boots.
A pin grease and a high-temperature paste are two different products. A single tube labelled for both rubber and metal contact is acceptable if the label says so.
How to apply brake grease: step by step
These steps cover one axle at a time. Work on one side, then the other, so the second side stays as a reference.
- Park and lift. Use level ground, wheel chocks and jack stands. Remove the wheel.
- Remove the caliper. Take out the caliper bolts. Hang the caliper from the suspension with a hook or wire. Do not let it hang on the brake hose.
- Remove the pads and old hardware. Note how each clip and shim sits. Take a photo.
- Clean the bracket. Use a wire brush on the clip seats. Remove rust and old grease. Spray with brake cleaner. Let it dry.
- Clean the pins and boots. Wipe the pins. Inspect the boots for tears. Replace torn boots.
- Fit new clips. Press them into the bracket until seated.
- Apply paste to clips. Put a thin film where the pad ears slide.
- Lube the pins. Apply a thin film of silicone grease. Reinstall.
- Prepare the pads. Fit the shims as the pad maker shows. Apply paste to the back only where allowed.
- Install the pads. Slide them in. They should move freely.
- Compress the piston and refit the caliper. Torque the bolts to the vehicle manufacturer's value.
- Wipe and check. Remove any grease from the rotor face with brake cleaner. Check that nothing touches the friction surface.
- Pump the pedal. Press it until it feels firm before moving the car.
- Bed in the pads. Follow the pad maker's bedding instructions.
Dust makes cleaning harder. Brake dust also marks wheels. For wheel cleaning after the job, this guide to removing brake dust safely covers dwell time and technique.
How much is enough
A thin, even film is enough. The grease should not form a blob, and it should not squeeze out when the part is installed. If it pushes out, wipe it off.
Brake clips: are they necessary
Yes, fit them. Anti-rattle clips hold the pad in position in the bracket. They stop the pad moving and clicking over bumps. They also give the pad ear a clean, smooth surface to slide on.
Clips wear. They lose spring tension, rust and bend. A pad on a tired clip can stick, rattle or wear unevenly.
Some manufacturers use drag reduction clips. These hold the pad slightly back from the rotor to cut drag. Raybestos publishes a technical bulletin on installing brakes with drag reduction clips. Check whether your vehicle uses them before you install the new pads. The orientation matters.
Rule: replace the hardware when you replace the pads. Pad kits that include a hardware kit make this simple. DBC carbon performance brake pads are listed with a hardware kit in the product names on the site.
Brake shims: purpose and when you need them
A shim is a thin layer, steel or rubber-coated steel, on the back of the pad. It does two things:
- It damps vibration between the pad and the piston or caliper.
- It reduces high-pitched squeal.
Do you need them? If the pad came with shims, or the vehicle had them, fit them. Leaving them out can bring back noise. Do not add shims the pad maker did not supply unless the pad or vehicle instructions call for it.
Shims wear and the rubber coating can peel. Replace them with the pads. Do not stack extra shims to cure a noise. That can change how the pad sits in the caliper.
If noise remains with new shims, check pad and rotor match, rotor runout and caliper movement. Our guide on matching pads and rotors to stop judder covers the 0.10 mm runout check.
Brake pad chamfers: do not grind them off
A chamfer is an angled cut on the leading and trailing edges of the pad friction material. Brake & Front End explains that chamfers control how the pad edge meets the rotor and help prevent noise.
Research from a dynamometer study of pad surface machining found chamfered pads tend to burnish quicker. The chamfer also helps brake gases and particles escape from the contact area.
Modern pads come with the chamfer angles set. Do not grind or file new pads unless the pad maker says so. Grease does not belong on the chamfer or any part of the friction material.
Our view on brake grease
We build brake kits, and most noise and sticking complaints we hear are not about the rotor or the pad. They are about the hardware.
Three habits cause most of them. People reuse old clips. People use the wrong grease on pins. People use too much grease and it reaches the friction surface.
We suggest treating hardware as part of the brake job, not an extra. Clean the bracket until it is bare metal. Fit new clips. Use a rubber-safe grease on pins. Use a thin film on metal contact points. Then check that the pad slides by hand.

Cross-drilled rotors are engineered to resist warping and wear well, but they do not remove the need for clean, lubricated hardware. A correct install protects the rotor and the pad. A stuck pin heats one side of the brake and shortens the life of both.
We also answer questions by person, not by script. If you are unsure which pad hardware fits your vehicle, ask before you order.
— Sam
Brake kits and pads with hardware from DBC
DBC is a Canadian manufacturer of brake kits with cross-drilled rotors. Browse brake kits, brake pads or brake rotors and select your vehicle. Pricing is inclusive, with no hidden fees. Orders over $100 ship free in Canada. Expedited shipping is $29.99 per order. See shipping information for details.
Greasing brakes in a Canadian winter
Road salt, slush and cold speed up corrosion on pins and clips. Seized hardware is a common reason for dragging brakes and uneven wear.
Transport Canada says the vehicle maker's maintenance schedule is the main authority for safe operation. It also advises regular brake inspections before winter at licensed facilities. A fall brake service is a good time to clean and re-lube the hardware.
Signs that hardware needs attention:
- One wheel is much hotter than the others after a drive.
- The car pulls to one side under braking.
- Pads wear unevenly, inner pad more than outer or the reverse.
- A clunk or rattle over bumps.
- A squeal that returns soon after a pad change.
For more on cold-weather braking, read brake performance in cold weather. If you do not have the tools or space for the job, a licensed shop can do it. See what to expect from brake shop services.
Common mistakes
- Too much grease. It migrates onto the pad and rotor.
- Wrong grease. Lithium and mineral-oil products damage boots.
- Skipping the cleaning. New grease over old dirt traps grit.
- Reusing clips. Worn clips stick or rattle.
- Greasing the friction face. Replace the pad and clean the rotor.
- Forgetting the pins. A seized pin ruins new pads.
- Ignoring torque specs. Use the vehicle maker's values.
FAQ
Can I use white lithium grease on brakes?
No. White lithium grease is a general-purpose product. It is not rated for caliper temperatures and it can damage rubber boots. Use a brake-specific, rubber-safe grease on pins and a high-temperature brake paste on metal contact points.
Can I use copper grease on caliper pins?
Not on the pins. Copper anti-seize is a high-temperature metal-contact product. Pins sit in rubber boots, and the boot needs a rubber-safe lubricant. Copper paste can be used on metal-to-metal abutment points if the label rates it for brakes.
Where do I put brake grease on the pads?
Only on the metal back plate where the pad maker allows it, and on the pad ears where they slide in the bracket clips. Never on the friction material. Keep the film thin and wipe off any excess.
Do I need new clips and shims with new pads?
Yes, in most cases. Clips lose tension and shims lose their coating. Fit the hardware supplied with the pads. If a pad kit has no hardware, buy a hardware kit for your vehicle.
Will grease stop all brake squeal?
No. Grease and shims damp vibration, but squeal also comes from glazed pads, worn pads, rotor wear and poor pad and rotor match. If squeal returns after a correct install, have the brakes inspected.
Sources
- Transport Canada, TSD No. 135 hydraulic brake systems
- Transport Canada, preparing your vehicle for winter
- AGS, Sil-Glyde silicone brake lubricant
- Brake caliper and guide pin grease
- Brake & Front End, brake pad chamfers, slots and shapes
- Brake pad surface machining and friction performance study
- AutoZone, brake grease and brake lube