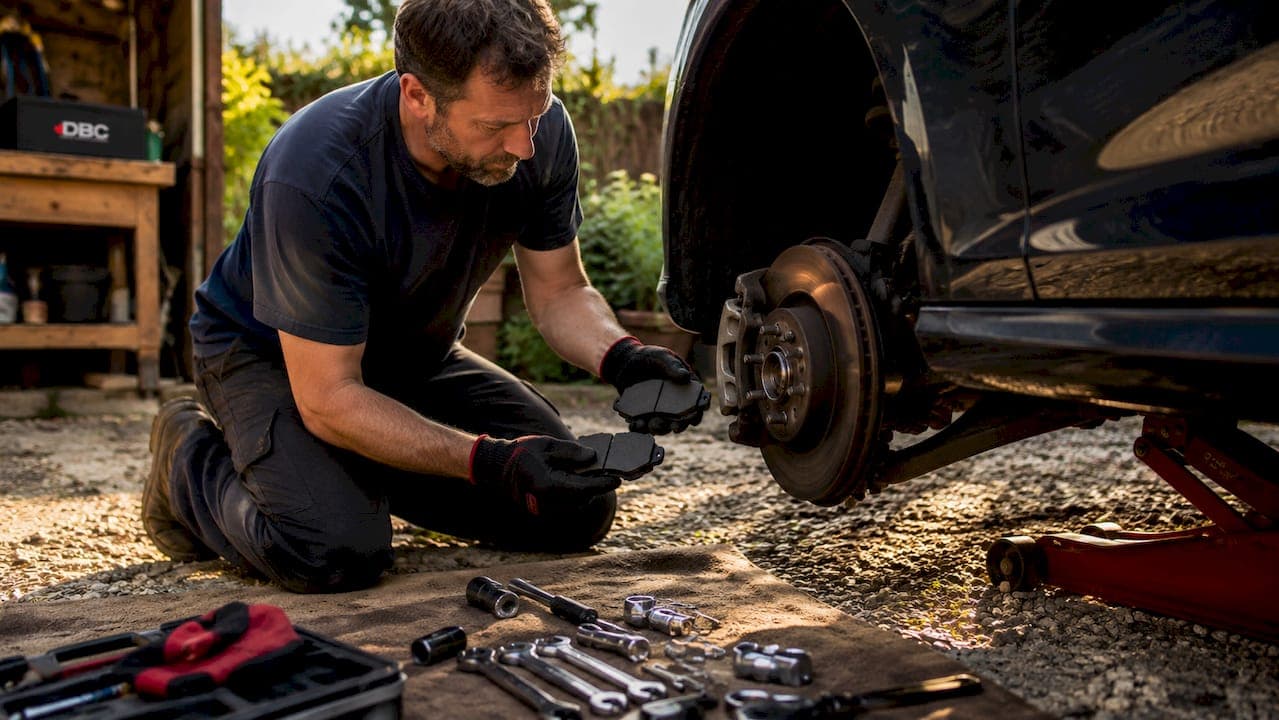
A brake system overhaul is defined as the full replacement and inspection of brake pads, rotors, callipers, hardware, and brake fluid to restore safe stopping performance. Weekend mechanics can complete this project in a single weekend with the right tools, parts, and a clear process. A full DIY overhaul takes experienced mechanics 4–6 hours, while first-timers should budget 6–8 hours total. That time investment pays off directly in braking confidence, reduced stopping distances, and longer component life. This guide covers every stage of the process, from tool selection to the final test drive, with diagnostic checks that most DIY articles skip entirely.
What tools and parts do you need for a brake overhaul?
Preparation determines whether your weekend car repair goes smoothly or stalls halfway through. Gather every tool and part before you lift the vehicle. Missing a single item mid-job means stopping, sourcing, and losing momentum.
Essential tools:
- Floor jack and two jack stands rated for your vehicle's weight
- Breaker bar and socket set (metric and imperial)
- Torque wrench (capable of at least 150 lb-ft)
- Caliper piston compressor or C-clamp
- Wire brush and hub cleaning tool
- Brake parts cleaner spray
- Rubber mallet
- Brake bleeder kit (one-person vacuum type or two-person pressure type)
- Safety glasses and nitrile gloves
Parts required:
- Brake pads (front and rear, matched to your driving style)
- Rotors (replace in axle pairs)
- Hardware kit (anti-rattle clips, caliper pins, shims)
- Brake fluid (DOT 3 or DOT 4 per your owner's manual; DOT 4 is preferred in Canadian climates due to its higher boiling point)
- Caliper slide pin grease (high-temperature rated)
| Item | Purpose | Estimated cost |
|---|---|---|
| Brake pads (axle set) | Friction material replacement | $40–$120 |
| Rotors (pair) | Braking surface replacement | $60–$200 |
| Hardware kit | Anti-rattle and pin replacement | $15–$40 |
| Brake fluid (500 ml) | System flush and refill | $10–$25 |
| Caliper piston compressor | Retracts piston safely | $20–$50 |
Pro Tip: Buy a complete brake kit rather than individual parts. Kits from Canadian suppliers like DBC Brakes include matched rotors, pads, and hardware, which removes the guesswork of compatibility and saves multiple shipping orders.
Torque specs vary by over 70 lb-ft between bolt types on the same vehicle. Print your vehicle's torque specifications before you start. Guessing torque values risks stripped threads and uneven clamping force.
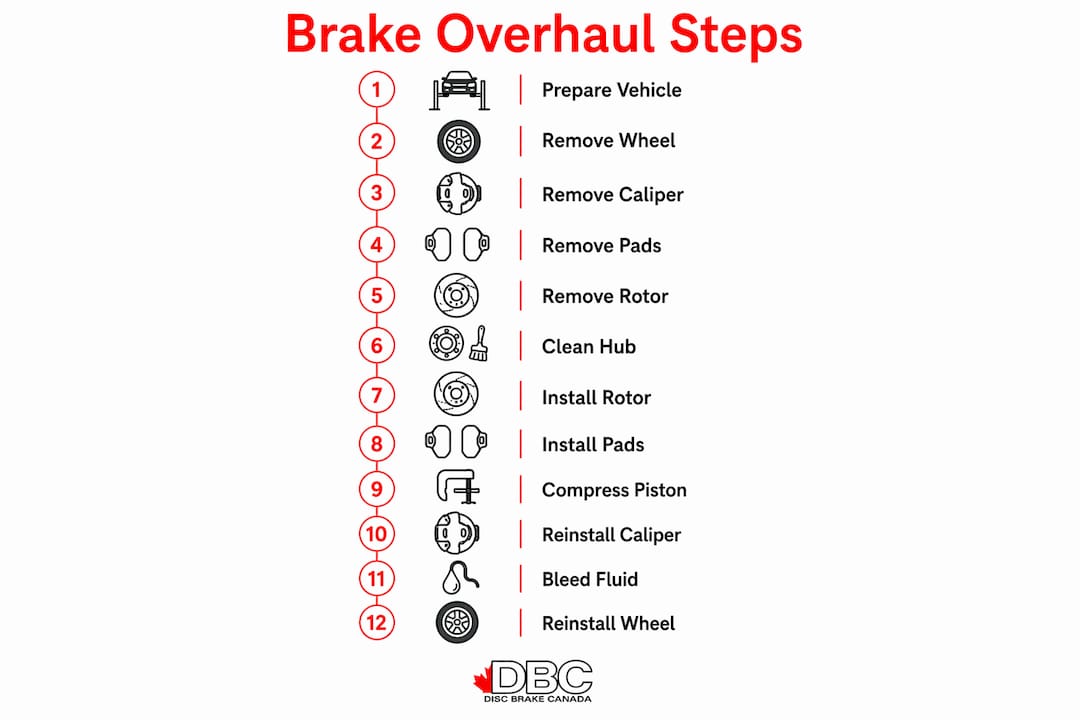
How to perform a full brake system overhaul step by step
This is the core of any weekend brake project. Follow the steps in order. Skipping or reordering steps is the most common cause of DIY brake failures.
Step 1: Prepare the vehicle
Park on a flat, solid surface. Loosen the wheel lug nuts one turn before jacking. Raise the vehicle with a floor jack, then place jack stands under the manufacturer-specified lift points. Never work under a vehicle supported only by a floor jack.
Step 2: Remove the wheel and inspect
Remove the lug nuts fully and pull the wheel. Before touching any brake component, look at the existing pads through the caliper. Brake pads below 3 mm of friction material require immediate replacement. New pads measure 10–12 mm, so anything below 3 mm signals you are well past the service window.
Step 3: Remove the caliper
Locate the two caliper slide bolts at the back of the caliper. Remove them and slide the caliper off the rotor. Do not let the caliper hang by the brake hose. Use a wire or bungee cord to support it from the spring or strut. A hanging caliper stresses the hydraulic hose and can cause internal cracking.
Step 4: Remove the brake pads and hardware
Slide the old pads out of the caliper bracket. Remove the anti-rattle clips and shims. Discard all old hardware. Reusing worn clips is a common mistake that causes brake noise and uneven pad wear within months.
Step 5: Remove the rotor
The rotor usually slides off the hub once the caliper and bracket are removed. If it is stuck, thread two lug nuts into the rotor's threaded holes (if present) and tighten evenly to push it off. Never hammer directly on the rotor face.
Step 6: Clean the hub face
This step is skipped more often than any other, and it causes the most callbacks. Rust and debris on the hub face cause lateral runout, which produces vibration that feels exactly like a warped rotor. Use a wire brush to clean the entire hub surface until bare metal is visible. A flat file removes stubborn high spots.
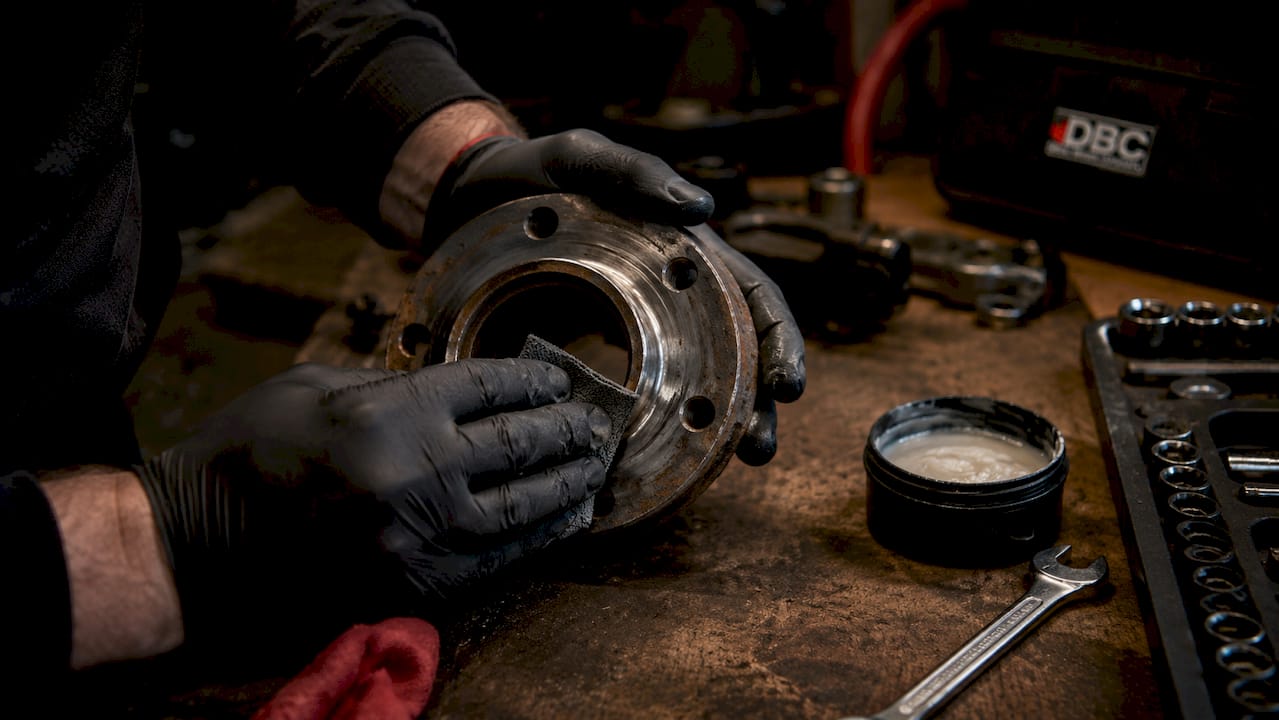
Pro Tip: Run your finger across the cleaned hub. If you feel any ridge or rough patch, keep cleaning. The rotor must sit perfectly flat against the hub.
Step 7: Install the new rotor
Slide the new rotor onto the hub. Thread one lug nut finger-tight to hold it in place while you work. Do not use anti-seize on the rotor hat contact surface. It changes the clamping torque and can allow micro-movement.
Step 8: Install new hardware and pads
Press the new anti-rattle clips into the caliper bracket. Apply a thin layer of caliper slide pin grease to the slide pin bores, not the pins themselves. Insert the new pads into the bracket with the friction material facing the rotor.
Step 9: Compress the caliper piston
Use a caliper piston compressor to push the piston fully back into the caliper bore. Watch the brake fluid reservoir as you do this. Fluid will be pushed back up the line. Remove some fluid from the reservoir first if it is near the full mark, to prevent overflow.
Step 10: Reinstall the caliper
Slide the caliper over the new pads and rotor. Thread the slide bolts in by hand first, then torque them to spec. Torque specs differ significantly between caliper bracket bolts and slide pin bolts on the same vehicle. Use the correct spec for each.
Step 11: Flush and bleed the brake fluid
Brake fluid absorbs moisture over time, which lowers its boiling point and risks brake fade under hard use. A full system flush is required every two years regardless of mileage. Start bleeding at the wheel farthest from the master cylinder (typically the right rear), then move to the left rear, right front, and left front. Bleed until clean, bubble-free fluid flows from each bleeder screw. For detailed technique, the brake bleeding process follows a specific sequence that prevents air pockets from forming.
Step 12: Reinstall the wheel and torque lug nuts
Mount the wheel and thread lug nuts by hand. Lower the vehicle until the tyre contacts the ground but does not bear full weight. Torque the lug nuts in a star pattern to the manufacturer's specification. Lower the vehicle fully and re-torque.
How to diagnose brake issues during your overhaul
Replacing parts without diagnosing the system is the single most expensive mistake a DIY mechanic makes. ASE-certified technicians confirm that simply swapping pads without a proper mechanical assessment leads to early failure within months. Treat the overhaul as a diagnostic process first.
Check these items on every overhaul:
- Caliper piston movement: Push the piston in and out slightly. Stiff or seized pistons cause dragging brakes and uneven pad wear.
- Slide pin condition: Pins should move freely by hand. Corroded or dry pins cause one-sided pad wear and pulling under braking.
- Hydraulic hose condition: Squeeze the rubber hose near each caliper. Cracks, bulges, or soft spots indicate internal deterioration. A collapsed hose acts as a one-way valve and causes a dragging brake.
- Pad wear pattern: Uneven wear across the pad face points to a sticking piston. Taper wear from front to back points to a sticking slide pin.
- Rotor surface: Score marks deeper than 1.5 mm require rotor replacement, not just pad replacement.
A thorough brake inspection covers visual checks, mechanical tests, and measurements of every component, including the parking brake system. Catching a sticking caliper or a degraded hose during an overhaul costs a fraction of what it costs after a brake failure on the road.
Understanding brake component quality also matters here. Low-quality rotors and pads accelerate the exact wear patterns described above, which means more frequent overhauls and higher long-term costs.
How to bed in new brakes and confirm they are safe
Bedding in new brakes is not optional. Skipping the bedding process causes uneven pad material deposits on the rotor surface, which produces vibration and inconsistent braking feel regardless of part quality. The bedding process transfers a thin, even layer of pad material onto the rotor face, which is what actually does the braking.
Standard bedding-in routine:
- Drive at low speed (approximately 50 km/h) and apply moderate brake pressure to slow to 10 km/h. Do not stop completely. Repeat 6–8 times.
- Allow brakes to cool for 5–10 minutes without stopping. Do not apply the parking brake during this cooling period.
- Perform 3–4 harder stops from 80 km/h to 20 km/h with firm, steady pedal pressure.
- Allow a full 10-minute cool-down before normal driving.
Pro Tip: Perform the bedding routine in a quiet industrial area or empty car park. You need consistent, uninterrupted runs without traffic stops. Stopping fully during the heat cycle deposits a pad print on the rotor, which causes the vibration you were trying to avoid.
After bedding, check these items before returning the vehicle to regular use:
- Pedal firmness: the pedal should feel solid within the first inch of travel
- No pulling to one side under braking
- No grinding, squealing, or vibration at highway speeds
- Brake fluid level in the reservoir is within the normal range
For ongoing brake fluid safety, schedule a fluid check every 12 months and a full flush every two years. Moisture contamination is invisible to the eye but measurable with an inexpensive brake fluid tester.
Key takeaways
A complete brake system overhaul requires proper diagnosis, correct torque application, hub cleaning, and a full bedding-in routine to deliver safe and lasting results.
| Point | Details |
|---|---|
| Budget the right time | First-timers need 6–8 hours; experienced mechanics average 4–6 hours for a full overhaul. |
| Diagnose before replacing | Check caliper pistons, slide pins, and hoses before installing new parts to prevent early failure. |
| Clean the hub face | Rust on the hub causes lateral runout and vibration that mimics a warped rotor. |
| Flush the brake fluid | Flush every two years regardless of mileage; moisture lowers boiling point and causes brake fade. |
| Always bed in new brakes | Skipping the bedding process causes uneven pad deposits and vibration from the first drive. |
What I've learned from doing this the hard way
The first time I tackled a full brake overhaul, I treated it like a parts swap. New pads, new rotors, done. The car vibrated under braking within three weeks. The problem was not the parts. It was a corroded slide pin I had not checked and a hub face I had wire-brushed for about 30 seconds instead of properly cleaning. Both issues were invisible until the symptoms showed up on the road.
The diagnostic mindset is what separates a mechanic from someone who just changes parts. Before you order anything, pump the brake pedal and feel for sponginess. Pull the wheels and push each caliper piston by hand. Check the hoses. Look at the wear pattern on the old pads. That five-minute inspection tells you more about the system's health than any parts catalogue.
Patience matters more than speed on this project. Rushing the hub cleaning, skipping the torque wrench, or cutting the bedding-in short all create problems that take longer to fix than the time you saved. A weekend is enough time to do this properly. Give yourself the full two days, not one long afternoon.
The other thing worth saying: a complete brake kit that includes matched rotors, pads, and hardware removes a significant source of error. Mixing parts from different sources introduces compatibility variables that are hard to diagnose when something goes wrong. One kit, one system, one outcome.
— Sam
Canadian brake kits for your weekend overhaul
Weekend mechanics doing a full brake overhaul need parts that are matched, ready to install, and built for Canadian road conditions.

DBC Brakes supplies complete brake kits for a wide range of vehicles, including cross-drilled rotors engineered to resist warping under repeated heat cycles. Kits include matched pads, rotors, and hardware, so everything arrives together and fits correctly. Free shipping applies on orders over $100. There are no hidden fees at checkout. For mechanics who want to confirm fitment before ordering, the DBC Brakes catalogue is searchable by vehicle make, model, and year. If you drive a Volkswagen Fastback, vehicle-specific brake kits are listed with full fitment details.
FAQ
How long does a full brake overhaul take?
Experienced mechanics complete a full overhaul in 4–6 hours. First-time DIY mechanics should budget 6–8 hours to work safely without rushing.
When should brake pads be replaced?
Replace brake pads when friction material measures below 3 mm. New pads start at 10–12 mm, so 3 mm represents significant wear.
How often should brake fluid be flushed?
Flush brake fluid every two years regardless of mileage. Brake fluid absorbs moisture over time, which lowers its boiling point and increases the risk of brake fade.
Why do new brakes vibrate after installation?
Vibration after a brake job is almost always caused by skipping the bedding-in process or leaving rust on the hub face. Both issues cause uneven contact between the pad and rotor surface.
Do I need a torque wrench for a DIY brake job?
A torque wrench is required, not optional. Torque specifications differ by over 70 lb-ft between bolt types on the same vehicle, and guessing risks stripped threads or unsafe clamping force.