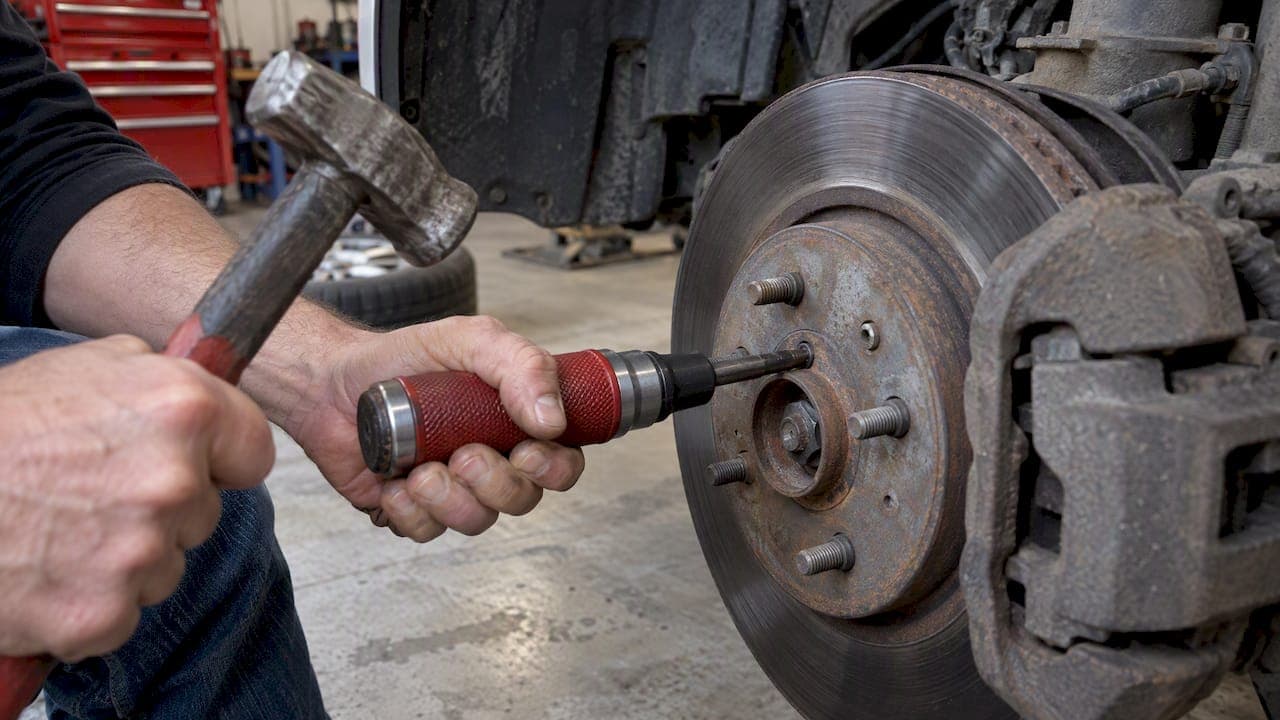
A rotor set screw comes out in five escalating steps: clean the recess, soak it in penetrating oil, seat a correctly fitting bit, strike it with a manual impact driver, and drill the head off if the head strips. The screw is a small factory fastener. It is usually the last thing holding a rotor on the hub, and it is often rusted solid.
This guide covers each step in order, the tools needed, and what to do when the screw is stripped. It also covers whether the screw has to go back in. Short answer: it does not.
TL;DR
- Clean the screw head and soak it in penetrating oil for 15 to 30 minutes before any attempt.
- Use a manual (hammer-struck) impact driver with a bit that fits the head exactly. Many Japanese-make screws are JIS, not Phillips.
- If the head strips, stop. Use a screw extractor, or drill the head off and remove the shank with locking pliers.
- The screw is an assembly-line aid. Once the wheel is torqued on, the lug nuts hold the rotor.
- Clean the hub and apply anti-seize before fitting new rotors so the next job goes easier.
Table of Contents
- What the rotor set screw does
- Before starting: safety and setup
- Tools to gather
- Step 1: clean the recess
- Step 2: soak with penetrating oil
- Step 3: match the bit to the head
- Step 4: use a manual impact driver
- Step 5: if the head strips, stop turning
- When the rotor will not come off after the screw is out
- Does the screw go back in?
- Prepare the hub so the next job is easier
- Perspective: why this small screw causes so much trouble
- Replacing the rotors: DBC brake kits
- Quick troubleshooting chart
- FAQ
- Sources
What the rotor set screw does
The set screw is a small countersunk screw, often a Phillips-style or JIS head, that sits in the rotor hat next to a stud. It is also called a rotor retaining screw or rotor locating screw.
Its job is on the assembly line. According to Tomorrow's Technician, it holds the disc flush to the hub so the brake assembly can be installed as a unit. After the wheel is bolted on, the clamping force of the lug nuts keeps the rotor in place.
The screw sits against bare steel and road salt. In Canadian winters, that means corrosion. The screw, the rotor hat and the hub bond together, and the small head strips before the bond breaks.

Before starting: safety and setup
The rotor sits behind the wheel, so the vehicle has to be lifted first.
- Park on level, solid ground. Set the parking brake on the axle that stays on the ground and chock the wheels.
- Lift with a jack. Support the vehicle on rated jack stands. Never work under or beside a vehicle held by a floor jack alone.
- Remove the wheel.
- Remove the caliper and the caliper bracket if the bracket covers the rotor edge. Hang the caliper from the spring or a wire. Do not let it dangle from the brake hose.
If the vehicle is a pickup or SUV with a heavy hub assembly, have a second person or a floor jack under the lower control arm for support while working.
Tools to gather
| Tool | Purpose |
|---|---|
| Wire brush and brake cleaner | Remove rust and dirt from the screw head and recess |
| Penetrating oil | Dissolve rust in the threads |
| Manual impact driver | Convert a hammer strike into torque and seat the bit |
| Matching bits | Phillips #2 or #3, or JIS, to suit the head |
| Hand hammer | Strike the driver |
| Screw extractor set | Remove a damaged head |
| Drill and bits | Final-resort head removal |
| Locking pliers | Remove the shank after the head is off |
| Anti-seize | Prevent the next seizure |
Step 1: clean the recess
Rust and brake dust fill the screw recess. A bit cannot seat in a packed recess, and a partly seated bit strips the head.
Brush the head with a wire brush. Pick out the recess with a small pick or a sharp nail. Spray brake cleaner and wipe.
This takes two minutes. It prevents the most common failure.
Step 2: soak with penetrating oil
Spray penetrating oil on the screw and around the edge of the head. Gear Arena recommends soaking for at least 15 to 30 minutes so the fluid creeps into the threads. Penetrating oil is a solvent that attacks oxidized metal. It is not a lubricant.
For a rotor that has not moved in years, reapply the oil once or twice during the soak. A few light taps on the rotor hat with a hammer can also help the oil travel.
More detail on timing is in our article on soaking a stripped rotor screw before drilling.
Step 3: match the bit to the head
Many rotor screws look like Phillips screws. Many are not.
Owners on a Honda forum thread point out that Honda screws, like most fasteners on those vehicles, use a JIS head. A Phillips bit fits loosely in a JIS recess and cams out. The same thread notes that a #3 JIS driver is the correct size, and that some owners grind the tip of a Phillips impact bit to fit.
A BimmerFest DIY write-up says the screw in most Japanese and European cars is the 6 mm type.
Test the fit before striking. The bit should sit fully in the recess with almost no play. If it wobbles, try another size or a JIS bit.

Step 4: use a manual impact driver
A hand-held impact driver is the first tool to use on a stuck rotor screw. The Tool Trunk explains that when it is struck with a hammer, the tool turns the downward force into torque. That breaks the rust bond while pushing the bit into the head.
Steps:
- Set the driver to the loosen direction (counter-clockwise).
- Seat the bit in the recess.
- Push down hard with one hand.
- Strike the end of the driver with a hammer. Use firm, square blows.
- Repeat. Several strikes are normal.
Air-powered impact guns are a poor first choice. The same source notes that air tools often strip small screw heads too quickly. A manual driver gives more control.
The EricTheCarGuy video guide covers a hammer-based method as well. He notes that some people disagree with the method he uses. If the strike method does not suit the screw, move to the next step.
Step 5: if the head strips, stop turning
Repeated attempts with the same driver make the damage worse. When the recess is round, change the method.
Option A: screw extractor
A screw extractor bites into a damaged head and turns it out. Gear Arena names the Irwin Hanson EX-3 and consumer kits such as SpeedOut as the preferred alternative to further damaging the screw or the rotor metal.
- Drill a shallow pilot hole in the centre of the head.
- Insert the extractor.
- Turn it counter-clockwise with a wrench, steadily and without jerking.
Option B: drill the head off
Drilling is the last resort, and it works. The BimmerFest procedure is to drill the head off completely with a bit slightly larger than the shank. Once the head is gone, the rotor slides off the hub. The remaining shank has no tension on it, so it comes out with locking pliers or by hand.
A forum user in a 2023 thread suggests the same approach. Keep the bit centred, drill only until the head separates, and avoid cutting into the hub.
The rotor and the screw are both being replaced in most jobs. That makes this option low-risk for the rotor. Protect the hub face and the threaded hole.
Option C: remove the rotor with the shank in place
If the head snapped off, the rotor may still come off the hub once rust bonds on the hub face are broken. Spray oil around the hub pilot and tap the rotor hat from behind with a hammer, rotating between strikes. Then treat the remaining stud with penetrating oil and remove it.
When the rotor will not come off after the screw is out
A removed screw does not always free the rotor. Rust on the hub pilot can hold the rotor on.
Steps from the Tool Trunk guide include releasing the parking brake, removing the caliper and carrier, and scrubbing the hub area before pulling the rotor.
Additional steps:
- Spray oil around the centre hub and the wheel studs.
- Strike the rotor hat face between the studs with a hammer or dead-blow mallet.
- Rotate the rotor a quarter turn and strike again.
- Never hit the friction surface of a rotor you plan to reuse.
For surface rust questions, see brake rotor rust for DIY drivers and how a 15 to 30 minute soak frees stuck rotors.
Does the screw go back in?
No. In most cases it stays out.
Tomorrow's Technician reports that technicians often skip reinstalling the retaining screw. The rotor stays square and secure once the lug nuts are torqued to specification. Retaining screws are often left out of later brake services because they seize and add no function once the wheel is on.
Two cases where a screw may still be fitted:
- The rotor is being held for storage or shipping before the wheel goes on.
- The vehicle manufacturer's service procedure calls for it. Check the service manual.
If a new screw is installed, coat it with anti-seize and use a new screw, not the old one.
Prepare the hub so the next job is easier
The step that matters most happens after the old rotor is off.
The Tool Trunk names impatience as the most common mistake. Mechanics clean the hub of rust and surface corrosion at every brake service. Doing so prevents the next rotor from sticking.
Hub preparation:
- Scrape and wire-brush the hub face and pilot until bare metal shows.
- Wipe with brake cleaner.
- Apply a thin film of anti-seize to the hub pilot. Keep it off the hub face where the rotor seats, and off the friction surfaces.
- Fit the new rotor and torque the lug nuts to the manufacturer's specification in a star pattern.
Surface preparation also appears in this guide on when to change tires and brake pads, which is useful when judging whether a brake job is due.
A worn wheel bearing or hub can also affect rotor seating. DBC lists wheel bearings alongside rotors and pads, so the parts can be ordered together.
Perspective: why this small screw causes so much trouble
We see the same pattern in rotor jobs. The screw is the cheapest part on the brake assembly and often the slowest part to remove.
Our view is practical:
- The screw is not structural. Do not let it turn a one-hour job into a weekend.
- Drilling the head off is acceptable when the rotor is being replaced. The rotor is a throw-away at that point.
- Fitment and hub condition matter more than the screw. A clean hub and a correctly fitted rotor give a smooth brake feel.
- Rust is the cause, not poor workmanship. Road salt does this to every vehicle in Canada.
DBC is a Canadian manufacturer of brake kits and cross-drilled rotors. We build for Canadian conditions, and our support team answers by phone and email without automated replies. If a fitment question comes up during a rotor swap, ask us before ordering.
— Sam
Replacing the rotors: DBC brake kits
When the old rotor is off, the next step is the replacement. DBC sells brake kits, brake rotors and brake pads with cross-drilled rotors engineered to resist warping. Pricing is inclusive, with no hidden fees. Orders over $100 ship free in Canada. Expedited shipping is $29.99 per order, as listed on the shipping information page.
Select the vehicle make, model and year on the DBC site to see matching kits. For heavier use, see brake rotors for towing. For a wider overview, read the Canadian driver's guide to brakes and rotors.
Quick troubleshooting chart
| Problem | Likely cause | Action |
|---|---|---|
| Bit slips in the recess | Wrong type or size, packed recess | Clean the recess, try JIS or a larger size |
| Head turns but screw does not move | Rust in threads | Soak again, use the manual impact driver |
| Head is round | Stripped | Extractor, or drill the head off |
| Head snapped off | Seized thread | Remove the rotor, then oil and remove the shank |
| Rotor stays on after the screw is out | Hub rust | Oil the pilot, strike the hat between studs |
| New screw seizes next time | No anti-seize | Leave the screw out or coat it |
FAQ
How do I take out a stuck rotor screw?
Clean the recess, soak the screw in penetrating oil for 15 to 30 minutes, and seat a bit that fits exactly. Strike a manual impact driver with a hammer. If the head strips, use a screw extractor or drill the head off.
Why is my screw not unscrewing?
The usual causes are rust in the threads and a bit that does not fit. Many Japanese-make screws are JIS, not Phillips, and a Phillips bit cams out. Clean, soak and use the correct bit before adding force.
Do I need to put rotor screws back in?
No. The screw only holds the rotor during factory assembly. The lug nuts hold it once the wheel is torqued to specification. Check your vehicle's service manual if you want to confirm.
Will vinegar loosen a screw?
Vinegar is a mild acid and can soften surface rust, but it works slowly and can leave residue on brake parts. A penetrating oil made for rust is the better choice. Clean any oil off the rotor friction surfaces and hub face with brake cleaner before reassembly.
Sources
- Brake Rotor Won't Come Off | The Tool Trunk
- How We Removed a Stuck Honda Rotor Screw | Gear Arena
- Do I Need That Rotor Screw? | Tomorrow's Technician
- DIY: How to remove stuck rotor screw in any car | BimmerFest
- The infamous Honda rotor screw, drilling out? | DriveAccord
- Removing Rotor Screws | EricTheCarGuy