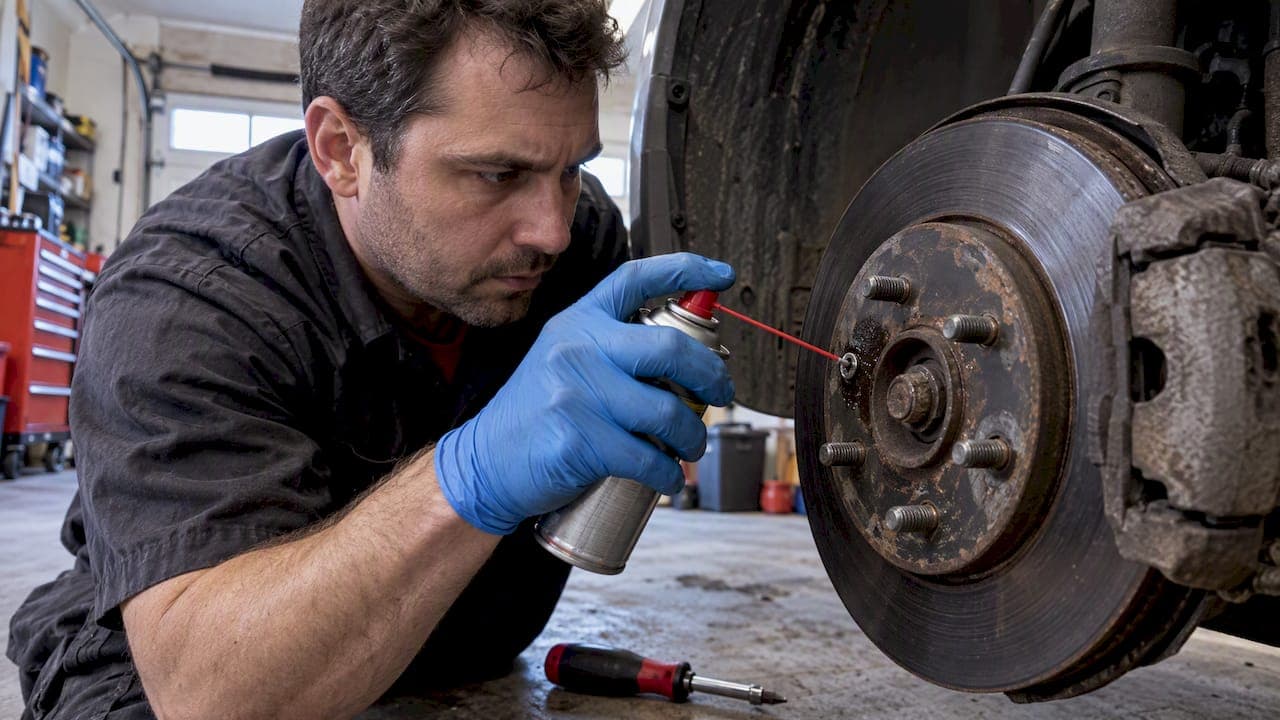
Yes, most stripped rotor set screws can be removed. Start with penetrating oil and a manual impact driver, then escalate only if needed. Replacement becomes the practical choice if the rotor or hub ends up damaged during the attempt. For most cars and trucks, the screw comes free before any cutting or drilling is required.
TL;DR:
- Let penetrating oil soak for at least 15 to 30 minutes, preferably several hours or overnight, then try a matching bit before escalating.
- Cut a fresh slot only when enough flat head metal remains; use an extractor when the head is too damaged but the shaft remains drillable.
- Stop if an extractor slips or breaks, because its hardened steel resists drilling; continued force can turn a removable screw into a larger repair.
- Drill the head off only after other methods fail, then inspect the hub threads and rotor for damage; replace a cracked, deeply scored, or warped disc.
- The screw mainly holds the rotor during assembly; torqued lug bolts retain it in use, while anti seize and correct torque help prevent seizure.
Table of Contents
- Tools, consumables and safety equipment to gather first
- Preparing the vehicle and the screw for safe removal
- Letting penetrating oil do the first work
- Using a manual impact driver the right way
- Cutting a new slot with a rotary tool
- Drilling and extracting with a screw extractor
- Drilling the head off as a last resort
- Cleaning up and reinstalling correctly
- Preventing the next stripped screw
- When to stop and call a professional
- Why this guide holds up
- A technician's view on when to stop fighting a screw
- If the rotor needs replacing, here's where that fits
- FAQ
- Sources
Tools, consumables and safety equipment to gather first
Before touching the screw, line up the full kit. Having every option on hand prevents a stalled job and reduces the chance of forcing a tool that is not suited to the task.
- Penetrating oil, a manual impact driver with matching bits, and a hammer or striker.
- A drill with a graduated bit set and a screw extractor kit sized to the fastener.
- A rotary tool or Dremel with a cutting wheel, a centre punch, and locking pliers or vise grips.
- A punch or drift, a torque wrench, jack stands, and wheel chocks.
- Anti-seize, thread-cleaning tools, brake cleaner, and clean rags.
- Eye protection and gloves, plus a secure way to support the vehicle.
Set the vehicle on jack stands, chock the wheels, and remove the wheel and caliper before starting. Working on a stable, supported vehicle keeps both the job and the person doing it safer.
Pro Tip: Lay every tool out before you start so you are not searching for a bit mid-job with oil-soaked fingers.
Preparing the vehicle and the screw for safe removal
A few minutes of prep saves a lot of frustration later. Work through these steps in order.
- Secure the vehicle on jack stands, remove the wheel, and take off the caliper and bracket to expose the rotor face.
- Stabilize the rotor so it cannot spin while you work on the screw.
- Brush or scrape rust and debris away from the screw head and the surrounding surface.
- Apply penetrating oil and, if a bit will be used, set a light centre punch mark to keep it from wandering.
- Keep drill speed low and pause periodically to avoid overheating the cast iron rotor.
Cast iron holds heat, and a bit run too fast will dull quickly and glaze the hole instead of cutting it.
Letting penetrating oil do the first work
Patience solves more stripped screws than force does. A quality penetrating oil needs at least 15 to 30 minutes to begin breaking down rust and corrosion, and several hours or overnight soaking gives it a better chance of reaching deep into the threads.
Apply the oil directly to the screw head and the gap where the shaft meets the rotor hub. A light tap with a hammer after application helps work the fluid into the threads by vibration. Reapply every few hours if the job stretches over a day, and try the screw again after each soak rather than waiting for one long session to do everything.

Once the oil has had time to work, fit a driver bit that matches the head exactly and attempt a firm, steady turn before reaching for anything louder. Many screws let go at this stage without further tools.
Using a manual impact driver the right way
A struck impact driver is the tool most likely to free a stubborn rotor screw once oil alone has not done it. Its rapid, high-torque strike breaks the corrosion bond between the screw and the hub far more effectively than steady hand pressure, which tends to ride up and round the head instead of turning it, according to Family Handyman.
- Select a bit that fully fills the screw head with no play.
- Set the driver to the correct rotation direction before the first strike.
- Hold the tool body firmly against the head to keep the bit seated.
- Strike squarely with a hammer, applying downward pressure through the tool as you hit it.
The combination of downward pressure and the sharp rotational impulse from the strike is what breaks the bond, and holding the driver body steady against the screw prevents the bit from camming out mid-strike, a technique Supercheap Auto also points to as the standard way to use this tool correctly.
Pro Tip: Inspect the bit before every strike. A worn or chipped tip rounds the head faster than the corrosion itself.
If the head continues to round under impact, or the bit keeps slipping despite a clean seat, stop. Continuing at that point only removes more usable metal from the head, and the next method depends on how much of that head is still intact.
Cutting a new slot with a rotary tool
When the head is too far gone for a driver bit to grip, cutting a fresh slot gives you a new surface to turn. This works well when enough flat head metal remains to hold a straight line.
- Clamp or steady the rotor so it cannot shift while the cutting wheel is running.
- Choose a thin cutting wheel sized for the rotary tool and run it at a moderate speed, not full throttle.
- Cut a straight slot across the full diameter of the screw head, working in short passes rather than one deep plunge.
- Pause often to let the wheel and the screw cool, and clear metal dust as you go to keep the cut visible.
- Fit a large flathead screwdriver into the new slot and turn with steady, controlled leverage.
Keep the cutting wheel off the rotor's braking surface entirely. A stray pass there can score the face and affect pad contact later, so angle the cut toward the screw head and away from the disc whenever the tool is close to the edge.
Drilling and extracting with a screw extractor
A screw extractor is the right call when the head is too rounded or too thin for a slot but the shaft is still straight enough to drill into. Start with a small pilot bit, around 1 to 2 millimetres or 1/16 inch, to keep the hole centred on the screw rather than drifting toward one side.
- Switch to the drill bit size specified by the extractor manufacturer and drill a hole centred in the screw.
- Tap the extractor into the hole with a hammer until it bites.
- Turn the extractor counter-clockwise with locking pliers or a tap wrench, since the reverse-thread design tightens its own grip as it turns.
- Apply steady, even pressure rather than jerking, which is what snaps an extractor tip.
Screw extractors handle diameters from about 3/32 inch up to 1/2 inch or larger, which covers nearly every rotor set screw on the road. If the extractor slips or a bit snaps off inside the hole, stop immediately. A broken extractor is made of hardened steel that resists drilling in return, and forcing the issue at that stage usually means moving to the drill-the-head-off method instead.
Drilling the head off as a last resort
When nothing else has worked, drilling the head off the screw removes the rotor without needing the fastener to turn at all. Start with a small pilot bit and work up through progressively larger sizes, commonly in the 1/8 to 5/16 inch range depending on the screw's dimensions, until the head separates from the shaft.
- Centre the pilot bit on the screw head using the earlier punch mark.
- Drill straight through the head, increasing bit size in small steps rather than jumping to the largest size right away.
- Watch for a sudden drop in resistance, which signals the head has separated from the shaft.
- Lift the rotor free once the head is gone.
- Use a punch to drift the remaining shaft out of the hub, or drill and extract it if it will not drift out cleanly.
Check the hub threads and the rotor mounting face for damage once the shaft is out. A rotor retaining screw is mainly a production aid to hold the disc in place during assembly, not a structural part of the wheel's retention, since that job belongs to the lug bolts once they are torqued down, as Toolsource notes. That is worth knowing if the old screw is hard to replace cleanly.
Cleaning up and reinstalling correctly
Finishing the job properly is what keeps this screw from seizing again.
- Inspect the rotor for cracks, deep scoring, or warpage, and set it aside for replacement if any of those are present.
- Run a thread chaser or tap through the hub hole if the threads picked up any damage during drilling.
- Wipe the hub face and rotor mating surface clean with brake cleaner before fitting anything back.
- Apply a light coat of anti-seize to the new screw's threads, keeping it away from the braking surface.
- Torque the new screw to the manufacturer's spec with a torque wrench rather than guessing by feel.
- Reinstall the caliper and bracket, replace the wheel, and torque the lug bolts to spec before lowering the vehicle.
Preventing the next stripped screw
A light coat of anti-seize on the threads, kept clear of the rotor's braking surface, keeps corrosion from welding the screw in place again. Pairing that with a torque wrench instead of an impact gun for final tightening avoids the over-torque that AutoClubCar flags as a common cause of rounded heads down the line. Replace any screw that already shows heavy rust during routine pad or rotor service rather than waiting for it to seize completely.
When to stop and call a professional
Some situations call for a shop visit instead of another attempt. If the rotor shows cracking risk, the hub threads strip out, or repeated extractor and drill attempts have gone nowhere, it is time to stop pushing and bring in a professional.
Weigh the time already spent and the tools still needed against the cost of a replacement rotor and an hour of labour. Safety comes before saving a few dollars on a screw that was never structural to begin with.
Why this guide holds up
This guide compiles established workshop techniques for rotor screw removal, drawing on penetrating oil soak guidance, manual impact driver technique, and screw extractor procedures from established automotive how-to sources. This guide appears on the DBC Brakes blog.
A technician's view on when to stop fighting a screw

Start with the least destructive method every time, even when it feels slower. Oil and a manual impact driver can free a stubborn rotor screw without a cut or drill pass, and jumping straight to a rotary tool or drill usually costs more time than it saves once you account for cleanup and inspection afterward.
Keep a screw extractor set and a cutting wheel in the toolbox even if you rarely need them. The jobs where you do need them are exactly the ones where improvising with the wrong tool turns a stuck screw into a damaged hub.
— Sam
If the rotor needs replacing, here's where that fits
When a screw removal attempt leaves the rotor cracked, scored, or warped, replacement is the straightforward next step rather than a setback. We build cross-drilled rotors engineered to resist warping, sold with transparent pricing and no hidden fees on checkout.
- Browse the Performance XDB, Premium Black Kote and Performance SS rotor lines if you need a direct, durable replacement.
- Check the brake rotor collection for front and rear options matched to your vehicle.
- Reach our support team with fitment questions before you order, and check the shipping terms for current free-shipping options within Canada.
Once you have the right rotor in hand, reinstalling with a fresh screw and correct torque finishes the job cleanly.
FAQ
What to do if a Torx screw is stripped?
Apply penetrating oil and let it soak, then try a snug manual impact driver with a matching Torx bit before anything more aggressive. If the head is too rounded to grip, cut a new slot with a rotary tool or drill a centred pilot hole for a screw extractor.
What is the rotor screw removal tool called?
The main tool is a manual impact driver, sometimes called a struck impact driver, used with a hammer to deliver rotational force to a stuck fastener. A screw extractor set is the backup tool when the head is too damaged for a driver bit to grip.
What do rotor screws do?
Rotor retaining screws mainly hold the disc in place during manufacturing and assembly, not during normal driving. Once the wheel's lug bolts are properly torqued, they handle rotor retention, which is why some technicians skip reinstalling a troublesome screw, according to toolsource.com.
How to unscrew a completely stripped screw?
Work through methods in order of least to most destructive: penetrating oil and a manual impact driver first, then a new slot cut with a rotary tool, then a screw extractor with a centred pilot hole. If none of those work, drilling the head off and drifting out the shaft is the final option.