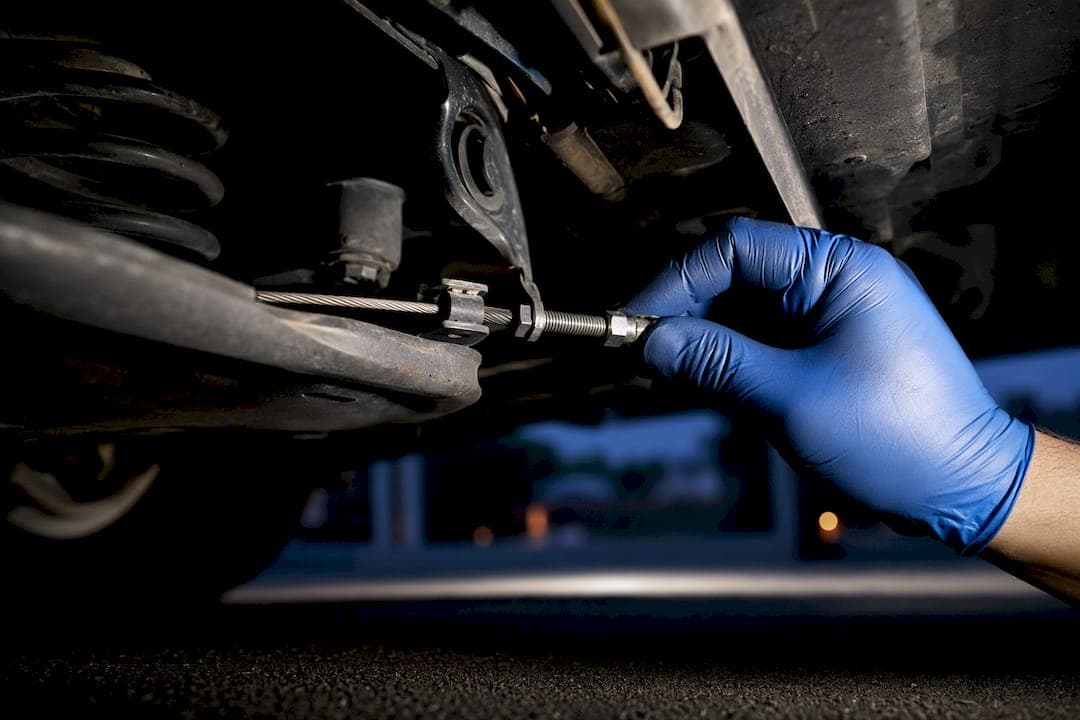
Most mechanical parking brakes can be adjusted at home using basic hand tools and a safe jacking setup. Electronic parking brakes need a service mode or professional tool to release the caliper safely. A correct adjustment reduces lever or pedal travel and holds the vehicle on a slope without dragging the wheels. Always check the manufacturer's service manual before starting.
TL;DR:
- Mechanical parking brakes are typically adjustable at home using basic tools, but electronic systems require professional diagnostic tools and should not be force-retracted manually.
- Symptoms indicating the need for adjustment include excessive lever or pedal travel, the vehicle rolling on a slope with the brake applied, or rear wheels turning freely despite engaging the parking brake.
- Proper adjustment involves ensuring the shoes lightly drag against the drum or the cable has minimal slack, with specific procedures for drum and cable systems to avoid over- or under-adjusting.
- If the parking brake continues to feel loose or requires frequent re-adjustment, worn shoes, corroded cables, or warped drums likely need parts replacement rather than further adjustment.
- Regularly verifying the parking brake's hold on gentle grades and following manufacturer-specific procedures ensures compliance with safety standards and prevents emergency failures.
Table of Contents
- Signs your parking brake needs adjusting
- Essential tools, safety checks and preparation
- How to adjust drum-style parking brakes (star wheel or internal adjuster)
- How to adjust cable and lever-style parking brakes
- Electronic parking brakes: why they're different
- How to verify the adjustment worked
- Maintenance, expected costs and time for adjustment
- Troubleshooting common problems after adjustment
- Getting the adjustment right and knowing when to stop
- When adjustment isn't enough: parts and kits worth considering
- Sources
- FAQ
Signs your parking brake needs adjusting
A parking brake that needs adjusting shows a few clear symptoms. The lever travels farther than it used to, or the pedal drops closer to the floor. On many vehicles the lever should engage fully within a set number of clicks. More clicks than the manual specifies usually points to slack in the cable or a worn adjuster.
A simple test separates adjustment issues from parts failure. Park on a slight grade, apply the parking brake, and see if the vehicle holds. Then check whether the rear wheels can still be turned by hand with the brake engaged.
- The lever or pedal travels farther than the service manual allows.
- The vehicle rolls or creeps on a grade with the parking brake applied.
- Rear wheels rotate with noticeable resistance instead of staying locked.
- The lever engages, but a rear wheel still spins freely by hand.
When a wheel turns freely with no resistance at all, or the cable does not move when the lever is pulled, adjustment will not fix it. That points to a seized cable, a broken shoe, or a snapped linkage that needs replacement instead.
Essential tools, safety checks and preparation
Before touching the parking brake, set up a safe work area. Park on level, solid ground, chock the wheels that stay on the ground, and support the vehicle on jack stands rather than a jack alone.
Basic tools cover most jobs:
- Wheel chocks and a floor jack rated for the vehicle's weight.
- Jack stands, a lug wrench, and a torque wrench for wheel reinstallation.
- A flat or Phillips screwdriver, a brake spoon or adjusting tool, and pliers.
- Safety glasses and gloves to handle brake dust and rusted hardware.
- The vehicle's service manual for torque values and adjuster location.
Brake dust can contain fine particles, so avoid blowing it out with compressed air. Wipe components down instead. Manufacturer manuals often specify a maximum force for pulling the lever or pressing the pedal during testing, and those limits matter when you verify the adjustment later.
Pro Tip: Keep the parking brake released while you jack up the vehicle. Adjusting with the brake partly engaged throws off your measurements.
How to adjust drum-style parking brakes (star wheel or internal adjuster)
Drum-style parking brakes use shoes inside the rear drum, expanded by a star wheel or a similar internal adjuster. Many drums have an adjusting slot on the backing plate, so the drum does not always need to come off.
- Raise the rear of the vehicle and support it on jack stands, then release the parking brake fully.
- Locate the adjuster slot on the backing plate, or remove the drum if no slot exists.
- Insert a brake spoon or flat screwdriver and turn the star wheel to expand the shoes.
- Keep turning until the drum is difficult to rotate by hand, indicating the shoes are lightly dragging.
- Back the adjuster off by one notch or click, then spin the drum again to confirm it turns freely with slight resistance.
- Reinstall the drum if removed, then check the lever or pedal for reduced travel.
This back-off step matters because too much drag will overheat the shoes and drum while driving, and too little leaves the brake loose again after a few uses.
A single notch of adjustment on a star wheel typically changes shoe-to-drum clearance by a small, fixed amount, which is why workshop guides describe backing off "one click" rather than a measured distance; the goal is slight, even drag on rotation, confirmed by hand before road testing.
If the drum has to come off, check the shoes for wear and check the adjuster mechanism itself. A star wheel that will not turn, or turns with a grinding feel, is usually rusted or corroded and needs cleaning, lubrication, or replacement rather than forcing. Many drum brakes also include a self-adjusting mechanism that ratchets automatically as the shoes wear. Manual back-off and re-engagement should respect that design, since disengaging the self-adjuster changes how the brake behaves over time, according to Transport Canada's technical standards document.
How to adjust cable and lever-style parking brakes
Cable-actuated systems, common on disc-brake rear axles, are adjusted at the lever, at an equalizer under the vehicle, or at both.
Start by measuring lever travel and comparing it against the manual's specified click count. If the lever pulls up too far before engaging, the cable has slack that needs to come out.
- Locate the equalizer, usually a bracket where two rear cables join a single front cable under the centre of the vehicle.
- Loosen the locknut on the adjusting rod or nut at the equalizer.
- Turn the adjusting nut to take up slack, checking wheel resistance by hand as you go.
- Tighten the locknut once the wheels show light, even drag with the brake applied.
- Recheck lever travel and confirm both rear wheels resist rotation equally.
Some vehicles also have an adjustment point directly at the lever, using a clevis pin or a nut on the cable end. Adjust there first if the manual specifies it, then fine-tune at the equalizer.
Pro Tip: Adjust a few turns at a time and retest. Overtightening the equalizer pulls one side harder than the other and causes uneven braking.
Inspect the cable itself while you are under the vehicle. Frayed strands, visible rust, or a cable that will not move smoothly through its housing means the cable is failing, not just loose. Frayed or seized cables need replacement rather than adjustment, since a corroded cable can seize completely or snap without warning.

Electronic parking brakes: why they're different
Electronic parking brakes, or EPB systems, use a small motor or an electric actuator to clamp the rear caliper instead of a mechanical cable. There is no star wheel or equalizer to turn by hand.
Retracting an EPB piston usually requires a diagnostic service mode, either through the vehicle's factory scan tool or a documented sequence of ignition cycles and switch presses specific to that model. Forcing the caliper piston back manually risks damaging the motor or the control module.
Never attempt to retract an electronic parking brake caliper by force. Use the vehicle's diagnostic service mode, a dealer, or a qualified shop.
EPB faults can mimic a loose mechanical brake: the dashboard warning light comes on, the brake feels weak on a slope, or the switch does not fully release. Those symptoms point to a service-mode reset or a shop visit, not a wrench. A qualified shop with the right diagnostic tools can confirm whether the issue is a worn pad, a motor fault, or a software reset.
How to verify the adjustment worked
Once the adjustment is done, two checks confirm it actually worked.
- With the vehicle still supported and the brake applied, spin each rear wheel by hand and compare resistance side to side.
- Release the brake and confirm both wheels spin freely with no drag.
- Lower the vehicle, then find a safe, gentle grade to test the parking brake's hold with the vehicle running and your foot ready on the regular brake.
- Recheck lever or pedal travel against the manual's specified click count.
Transport Canada's technical standards document No. 135 sets out the formal test: a parking brake must hold a light vehicle stationary on a specified grade for five minutes, within defined actuation force limits at the hand or foot control. A static hold on the specified grade for several minutes is the benchmark Transport Canada uses to judge parking brake effectiveness, which gives DIYers a practical target even without lab equipment: if the brake holds solidly on a real slope with normal lever effort, the adjustment passed.
A pass on the wheel-rotation check does not always mean the job is finished. Uneven resistance side to side, or a lever that still travels too far, means more adjustment or a hardware inspection is needed before the vehicle goes back on the road.
Maintenance, expected costs and time for adjustment
A basic mechanical adjustment, with no seized parts and no drum removal, is a manageable driveway job for most owners with the right tools.
- Parking brake shoes and cables are relatively inexpensive parts compared to most brake components.
- Drum machining or replacement adds cost when the drum surface is scored or out of round.
- EPB diagnostics or a service-mode reset usually requires a shop visit, since most owners do not have the factory scan tool.
- Corrosion, seized adjusters, or an EPB system are the main reasons to hand the job to a mechanic instead of doing it yourself.
Anyone missing jack stands, a torque wrench, or comfort working under a raised vehicle is better off booking a shop. The same goes for any EPB-equipped vehicle where the piston needs retracting.
Troubleshooting common problems after adjustment
If the brake still feels loose, or a new problem shows up after adjustment, work through a short checklist before assuming the job failed.
- A stretched cable will need retightening again soon and may be near the end of its service life.
- A seized adjuster that will not hold its new position points to internal corrosion needing cleaning or replacement.
- Worn shoes below the minimum thickness will not create enough drag even when fully adjusted.
- A warped drum or rotor causes uneven resistance or a pulsing feel when the brake is applied.
If one side holds firm and the other stays loose, check the equalizer first. It may need re-centring, or one cable may be sticking in its housing while the other moves freely.
Pro Tip: Mark the equalizer's resting position with a dab of paint before adjusting. It makes it easier to see if one side is pulling more than the other.
Persistent left-right imbalance after correcting the equalizer usually means a hardware or cable problem on the stiffer side, and that side should be inspected before the vehicle is driven regularly.
Getting the adjustment right and knowing when to stop
Manufacturer procedures exist because parking brake hardware varies enough between vehicles that generic steps can mislead. Follow the service manual's click counts and torque values over any shortcut, and treat Transport Canada's hold and force limits as the real pass mark, not just a guideline.
If a parking brake needs adjusting every few months, that is not a maintenance rhythm, it is a sign the cable or shoes are worn out and due for replacement. Replacement parts and support can make the process straightforward when the wrench-and-star-wheel approach stops working.
— Sam
When adjustment isn't enough: parts and kits worth considering
Adjustment buys time, but worn shoes, a corroded cable, or a scored drum eventually need replacement, not another turn of the star wheel. DBC's parking brake shoes cover that repair directly, alongside broader brake kits built around cross-drilled rotors for owners planning a fuller rear-brake refresh.

Before ordering, confirm the part matches the vehicle's year, make, and model, and check DBC's shipping terms, including expedited and international shipping options, since standard shipping is free on orders over $100. Support is available for fitment questions before checkout. Browse the full brake kits and rotors lineup to compare options before buying.
Sources
For vehicle-specific torque values and adjuster locations, the factory service manual remains the authority. Transport Canada's technical standards document No. 135 sets the formal hold-time and force-limit requirements referenced throughout this guide. For background on how mechanical and electronic parking brakes differ in daily use, see this emergency brake safety guide.
- Technical standards document No. 135, Revision 5 (Transport Canada)
FAQ
How much does it cost to adjust a parking brake?
A basic DIY adjustment costs little beyond tools you may already own, since it involves no new parts. Shop labour costs vary by location and vehicle, so it's worth requesting a quote if you'd rather not do it yourself.
How do I know if my handbrake needs adjusting?
Watch for a lever or pedal that travels farther than the service manual specifies, or a vehicle that rolls slightly on a slope with the brake applied. Rear wheels that still turn by hand with the brake engaged are another clear sign.
How do I fix a loose parking brake?
On drum-style systems, turn the star wheel adjuster until the drum drags slightly, then back off one notch. On cable systems, tighten the adjusting nut at the equalizer until both rear wheels show even resistance, then recheck lever travel.
Is parking brake adjustment necessary?
Yes, periodic adjustment keeps the parking brake within the hold and force limits set out in Transport Canada's technical standards document. A brake that no longer holds on a grade cannot be relied on in an emergency or on a hill.