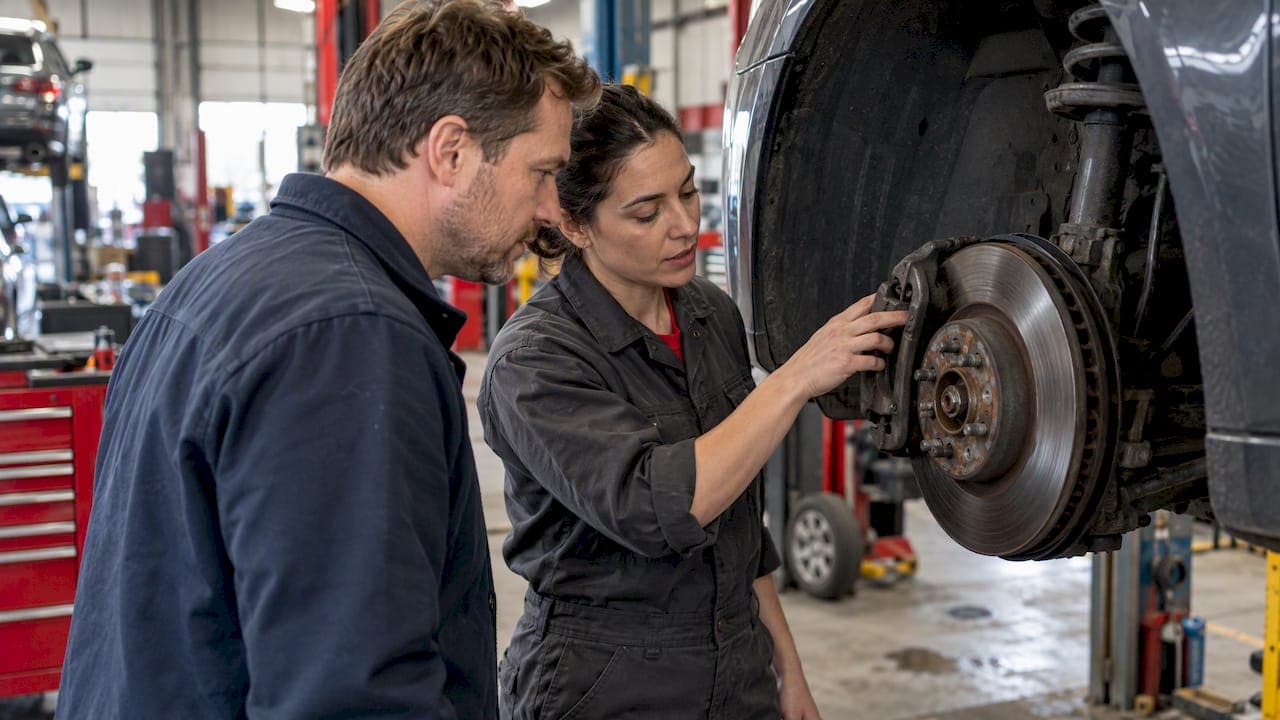
Pad and rotor swaps on a simple disc brake setup are reasonable for an experienced DIYer with the right tools. Hydraulic leaks, ABS faults, master cylinder problems, electronic parking brakes, and unexplained warning lights need a professional. The decision rests on four factors: cost, skills and tools, safety risk, and warranty or liability exposure.
TL;DR:
- DIY brake jobs mainly save on labour costs, but require proper tools, workspace, and clear documentation to ensure safety and quality.
- Simple front pad and rotor replacements on straightforward disc brake systems are suitable for DIY; complex hydraulic or electronic systems should be handled by professionals.
- Costs for parts are similar regardless of who installs them, but labour can range from one to several hours for DIYers and are usually higher at shops, especially for multi-axle jobs.
- Safety verification, including fluid leak checks and test drives, is critical before deeming a brake repair complete, and warning lights or abnormal pedal behavior require professional inspection.
- Choosing the right parts and following manufacturer specifications reduce the risk of rework or safety issues, especially if the job is performed by a DIYer with experience and proper resources.
Table of Contents
- Quick pros and cons: DIY vs mechanic
- Which brake jobs are reasonable for a DIYer and which need a pro
- Tools, workspace and skill checklist for a safe DIY brake job
- Costs and time: realistic ranges for DIY vs professional brake service
- Safety checks, verification and when to stop and call a professional
- Expert perspective: what matters most for a confident DIY call
- A safety-first takeaway on making the call
- Parts and resources for DIYers who choose to proceed
- FAQ
- Sources
Quick pros and cons: DIY vs mechanic
DIY brake work saves money mainly on labour. Parts cost the same whether we install them ourselves or a shop does, but labour charges disappear, and some shops mark up parts beyond their cost too.
A mechanic brings diagnostic equipment, a trained eye for wear patterns, and a warranty on the finished job. Many shops also carry liability coverage that protects the owner if a repair fails. A shop visit fits into a schedule window and gets the car back on the road without weekend garage time.
The trade-offs run both ways.
- DIY savings come primarily from skipped labour charges, not cheaper parts.
- Mechanic advantages include diagnostics, workmanship warranties, and liability protection if something goes wrong later.
- Convenience favours a shop: book an appointment, drop the car off, walk away.
- DIY risks include missed root-cause diagnosis, incorrect torque or bleeding, and insurance complications if a claim traces back to a self-performed repair.
Choosing between the two means weighing a few hours of labour savings against the value of a second set of trained eyes on a safety-critical system.
Which brake jobs are reasonable for a DIYer and which need a pro
Not every brake job carries the same risk. Grouping common jobs into tiers helps match the task to the right skill level.
- Tier A, DIY-friendly: front pad replacement, rotor swaps on a straightforward disc brake system, and caliper slide-pin cleaning and lubrication when the procedure is simple and well documented.
- Tier B, proceed with caution: rear brakes paired with a mechanical parking brake, vehicles with an integrated electronic parking brake system, and any job that calls for a special piston-compression tool or a non-standard procedure. These are manageable only with the correct service documentation for that specific vehicle.
- Tier C, professional only: brake-line work, master cylinder replacement, ABS diagnostics, any suspected hydraulic leak, an unexplained warning light, and repairs tied to regenerative braking on an EV or hybrid.
The split exists because some faults look cosmetic but are not. A Driving makes this point directly: a brake job can look simple, but diagnosing the actual cause, meeting the manufacturer's specifications, and verifying that a safety-critical system is truly fixed is harder than it looks, and small mistakes carry outsized consequences.
Transport Canada's own technical standards back up why Tier C stays off the DIY list. The hydraulic and electric brake systems standard sets testable stopping-distance requirements and treats ABS, hydraulic pressure, and master cylinders as safety-critical systems, which is exactly the kind of validation a home garage cannot replicate.
Tools, workspace and skill checklist for a safe DIY brake job
A safe brake job depends on having the right tools before starting, not partway through.
- A jack rated for the vehicle's weight, paired with secure jack stands.
- A torque wrench for caliper bolts and wheel fasteners.
- A ratchet and socket set, a piston-compression tool or C-clamp, and the correct wrenches for the caliper bracket bolts.
- Brake-clean product to remove dust and grease from rotor and pad surfaces.
- A bleed kit or vacuum pump if the job disturbs the hydraulic line.
- A bleed block or an old pad to protect the caliper piston during compression.
The workspace matters as much as the tools. A level surface, good lighting, wheel chocks on the opposite axle, clean rags, and a proper disposal plan for old brake fluid, pads, and rotors all reduce the chance of a mistake.
Three practices separate a clean job from a risky one: following the service manual's torque specifications exactly, using the correct bleeding sequence if the hydraulic system was opened, and keeping grease or brake fluid off the pad and rotor surfaces during assembly. Writing down the torque values and parts fitted gives a record to check against later.
Pro Tip: Wipe down rotors with a dedicated cleaner, not an all-purpose degreaser, to avoid leaving a residue that affects initial pad bite.

Costs and time: realistic ranges for DIY vs professional brake service
Parts cost roughly the same no matter who installs them, and they fall into three general tiers: economy aftermarket, premium aftermarket, and OEM-fit components, with price climbing at each step. Labour is where the real cost difference appears.
A regional shop-cost guide from Ontario shows brake repair costs vary widely, from moderate prices for basic pad replacements up to significantly higher prices for complete front-and-rear jobs, with labour rates and parts choices explaining most of the spread. Dealership labour rates typically run higher than independent shop rates, and that gap compounds on a job involving multiple axles.
- Experienced DIYer: a front pad and rotor swap often takes one to two hours per axle.
- First-time DIYer: the same job can take an afternoon, especially with a stuck caliper bolt or a seized rotor.
- Shop turnaround: often same-day, though parts availability or a misdiagnosed issue can add a day or more.
A cheap repair result sometimes reflects omitted hardware or service steps that show up as extra cost later, according to the same Ontario cost guide, which flags that regional price variance often tracks what is and isn't included in the quoted price.
Hidden DIY costs add up too: a torque wrench or bleed kit if we don't already own one, replacement brake fluid, proper disposal fees for old components, and the cost of a shop visit to fix a DIY job that didn't go as planned.
Safety checks, verification and when to stop and call a professional
Finishing the install isn't the same as confirming it's safe. A short verification routine catches most problems before they become dangerous.
- Inspect visually for fluid leaks at the caliper, line fittings, and master cylinder.
- Pump the brake pedal with the engine off; it should feel firm, not soft or sinking.
- Take a short, controlled test drive at low speed in an empty area, braking gently several times.
- Confirm no ABS or brake warning lights appear on the dash.
- Follow the bedding-in procedure for new pads and rotors if the manufacturer specifies one.
Some symptoms mean stop immediately and book a shop visit rather than troubleshoot further: a sinking or spongy pedal, a persistent ABS or brake warning light, the car pulling to one side under braking, or new grinding noises or vibration.
The Transport Canada recall database backs a conservative line here: its guidance is to stop driving and get a professional diagnosis for a low or sinking pedal, a fluid leak, a warning light, grinding, pulling, severe vibration, a seized component, or unexplained longer stopping distances. A visual check alone cannot confirm that a hydraulic or electronic fault is actually resolved, which is why these symptoms call for a shop rather than another look under the car.
Expert perspective: what matters most for a confident DIY call
A short checklist settles most borderline cases: do we have direct experience with this type of brake job, enough time to do it without rushing, every tool on hand before starting, and a vehicle with a straightforward disc brake system rather than an integrated electronic parking brake or complex hybrid setup? If any one of those is missing, a mechanic is the safer call.

Fitment matters as much as skill. Parts that match the vehicle's exact specifications and come with clear torque values reduce the chance of a comeback repair. Our brake kit installation guide and safety checklist walk through the steps and checks that reduce rework risk for anyone doing the job themselves.
A safety-first takeaway on making the call
We'd DIY a front pad and rotor swap on a simple disc setup with the right tools on hand. We'd hand off anything hydraulic, electronic, or unexplained to a mechanic without hesitation. Either way, keep the receipts, torque records, and any warranty paperwork.
— Sam
Parts and resources for DIYers who choose to proceed
For readers moving ahead with a DIY job, fitment and part quality matter more than almost any other factor in avoiding a repeat repair. Our Performance XDB, Premium Black Kote, and Performance SS kits use cross-drilled rotors engineered to resist warping, with pricing that includes no hidden fees and free shipping on orders over $100 within Canada.

- Browse brake rotors, pads, and complete kits by vehicle fitment before ordering.
- Check front brake rotors or rear brake rotors depending on the job.
- Read our installation guide for torque specs and step-by-step fitment notes.
- After the install, protect new rotors from brake dust buildup using a safe cleaning method with a short dwell time rather than an aggressive degreaser.
Support is available to answer fitment questions directly. Check your vehicle's fitment on our brake kit collection page or reach out if anything about the job looks unclear before you start.
FAQ
How much should a DIY brake job cost?
Parts alone typically run from economy aftermarket pricing up to premium or OEM-fit pricing, with the exact figure depending on the vehicle and the components chosen. The main saving in a DIY job comes from skipping labour rather than from cheaper parts.
Is it worth it to do your own brakes?
It's worth it for a straightforward pad and rotor swap if we have the right tools, the time, and a vehicle with a simple disc brake setup. It's not worth the risk for hydraulic, ABS, or electronic parking brake work, where a professional diagnosis is the safer route.
What is the 30/30/30 rule for brakes?
This isn't a recognized Transport Canada or manufacturer standard, and definitions of it vary across car forums and blogs. Rather than rely on an informal rule, check pad thickness, rotor condition, and fluid colour against the vehicle's own service manual intervals.
Why do mechanics charge so much for brakes?
Shop pricing covers diagnostic time, trained labour, and a workmanship warranty, not just the physical parts. A regional cost breakdown from Ontario shows labour and shop type explaining most of the price difference between a basic pad job and a full front-and-rear service.
Sources
- Transport Canada recall database
- Hydraulic and electric brake systems (TSD Rev. 5)
- Your corner wrench: Can I – and should I – change my car's brakes myself? | Driving
- How much does brake repair cost in Ontario? | Master Mechanic