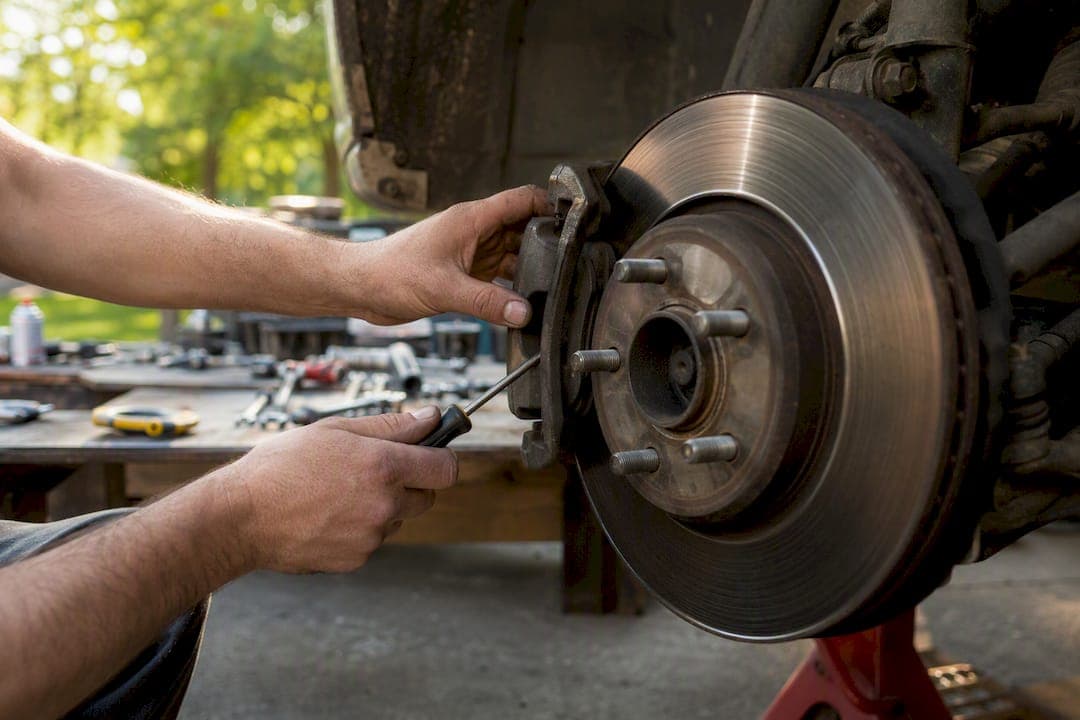
Try two or three controlled stops from low speed. If the squeal clears, it's likely surface rust from overnight moisture. If it persists on every stop, or you notice grinding, a soft pedal, the brake warning light, or the car pulling to one side, stop driving and get the vehicle inspected before doing anything else.
TL;DR:
- Surface rust from overnight moisture typically clears within a few stops and does not require professional repair unless squealing persists or is accompanied by other symptoms.
- Worn or missing shims, seized caliper slide pins, and glazed pads or rotors can cause persistent squeal and usually need targeted hardware or resurfacing fixes.
- Debris lodged between the rotor and dust shield causes sudden noise but is easy to remove with basic inspection and cleaning, often in under 20 minutes.
- Ignoring warning signs like burning smells, grinding, or a sinking pedal can lead to costly rotor damage, with repairs often costing substantially more if delayed.
- Proper maintenance—such as regular lubrication of slide pins, bedding in pads, and choosing appropriate pad materials—prevents squeal recurrence and prolongs brake performance.
Table of Contents
- How to diagnose brake squeal before you touch anything
- What actually causes brake squeal
- Step-by-step fixes for each cause
- When to stop DIY and call a shop
- Preventing squeal from coming back
- Why this brake squeal guide holds up
- What I'd actually do first
- When a rotor upgrade makes more sense than another repair
- Sources
How to diagnose brake squeal before you touch anything
Squeal is a symptom, not a diagnosis. The pattern tells you what's actually wrong, and matching that pattern correctly saves you from replacing parts that were never the problem.
Work through this quickly before you reach for tools:
- Note when it happens. Squeal on the first few stops of a damp morning points to surface rust that clears with normal braking. Squeal only at low speed, especially while coasting with your foot off the pedal, often means the wear indicator is doing its job. Squeal that shows up right after a brake job is a different problem entirely.
- Check if it's constant or intermittent. A noise that stops the instant you apply the brake is usually the metal wear indicator tab contacting the rotor. That's a built-in warning, not a fault.
- Look for companion symptoms. Vibration through the pedal or steering wheel, a spongy or sinking pedal, a burning smell, or a dashboard warning light all raise the urgency well past "annoying noise."
- Do a basic wheel check. Pull the wheel if you're comfortable doing so, or shine a flashlight through the spokes. Look for a lodged pebble, a heavy grey glaze on the pad face, or rust streaking across the rotor.
If the noise is isolated to one wheel and paired with uneven pad wear, that's a strong hint at a seized or dry caliper slide pin rather than anything wrong with the pad material itself.
What actually causes brake squeal
Brake squeal comes from vibration, specifically the pad resonating against the rotor at a frequency your ear can pick up. Different root causes produce that vibration in different ways, and each one comes with its own urgency level.
- Surface rust or moisture. A car left outside overnight forms a thin rust film on the rotor, which is explained further in why brakes squeal when cold. It typically clears within a few normal stops and needs no action.
- Wear indicator contact. A small metal tab squeals against the rotor once the pad material wears down. If it stops squealing under braking but continues while coasting, plan on service within a short, reasonable timeframe.
- Glazed pads or rotors. Repeated hard braking or riding the pedal in traffic bakes the pad surface into a hard, shiny layer. This produces a high-pitched squeal and noticeably reduces stopping performance, so resurfacing or replacement is usually the fix.
- Debris behind the rotor. A pebble picked up on a gravel road or during a car wash can wedge itself between the rotor and dust shield, causing a sudden, localized squeal.
- Missing or worn shims. If squeal shows up right after a brake job, missing anti-squeal hardware or a skipped shim is a common cause worth flagging with the shop.
- Dry or seized caliper slides. Corroded slide pins let the caliper bind slightly, creating persistent noise from one wheel along with uneven pad wear.
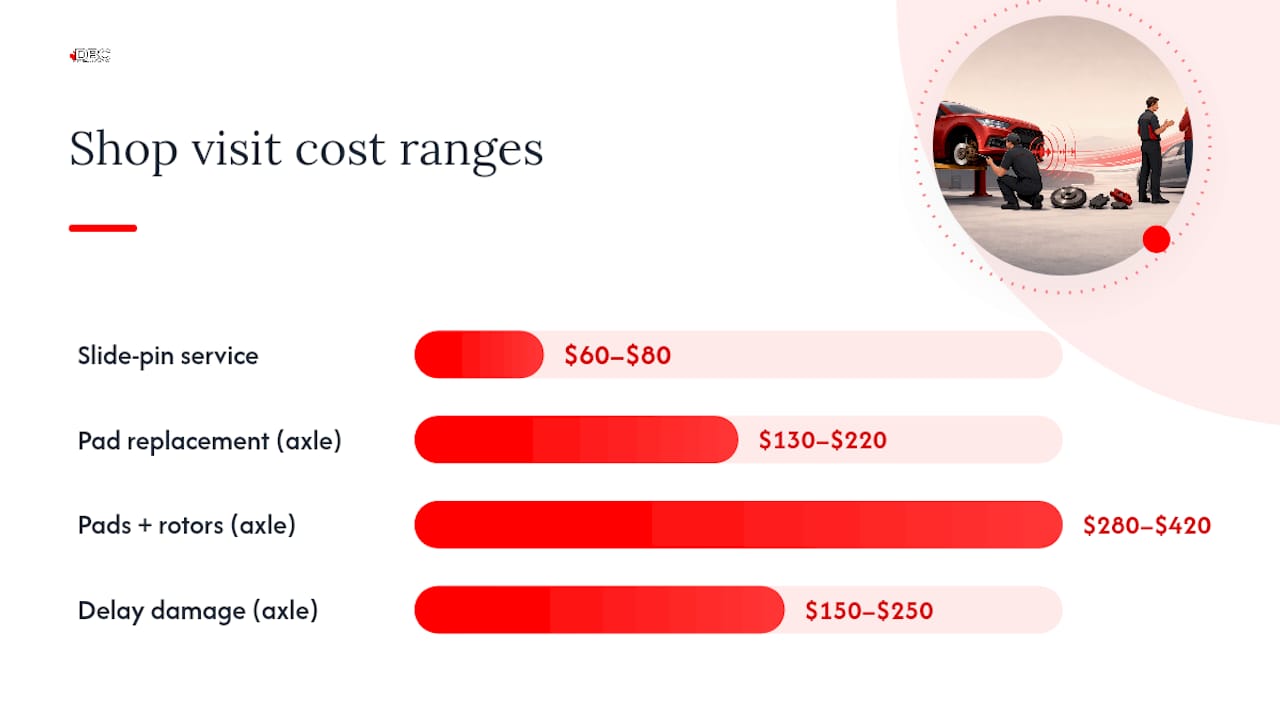
Typical shop repairs for these issues range from a slide pin service up to a full pad and rotor job per axle, with costs varying based on the specific services needed.
Step-by-step fixes for each cause
Once you've matched the symptom to a likely cause, the fix is usually straightforward. Work through these in order of complexity, and stop at any point where something feels beyond your comfort level.
- Confirm surface rust resolves itself. Take a short, safe drive with a few normal stops from moderate speed. If the squeal fades within the first few applications, you're done. Never spray anything onto the rotor to "clean" it. That surface needs to stay dry and bare.
- Remove debris. Pull the wheel, inspect behind the dust shield, and clear out any pebbles or road debris by hand. If you can't reach it safely, a shop can do this in under 20 minutes.
- Re-grease the slide pins. Remove the caliper (following your vehicle's service steps), clean the pins with brake cleaner, and apply a thin layer of high-temperature brake grease. Reinstall and work the caliper back and forth to confirm smooth movement.
- Fit new shims or apply anaerobic adhesive. If shims are missing or damaged, install manufacturer-spec replacements. For a stubborn resonance that shims don't fix, technicians sometimes use an anaerobic adhesive to bond the pad backing plate to the caliper piston, which shifts the vibration frequency out of the audible range. This requires careful surface prep and holds up well under heat, though it's a more permanent step than a shim.
- Address glazing. Measure pad thickness against your manual's minimum spec. Light glazing can sometimes be lightly sanded off the pad face, but heavier glazing calls for rotor resurfacing or full pad and rotor replacement. Either way, run a proper bedding-in procedure afterward, several moderate stops from highway speed without dragging the pedal, to seat the new surfaces correctly.
- For persistent noise after trying the above, consider a pad compound change. Ceramic and semi-metallic pads vibrate differently, and swapping compounds sometimes resolves a resonance that hardware fixes couldn't touch.
Pro Tip: Never apply grease, oil, or anti-squeal spray to the rotor or pad friction surface. Contamination there reduces stopping power immediately, and it's one of the more common mistakes made during a rushed DIY fix.
Before you finish any job: use proper jack stands rather than relying on a jack alone, torque wheel lug nuts to the manufacturer's spec, and dispose of old pads and rotors at a shop or recycling centre rather than in household trash. If any part of this sequence feels outside your skill level, that's the point to book a shop instead.
When to stop DIY and call a shop
Grinding, a burning smell, a soft or sinking pedal, or a warning light on the dash mean the vehicle needs professional attention now, not after your next errand run.
A shop visit for squeal typically includes:
- Measuring remaining pad thickness against minimum spec
- Checking rotor condition for scoring, glazing, or thickness variation
- Testing caliper slide movement and piston operation
- Inspecting hardware (shims, clips, anti-rattle springs) and brake fluid condition
Costs vary by vehicle and labour rate, but typical ranges run around $60 to $80 for a slide pin cleaning and re-grease, $130 to $220 per axle for pad replacement alone, and $280 to $420 per axle when pads and rotors are replaced together. Waiting until the noise turns into grinding can add another $150 to $250 per axle, since metal-on-metal contact often damages the rotor beyond what resurfacing can fix.
Preventing squeal from coming back
A little maintenance goes a long way toward keeping brakes quiet between services.
- Apply high-temperature brake grease to slide pins and pad backing contact points at every pad change, never on the rotor or pad friction surface.
- Choose your pad compound with trade-offs in mind: ceramic pads run quieter and produce less dust but can be more prone to occasional low-speed squeal, while semi-metallic pads bite harder and last longer under heavy use but generate more brake dust and noise.
- Always bed in new pads and rotors with several moderate stops from speed, avoiding hard stops or prolonged pedal pressure during the initial break-in period.
- Inspect pads and hardware seasonally, and always recheck slide pins and shims after any new brake work.
Pro Tip: If a shop's work leaves your brakes squeaking, ask them to check the slide pins and shims before assuming you need new pads. A missed lubrication step during installation is one of the most common comebacks in any brake bay.
Why this brake squeal guide holds up
This guide draws on diagnostic patterns mechanics rely on daily, cross-checked against how brake pad wear actually presents and how caliper components function under load. DBC Brakes builds cross-drilled rotors engineered to resist warping, backs every order with inclusive pricing and no hidden fees, and ships free within Canada on orders over $100. Before buying replacement parts, always confirm fitment and warranty terms on the official product page for your specific vehicle.
What I'd actually do first
If your brakes are squealing, inspect before you buy anything. Clean the wheel area, re-grease the slide pins, check the shims. Most squeal complaints resolve with a $60 hardware service, not a $400 parts bill.
Where I'd reach for a premium kit instead of another round of hardware tweaks: if you've resurfaced or replaced rotors more than once for the same vehicle, or you're chasing performance beyond stock spec. At that point, better-engineered rotors solve the recurrence instead of masking it. For the deeper mechanics behind vibration and pad wear, the DBC blog is worth a read before your next service.
— Sam
When a rotor upgrade makes more sense than another repair
Repeated glazing, rotors that keep warping despite resurfacing, or a vehicle that's simply asking for more stopping power than stock parts deliver are all signs a hardware fix won't hold. That's a rotor problem, not a grease problem.

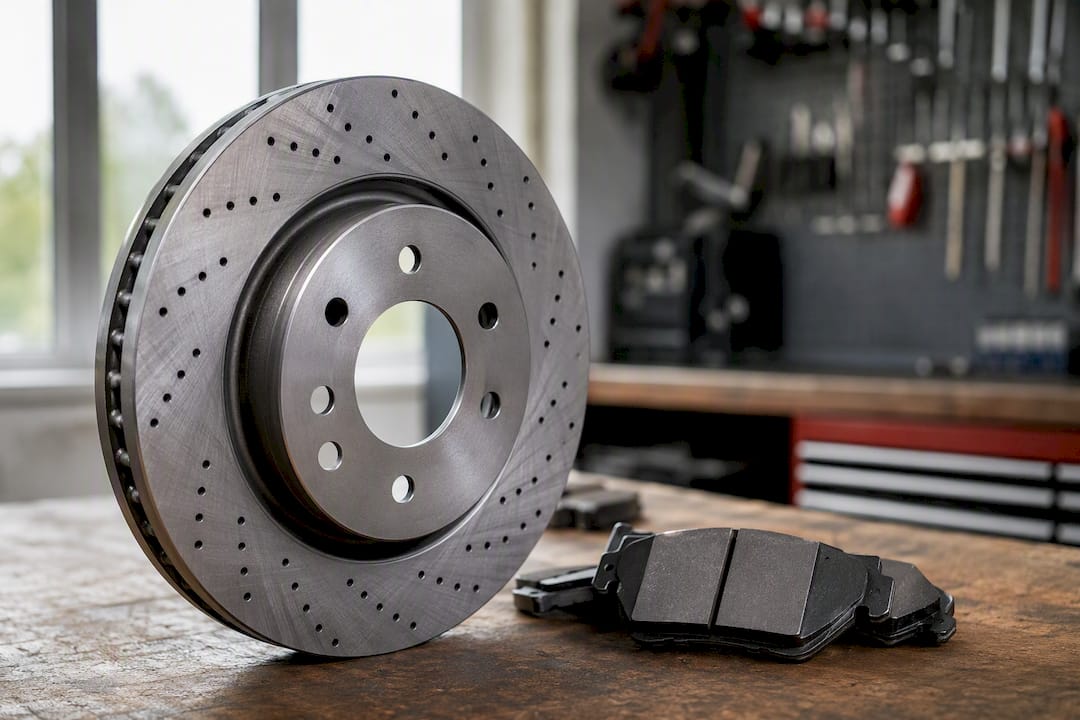
DBC Brakes engineers its rotors with cross-drilling specifically to resist the heat buildup that causes warping and glazing in the first place, so you're not back under the car in six months chasing the same noise. Pricing is inclusive with no hidden fees, support comes from a real person rather than an automated queue, and orders over $100 ship free across Canada. If your current rotors keep glazing or warping no matter how carefully you bed them in, browse the performance brake kit collection and check fitment for your vehicle before your next service appointment.
Sources
For deeper detail beyond this guide, Popular Mechanics covers shim and adhesive techniques in more depth, RAC Drive breaks down moisture-related causes, and AAA Frictions explains cold-weather squeal and pad compound behaviour.
- How to fix squeaky brakes | Popular Mechanics
- Squeaky brakes: causes and solutions | RAC Drive
- Squeaky brakes at low speed: every cause, ranked by urgency
- Why are my brakes squeaking? Causes & How to fix it | CRC Industries