
Choose an application-matched brake kit with verified fitment. That single decision determines correct braking force, complete hardware, and no surprises during install. A kit built for your driving style, checked against your exact year, make, and model, cuts the two biggest sources of failure: mismatched components and returns.
TL;DR:
- Ensuring the brake kit is matched to your vehicle's exact make, model, and trim is crucial to prevent fitment issues and reduce the risk of mismatched parts.
- Complete brake kits should include rotors, pads, hardware, sensors, and instructions, with missing components leading to delays and potential added costs.
- Different types of brake kits suit specific driving styles; choosing the wrong one, such as a track-oriented kit for daily driving, can lead to unnecessary noise, dust, or reduced performance.
- Verifying compatibility through spec tables for rotor size, thickness, and piston count helps prevent costly returns and ensures proper fitment.
- Proper installation requires attention to torque settings, bedding-in procedures, and post-installation checks to maintain brake performance and longevity.
Table of Contents
- How do you choose a brake kit? Start with what's inside
- What types of brake kits suit different driving styles?
- How to choose the right brake kit for your vehicle and driving style
- Which pad, rotor, and caliper specs actually matter?
- What does installing and maintaining a brake kit involve?
- What DBC's product team wants every buyer to know
- Why DBC premium brake kits check every box on this list
- Where to verify specs and fitment before you buy
- Sources
How do you choose a brake kit? Start with what's inside
Every brake kit should list its contents on the product page before you buy it. A complete kit typically includes rotors, pads, mounting hardware, and installation instructions, with sensors and sometimes calipers bundled in depending on the vehicle and kit tier. Verifying that parts list before checkout avoids the frustrating discovery, mid-install, that a bolt or clip is missing.
Each component earns its place for a specific reason:
- Rotors provide the friction surface and manage heat dissipation.
- Pads convert pedal pressure into stopping force through contact with the rotor.
- Mounting hardware (bolts, clips, shims) keeps everything seated correctly and quiet.
- Sensors (where equipped) feed wear data to the dash and, on some vehicles, to the ABS module.
- Instructions specify torque values and sequence, both of which affect safety.
Watch for red flags on a listing: no mention of hardware, vague sensor compatibility, or a photo that shows only a rotor when the title says "kit." An incomplete kit forces a second order, a delayed install, and often a mismatched part sourced in a hurry. Our own complete guide to brake kit contents breaks down what should show up in the box for common vehicle categories.
What types of brake kits suit different driving styles?
Brake kits fall into four broad categories, and picking the wrong one wastes money in one direction or leaves performance on the table in the other.
- Standard replacement kits use solid cast rotors and semi-metallic or ceramic pads. Built for daily commuting, they handle stop-and-go traffic without drama and cost the least. They're not designed for repeated hard braking from speed.
- Drilled and slotted kits add cross-drilled holes or slots to the rotor face for better heat venting and wet-weather bite. They suit spirited street driving and light track days, but continuous track abuse can cause stress cracking around the drilled holes over time, a trade-off worth knowing before you commit to one.
- Performance kits and big brake kits (BBKs) step up rotor diameter, caliper piston count, and pad compound for track days or aggressive mountain driving. Stopping power improves noticeably, but a BBK often demands larger wheels to clear the bigger caliper, and cost climbs fast.
- Heavy-duty kits target towing and hauling. Thicker rotors and higher-temperature pad compounds resist fade under sustained load, which matters more than outright bite for someone pulling a trailer.
Matching kit type to driving profile rather than chasing the most aggressive option available is the single biggest lever most buyers overlook. A daily driver with a track kit lives with noise and dust for no real benefit; a tow rig with standard pads lives with fade at the worst possible moment.
How to choose the right brake kit for your vehicle and driving style
Once you know the kit type you want, the real work is fitment. Skipping this step is where most bad purchases happen.
- Confirm exact fitment first: year, make, model, trim, and whether your vehicle has ABS or ESC, since sensor wiring and tone rings vary even within the same model year.
- Check wheel clearance: inner wheel diameter and backspace determine whether a bigger rotor or caliper will physically fit behind your current rims.
- Match pad compound and rotor design to your operating temperature: ceramic pads suit daily heat cycles; semi-metallic and high-temp compounds suit sustained braking under load.
- Consider the master cylinder and brake bias before a BBK upgrade: swapping to bigger front calipers can shift front-to-rear balance, and a shop check is worth the visit if you're not confident reading a spec sheet.
- Compare warranty and included hardware, not just the sticker price: a cheaper kit missing shims or clips often costs more once you've sourced the gaps.
Pro Tip: Read the spec table before the marketing copy. Rotor diameter, thickness, minimum wheel size, and caliper piston count tell you more about real-world fitment than any product description ever will.
Fitment checkers built into a retailer's product page exist for exactly this reason, and using one meaningfully cuts the odds of ordering a kit that arrives and doesn't bolt on. Our compatibility guide for performance vehicles walks through the wheel clearance math in more detail if you're stepping up to a bigger rotor.
Which pad, rotor, and caliper specs actually matter?
Not every spec on a listing moves the needle equally. A few decide most of the outcome.
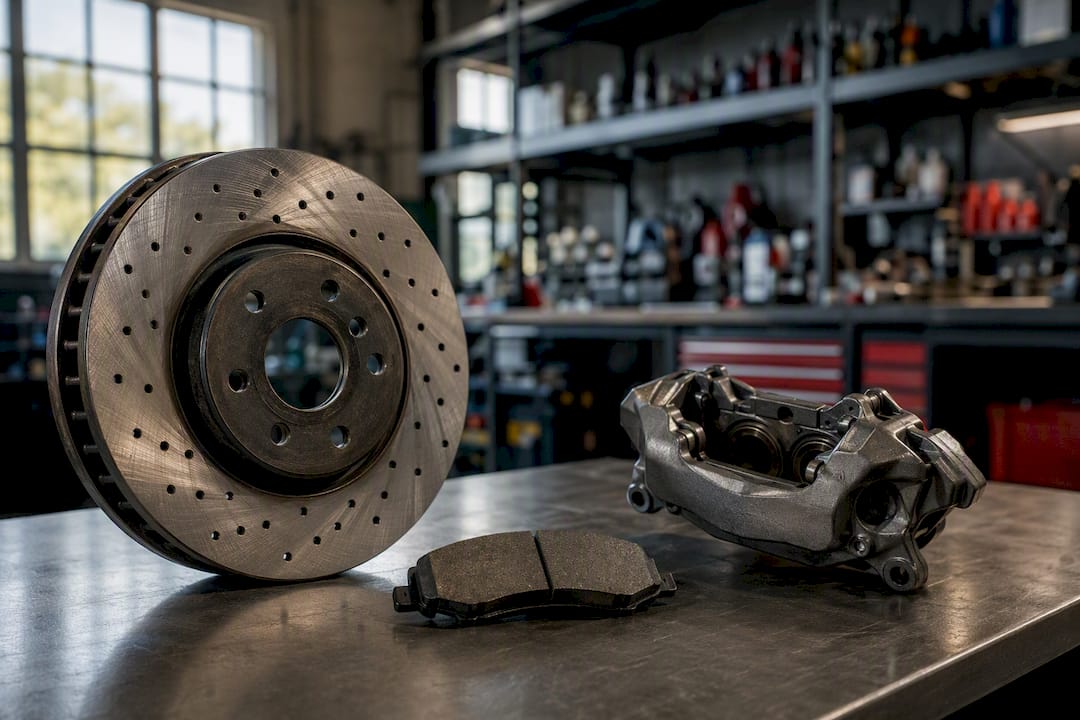
Pad compounds break down into three families. Ceramic pads run quiet and low-dust, suiting daily drivers who want clean wheels and minimal noise. Semi-metallic pads handle higher heat and resist fade better, which fits spirited driving or moderate towing. Organic pads are softer, quieter still, but wear faster and fade sooner under sustained heat, so they're mostly for light-duty daily use.
Rotor construction spans a wider range:
- Solid cast rotors are the budget baseline, reliable for daily driving.
- Slotted or drilled rotors improve cooling and wet bite at some cost to long-term durability under extreme heat.
- Two-piece rotors separate the hat from the friction ring, cutting unsprung weight and improving cooling, a real advantage for track-focused builds.
- Carbon-ceramic rotors sit at the top end, built for extreme performance applications and priced accordingly.
The floating design in two-piece rotors also isolates thermal expansion between the hat and friction ring, which reduces warpage risk under the repeated heat cycles that towing or track driving generate. Caliper piston count matters here too: more pistons distribute clamping force more evenly across the pad, which helps in back-to-back hard stops where a single or dual-piston caliper can flex and lose bite. Stainless braided lines and high-temperature fluid round out a serious upgrade, since fluid with a low boil point turns spongy under heat exactly when you need the pedal firm.
What does installing and maintaining a brake kit involve?
Brake kit installation is within reach for a confident DIYer with the right tools, but it's not a job to rush.
- Gather your tools: a torque wrench, jack and stands, C-clamp or piston tool, and basic hand tools. Budget two to four hours per axle for a first attempt.
- Decide DIY versus professional install: if your vehicle has electronic parking brakes or integrated ABS sensors that need calibration, a shop visit is the safer call.
- Bed in the new pads and rotors before driving normally. The a common bedding-in procedure often recommended for new pads and rotors, a series of controlled stops from moderate speed with cooling periods between, transfers pad material evenly onto the rotor. Do this in a safe, empty area away from traffic.
- Check everything after install: torque values against spec, fluid level, ABS warning light, and pedal feel before your first real drive.
- Watch for service signs going forward: squealing, pulsation under braking, or pad thickness below 3mm all mean it's time to look again.
What DBC's product team wants every buyer to know
The most common mistake we see isn't a bad kit choice, it's skipping the fitment check because "it's the right year and make." Trim levels change rotor diameter more often than owners expect, and that's where returns come from.
DBC Brakes specifies cross-drilled rotor geometry because it manages heat without the stress concentration that plain slotting alone can leave behind, which is why our rotors are engineered against warping rather than just marketed against it. Pad compound choice still comes down to your vehicle's actual operating temperature: a heavier SUV that tows occasionally needs a different compound than a commuter sedan, regardless of what looks aggressive on a spec sheet.
— Sam
Why DBC premium brake kits check every box on this list
DBC Brakes builds kits around the exact checklist above: verified fitment, complete hardware, and cross-drilled rotor geometry engineered to resist warping under heat cycles rather than just cooling on paper.
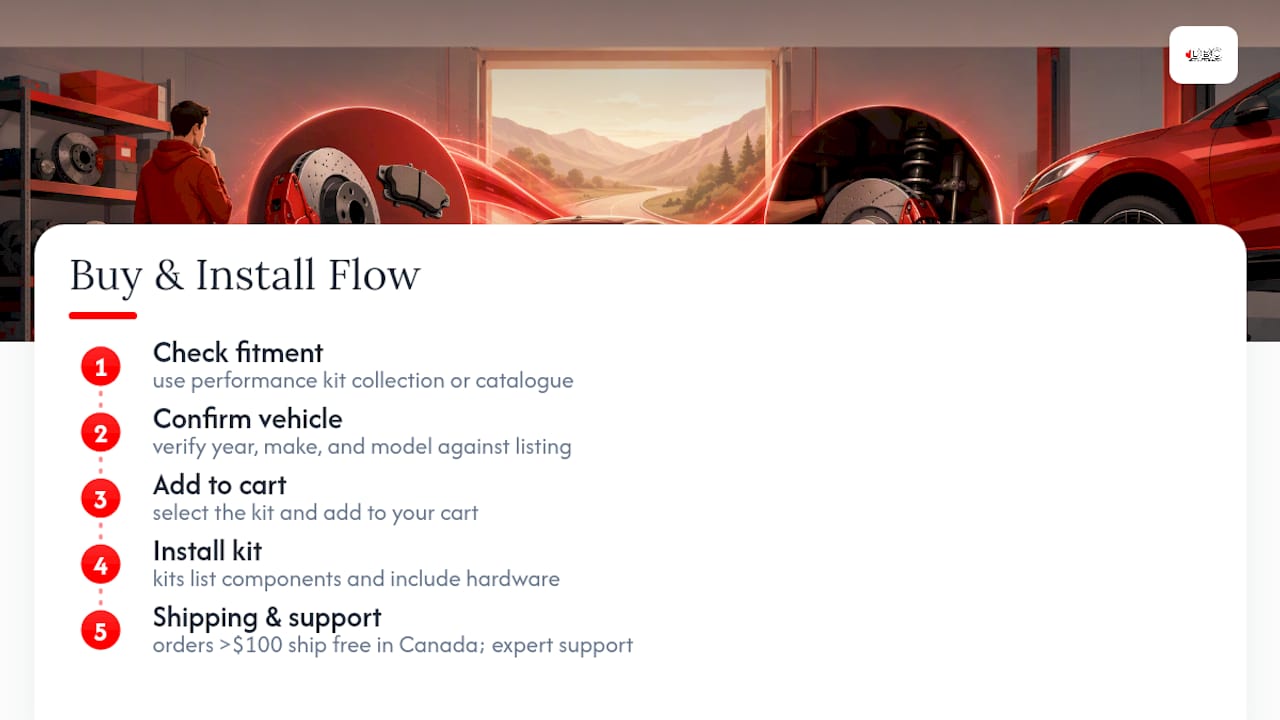
 Every kit lists its included components upfront, no guessing about missing clips or sensors at install. Pricing is inclusive with no hidden fees, support comes from people who actually know brakes rather than a script, and orders over $100 ship free within Canada. If you're upgrading for towing, daily driving, or a weekend track day, start by checking fitment on the performance brake kit collection or browse the full brake kits catalogue to compare options side by side. Confirm your year, make, and model against the listing, add the kit to your cart, and you're set for install.
Where to verify specs and fitment before you buy
A few outside resources are worth bookmarking alongside your own research. Parts Avenue's buying guide walks through what a complete kit should include, useful for cross-checking any listing. MP Brakes' guide to spec tables explains how to read rotor diameter, thickness, and piston count correctly, the exact numbers that determine whether a kit clears your wheels. For manufacturing context on how rotor tolerances get built in the first place, WJ Prototypes' overview of precision CNC machining is a solid read on why tight tolerances matter for durability.
Sources
- Ultimate Brake Kits Buying Guide – Parts Avenue
- How to read brake kit spec tables | Brake Kit Comparison Guide
- Best brake kit for car | TEI BRAKES Performance Guide