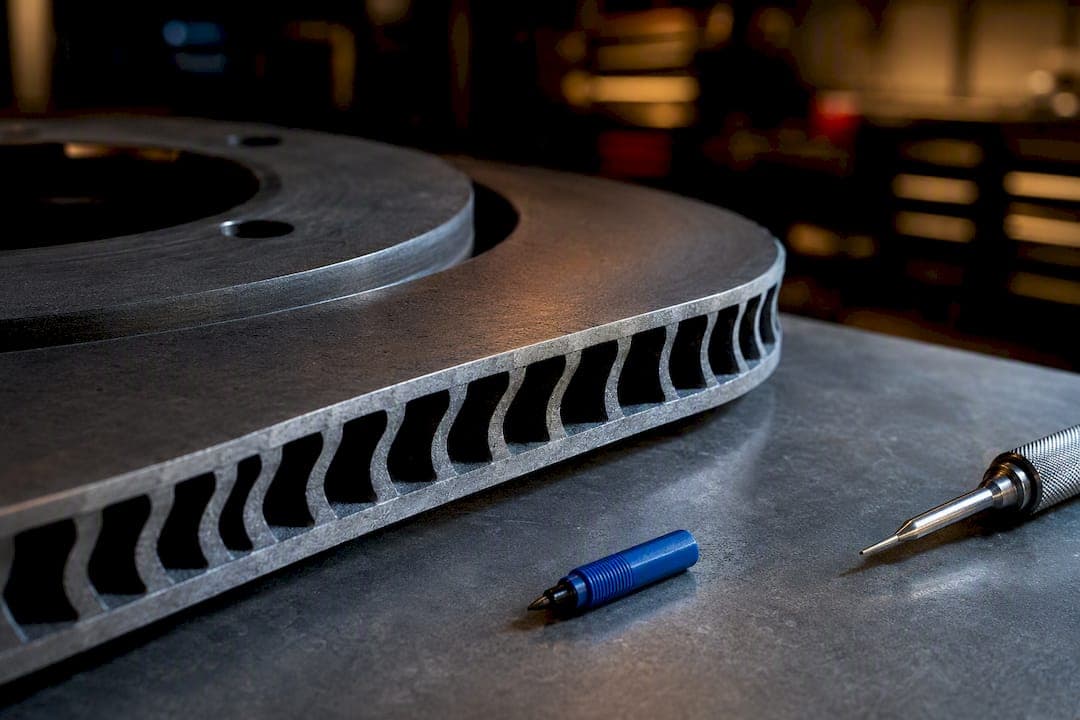
Directional rotors must go on with their internal cooling vanes leaning toward the rear of the vehicle. That vane angle pumps air outward through the rotor and clears heat and gas from the friction surface. Slots or drill holes on the face can look like they point either way, so never use them alone to judge orientation. Get it backwards and you lose cooling efficiency, and that shows up as noise, uneven pad wear, or fade under hard braking.
TL;DR:
- Directional rotors should have vanes leaning toward the vehicle's rear once installed to ensure optimal cooling and prevent brake fade during hard stops.
- Look for stamped markings, arrows, or labels on the rotor hat; if absent, verify vane orientation visually or by comparing to a functioning rotor from the same side.
- Incorrectly installed directional rotors can cause increased noise, uneven pad wear, higher temperatures, and faster rotor cracking, especially under repeated heavy braking.
- Bed-in procedures involving moderate, staged braking with cooling intervals are essential to maintain rotor performance and prevent warping.
- Performance-focused drivers towing, mountain driving, or doing track days benefit most from properly oriented directional rotors, while everyday use typically justifies non-directional types.
Table of Contents
- What makes a rotor directional: internal vanes and cooling
- How to tell left from right: markings, vanes, and slot caveats
- Practical installation checklist: orienting and fitting directional rotors
- What happens if a directional rotor is installed backwards
- Bed-in, maintenance and checks to preserve directional rotor performance
- A technician's take on when directional rotors actually pay off
- Where DBC Brakes fits if you're buying directional rotors
- Where to check the fine print on your specific rotor
- Sources
- FAQ
What makes a rotor directional: internal vanes and cooling
A directional rotor is built with curved or tilted internal vanes between the two braking surfaces. Spin the rotor and those vanes work like a small fan, pulling air in near the hub and throwing it out toward the edge as the vehicle moves forward. Vendor guidance on rotor orientation confirms that this angled vane design is what pulls extra air through the rotor and cools brakes faster than a flat vane setup.
Non-directional rotors use straight, radial "pillar" vanes instead. Because those vanes run straight from centre to edge, airflow works the same regardless of which side of the car the rotor sits on, which is why non-directional rotors can be mounted left or right without consequence.
This is also why vane shape, not surface pattern, is the real test. A slot or drill hole is cut into the face for heat and gas venting or pad cleaning, and manufacturers style those cosmetic patterns differently from brand to brand. The vane underneath tells you the truth every time.
- Look at the rotor from above with the hub facing you and trace the vane curve from inner to outer edge.
- If the vane sweeps toward what will be the rear of the car once mounted, that side is correct.
- If you can't see the vanes without pulling the hub, check the box, casting marks, or part number instead.
Pro Tip: If the rotor is already on the vehicle and you're unsure, shine a flashlight through the vent slots at the outer edge. You can often make out the vane curve without removing anything.
How to tell left from right: markings, vanes, and slot caveats
Start with the markings, not the metal. Manufacturers regularly stamp an "L" or "R" into the rotor hat, cast an arrow showing rotation direction, or print it directly on the box. Those markings override any visual guess you'd otherwise make from the face pattern.
- Check for a stamped letter, arrow, or label on the packaging or rotor hat first.
- If nothing is stamped, sight down at the vanes and confirm the lean points rearward once test fitted.
- Cross reference the part number against the manufacturer's fitment guide before final installation.
- If you removed a working rotor from the same side, lay the new one beside it and match the vane and slot pattern exactly.
Slot and drill patterns cause more confusion than anything else on this job. One brand's directional rotor might show slots sweeping one way across the face, while a different brand's rotor achieves the identical vane orientation with the surface pattern running the opposite direction. Manufacturer drill patterns can intentionally appear to sweep forward or rearward while the vane orientation underneath stays the actual determining factor, so two rotors that look mirrored on the surface can both be correct for their respective sides.
If markings are missing entirely, don't guess. Compare the new rotor to the old one before you pull it off the car, or call the manufacturer with the part number in hand. Five minutes on the phone beats a comeback job.
Practical installation checklist: orienting and fitting directional rotors
Getting the orientation right is only half the job. The fit, torque, and pairing matter just as much for long-term performance.
- Confirm the part number against your vehicle's fitment chart before opening the box.
- Read any manufacturer notes printed on the rotor or included with the kit, especially around L/R stamps or arrows.
- Hand-fit the rotor onto the hub and check that any arrow or vane lean points toward the rear.
- Fit hub components (wheel bearing, dust shield, caliper bracket) in the sequence your service manual specifies.
- Thread lug hardware finger-tight in a star pattern before torquing.
- Torque to the vehicle manufacturer's specification. Rotor hats warp easily under uneven clamping force, so always follow OEM torque values and the star sequence, never a shop guess.
- Install the matched pair. Left and right rotors should go on as a set, and if your vehicle uses different front and rear rotor sizes or types, verify neither pair got swapped end to end.
- Re-check torque after the first short drive once the assembly has settled.
Before you drive off, spin each wheel by hand and listen for rubbing or a scraping caliper. Then do a low-speed test stop in a controlled area to confirm the pedal feels normal and nothing pulls to one side.
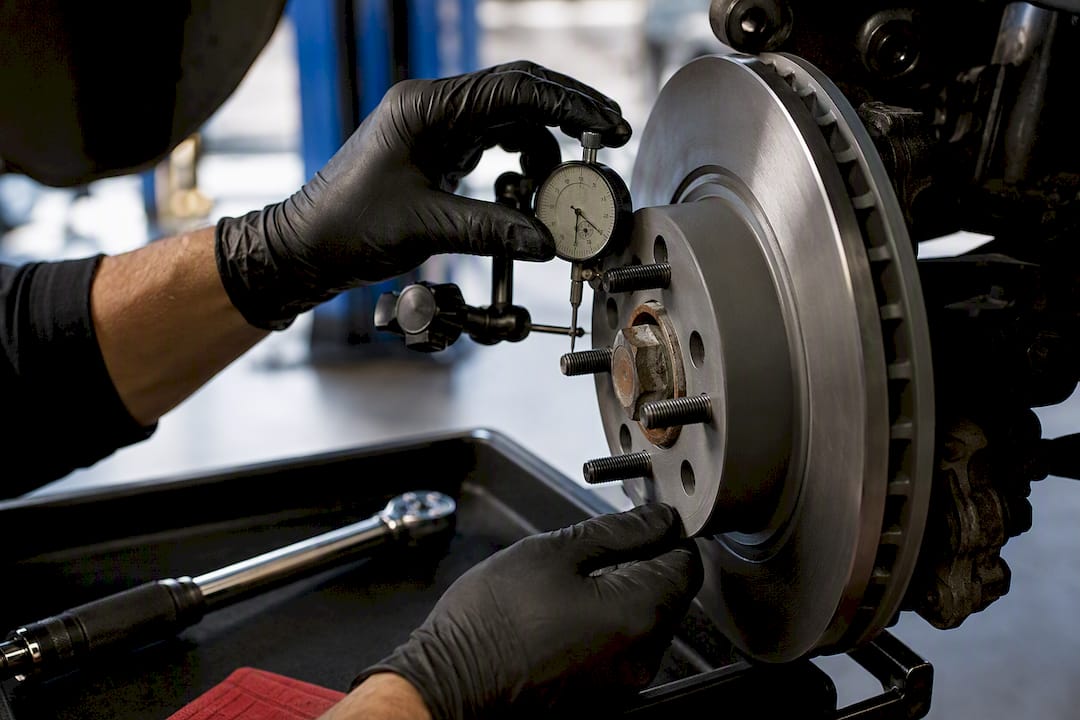
Pro Tip: If you have access to a dial indicator, check rotor runout after mounting. Anything beyond your rotor manufacturer's spec usually points to a warped hat, a dirty hub face, or uneven torque, not a bad rotor.
What happens if a directional rotor is installed backwards
A backwards directional rotor still stops the car, which is exactly why the mistake goes unnoticed for weeks. The vanes pump air the wrong way, so cooling efficiency drops right when you need it most.
Short term, expect more brake noise and less consistent pad contact as the pads and rotor wear in against the wrong airflow pattern. Installing directional rotors incorrectly can raise noise levels, hurt pad contact consistency, and increase fade risk under repeated hard stops, since the rotor and pad run hotter than they're designed to.
Push it further, on a mountain descent, a towing run, or a track day, and the consequences compound:
- Reduced heat evacuation raises rotor and pad temperature during repeated hard stops.
- Brake fade becomes more likely under sustained heavy braking.
- Uneven pad wear develops over months, sometimes with visible tapering across the pad face.
- Rotor cracking or premature replacement risk climbs, along with runout.
Light commuting with a backwards rotor might feel fine for a while. Towing, track use, or mountain driving is where the reversed vane design turns from a minor inefficiency into a real safety margin you've given away.
Bed-in, maintenance and checks to preserve directional rotor performance
Correct orientation only pays off if you bed the rotor in properly afterward. A conservative bed-in routine uses progressive braking cycles, moderate stops from moderate speed, with cooling intervals between each one, so the pad transfers an even layer of material across the rotor face instead of glazing one hot spot.
A published bed-in procedure for cross-drilled and slotted rotors walks through this staged approach, and a simple check afterward, spinning the hub and listening for intermittent rubbing before a controlled low-speed stop, confirms the pads are bedding evenly with no abnormal noise.
Ongoing maintenance is where directional rotors either keep their advantage or lose it:
- Inspect the face regularly for glazing, scoring, or discoloration.
- Check runout at each brake service, not just at installation.
- Watch pad thickness for uneven wear across the surface, which often signals a fitment or caliper issue.
- Avoid stacking repeated high-heat stops without a cooling interval; that habit causes warping faster than mileage alone ever will.
Resurfacing is an option when runout is mild and rotor thickness stays above minimum spec. Once the rotor's below minimum thickness or shows heat cracking, replacement is the safer call, and a matched pair goes back in together.
Pro Tip: After a hard bed-in session, clean brake dust off the wheel face while it's still loose grime rather than baked on; a quick wheel-safe cleaning approach with a short dwell time keeps dust from etching into clear-coated wheels.
A technician's take on when directional rotors actually pay off
Directional rotors earn their keep under repeated heavy braking: towing, mountain descents, track days, or performance builds where rotor temperature climbs fast and stays there. For ordinary commuting and light weekend driving, a straight-vaned non-directional rotor cools fine and costs less to stock in pairs. Decide based on how hard you actually brake, what your budget allows, and whether you're willing to double-check orientation and part numbers every time you service them.
— Sam
Where DBC Brakes fits if you're buying directional rotors
If you've decided a directional rotor is the right call for your driving, the harder part is trusting the kit you buy to be marked clearly and built to hold up. DBC Brakes engineers its cross-drilled and slotted rotor kits with clear L/R fitment guidance so you're not left guessing at the vane direction on installation day.

Every kit ships with a documented bed-in procedure and access to knowledgeable support if you hit a fitment question partway through the job, no automated runaround. Pricing is inclusive with no hidden fees, and orders over $100 ship free within Canada. Browse the current performance brake kits and confirm your fitment before you order.
Where to check the fine print on your specific rotor
Manufacturer help pages and installation notes remain the final word on orientation for your exact part number. Pair those with a technician-vetted bed-in procedure and the rotor warping prevention guide before your next brake job.
Sources
- Which way do I install my rotors? - Help Center
- Slotted disc brake rotor directional placement - AutoShack
- Which way do drilled and slotted rotors go?
FAQ
Which way do directional brake rotors go?
The internal vanes should lean toward the rear of the vehicle once mounted, since that orientation pumps air outward and cools the brakes faster than the reverse fitment.
What happens if you put directional rotors on backwards?
You'll typically notice more brake noise and less even pad contact right away, with reduced cooling, higher heat, and a greater chance of fade under hard braking over time.
How do I install directional brake rotors correctly?
Confirm the part number and any L/R stamp or arrow first, hand-fit the rotor with the vanes leaning rearward, then torque lug hardware to your vehicle manufacturer's spec in the correct sequence before re-torquing after a short drive.
Do drilled and slotted rotors really make a difference?
Many performance drilled and slotted rotors are genuinely directional and built for a specific side, but the benefit shows up mainly under repeated heavy braking, towing, or track use rather than everyday commuting.
Are all drilled and slotted rotors directional?
No. Some can be mounted on either side, so always confirm with the manufacturer's part markings rather than assuming every drilled or slotted rotor follows the same rule.